Table of Contents >> Show >> Hide
- Why Seal a Concrete Floor?
- Choose the Right Concrete Sealer (Match the Sealer to the Problem)
- Safety Note (Especially Important)
- What You’ll Need
- Step-by-Step: How to Seal Concrete Floors
- 1) Confirm the Concrete Is Ready (Cure Time Matters)
- 2) Check for Moisture Problems Before You Seal
- 3) Clean Like You Mean It
- 4) Repair Cracks and Defects
- 5) Create the Right Surface Texture (Adhesion Needs a Profile)
- 6) Mask and Plan Your Exit Strategy
- 7) Apply the First Coat (Thin, Even, and Calm)
- 8) Apply a Second Coat (If Recommended)
- 9) Let It Cure Before You Use It
- Concrete Sealing by Location: Basement, Garage, and Outdoors
- Troubleshooting: Common Problems (and How to Avoid Them)
- Maintenance: Keeping a Sealed Concrete Floor Looking Good
- FAQ
- Real-World Experiences: What Usually Happens When You Seal Concrete Floors ()
- Conclusion
Concrete is tough, dependable, and about as glamorous as a gray sweatshirtuntil it starts shedding dust, soaking up stains,
or turning into a blotchy “abstract art” project every time someone spills a drink. That’s where sealing comes in.
A good concrete sealer can make your floor easier to clean, more resistant to oil and water, and far less likely to look
like it survived a tiny, very personal apocalypse.
In this guide, you’ll learn how to choose the right sealer, prep your slab the right way (this is where most DIY disasters begin),
and apply a finish that holds upwhether you’re sealing a garage floor, a basement, or a polished concrete interior.
You’ll also get practical tips, common mistakes to avoid, and real-world “here’s what usually happens” experiences at the end.
(Spoiler: rushing the prep is the #1 villain.)
Why Seal a Concrete Floor?
Concrete is porous. Think of it like a stone sponge with confidence issues: it looks solid, but it absolutely will absorb moisture,
oil, dirt, and whatever mystery liquid dripped out of the trash bag last Tuesday.
Sealing helps by creating either (1) a protective film on top of the surface or (2) protection inside the concrete’s pores.
- Stain resistance: Helps block oil, grease, food, and pet accidents from soaking in.
- Dust control: Reduces that chalky “concrete dust” that shows up on socks and mop heads.
- Easier cleaning: Less scrubbing, fewer harsh cleaners, fewer regrets.
- Moisture protection: Helps repel water and can reduce freeze-thaw damage outdoors (with the right sealer).
- Better appearance: Options range from invisible matte to glossy “showroom floor” shine.
Choose the Right Concrete Sealer (Match the Sealer to the Problem)
The “best” sealer depends on where your concrete is and what it deals with daily: cars, wet boots, basement humidity, sunlight,
or a herd of kids and dogs doing laps.
Penetrating Sealers (Natural Look, Breathable Protection)
Penetrating sealers soak into the concrete and react within the pores, improving water resistance while keeping the surface looking
mostly the same. These are popular for patios, driveways, pool decks, and any slab that needs to “breathe.”
Choose this if you want: low sheen, outdoor durability, and less peeling risk.
It’s a great fit for concrete that might hold moisture below the surface (like some basements).
Acrylic Sealers (Budget-Friendly, Light-to-Moderate Protection)
Acrylic sealers form a thin film on top. They’re common for decorative concrete and indoor spaces with lighter wear.
They can add a subtle “wet look” or a satin sheen depending on the product.
Choose this if you want: easy application, faster dry times, and an affordable refresh.
Plan on re-coating sooner than with heavy-duty systems if the floor gets a lot of traffic.
Epoxy Coatings (Hard-Wearing for Garages and Workshops)
Epoxy is the classic garage-floor upgrade: durable, stain-resistant, and often available as a kit.
It creates a thicker coating than acrylic and can dramatically improve how the floor cleans up after oil drips and tire tracks.
Choose this if you want: strong chemical resistance, a tougher surface, and a more finished look.
Avoid it if you have ongoing moisture issues rising through the slabtrapped moisture is a common cause of peeling.
Polyurethane / Polyaspartic Topcoats (Next-Level Durability)
These are often used as a topcoat over epoxy or other coatings to improve scratch resistance and UV stability.
Some systems are pro-grade and cure quickly, which is great… unless you weren’t ready, because “quick cure” waits for nobody.
Choose this if you want: excellent abrasion resistance, better UV performance, and a long-lasting finish.
Concrete Densifiers (Harder Surface, Less Dust)
Densifiers (often silicate-based) penetrate and react to help harden the surface, making it less dusty and more wear resistant.
They’re common in polished concrete systems. A densifier isn’t always a “sealer” in the glossy, film-forming sensebut it can be
part of a sealing strategy, especially for interior slabs where dusting is the main problem.
Safety Note (Especially Important)
Concrete sealing products can involve strong cleaners, fumes, slippery surfaces while wet, and tools that can cause injuries.
If you’re under 18, don’t handle chemical prep or coatings alonehave a responsible adult do the application and follow the product label
exactly. If a floor needs grinding, shot blasting, or strong etching, that’s typically a job for experienced adults or pros.
What You’ll Need
- Concrete cleaner/degreaser (appropriate for your floor condition)
- Stiff broom and scrub brush or floor scrubber
- Wet/dry vacuum or mop setup for rinse water
- Crack repair product (as needed) and patching tools
- Painter’s tape and plastic sheeting for masking
- Roller frame + appropriate nap roller cover (often 3/8" to 1/2" depending on product)
- Extension pole, paint tray/bucket, and a brush for edges
- Pump sprayer (optional; some sealers apply well by sprayer)
- Personal protective equipment per label (gloves, eye protection, and ventilation)
Step-by-Step: How to Seal Concrete Floors
1) Confirm the Concrete Is Ready (Cure Time Matters)
New concrete needs time to cure before many sealers or coatings can perform well. If the slab is fresh, follow your sealer’s instructions
for minimum cure time. This isn’t busyworkit’s chemistry. Sealing too soon can trap moisture and cause hazing, bubbling, or poor adhesion.
2) Check for Moisture Problems Before You Seal
Moisture is the silent troublemaker behind many peeling coatings. If your floor is in a basement, garage, or ground-level slab,
do a basic moisture check. A common screening method is taping down a clear plastic sheet to the slab and looking for condensation
after a day. More advanced tests exist, but the key takeaway is simple: if moisture is coming through the slab, choose a breathable
penetrating sealer or address the moisture source before applying a non-breathable coating.
- Good sign: No condensation and the concrete surface stays consistently dry.
- Red flag: Condensation, dark damp patches, or recurring white powder (efflorescence).
3) Clean Like You Mean It
Sealer doesn’t stick to dirt, grease, wax, or mystery gunk. It sticks to clean, sound concrete. Thorough cleaning is non-negotiable.
Focus extra effort on garages (oil spots) and basements (fine dust).
- Sweep thoroughly, then scrub with a concrete-appropriate cleaner/degreaser.
- Rinse wellleftover cleaner residue can interfere with adhesion.
- Remove standing water and let the slab dry completely before sealing.
4) Repair Cracks and Defects
Fill cracks, spalls, or pits with the correct repair product for your situation. Hairline shrinkage cracks may be cosmetic,
but wide cracks can telegraph through coatings and collect dirt. Let repairs cure as directed.
Pro tip: If you want a showroom finish, this is where you earn it. Most “my epoxy looks bumpy” stories start with “I thought
the cracks weren’t a big deal.”
5) Create the Right Surface Texture (Adhesion Needs a Profile)
Many coatingsespecially epoxiesneed a properly prepared surface profile to bond well. If the floor is very smooth (troweled hard)
or previously sealed/painted, the new coating may not grab on without additional prep. This can involve mechanical preparation
(often done by pros) or manufacturer-approved chemical prep systems. Follow the product directions carefullythis step varies a lot
by sealer type.
6) Mask and Plan Your Exit Strategy
Mask baseboards, walls, and anything you don’t want sealed forever. Then plan your application path so you don’t seal yourself into a corner
like a character in a low-budget comedy.
7) Apply the First Coat (Thin, Even, and Calm)
Stir (don’t shake unless directed) to avoid bubbles. Apply a thin, even coat with a roller or sprayer depending on product instructions.
Over-application can cause puddles, uneven sheen, or a tacky surface that seems to last until the end of time.
- Work in manageable sections and keep a wet edge.
- Roll in consistent patterns to reduce lap marks.
- Don’t “fix” half-dried areaswait for the recoat window instead.
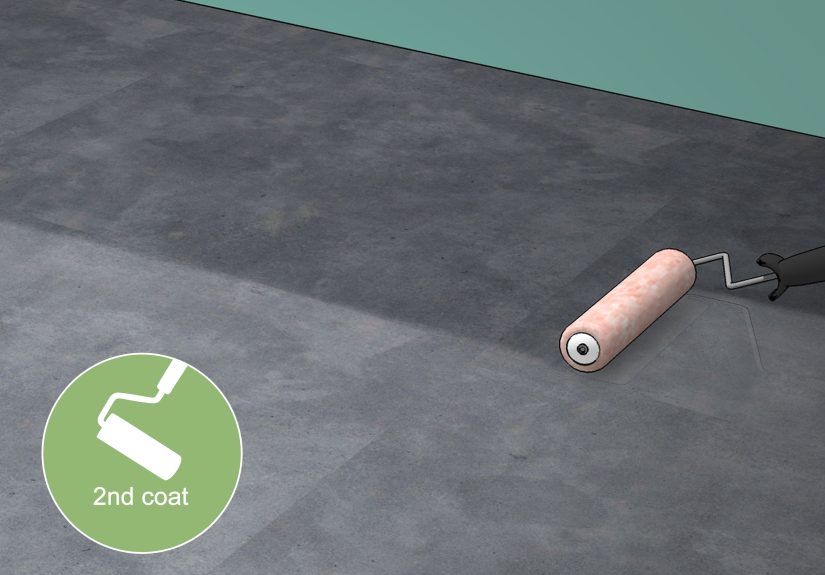
8) Apply a Second Coat (If Recommended)
Many sealers perform best with two thin coats rather than one thick one. If applying a second coat, do it within the manufacturer’s
recoat window. Some products want the next coat while the first is slightly tacky; others need a full dry first.
If you’re using a multi-layer system (like epoxy plus a topcoat), read the timing instructions carefully. Timing is where
“pretty good” becomes “professional-looking.”
9) Let It Cure Before You Use It
“Dry” and “cured” are not the same thing. Dry means it’s not wet to the touch. Cured means it can handle traffic, furniture,
hot tires, and cleaning without damage. Respect cure timesespecially in garages.
Concrete Sealing by Location: Basement, Garage, and Outdoors
Basement Floors
Basements often have higher humidity and greater moisture risk through the slab. If you’ve ever seen damp spots, peeling paint,
or persistent efflorescence, prioritize breathable solutions and moisture management (gutters, grading, drainage) before applying a thick,
non-breathable coating.
Garage Floors
Garages deal with oil, road salt, tire plasticizers, abrasion, and temperature swings. If you want maximum durability, consider a coating system
designed for garages (often epoxy with a compatible topcoat). Prep is critical: remove oils thoroughly and ensure the surface profile is right.
Patios, Porches, and Outdoor Slabs
Outdoor concrete faces UV exposure and weather. Many people choose penetrating sealers for a more natural look and lower maintenance,
or UV-stable topical sealers when they want sheen and color enhancement. If the slab gets slick when wet, consider a finish designed
to reduce slip risk and keep sheen modest.
Troubleshooting: Common Problems (and How to Avoid Them)
Problem: Sealer Peels or Flakes
- Likely causes: Moisture vapor, poor cleaning, or inadequate surface profile.
- Prevention: Moisture check first; clean thoroughly; prep per manufacturer; avoid sealing over unknown old coatings.
Problem: White Haze or Cloudiness
- Likely causes: Moisture trapped under a film sealer, application in damp conditions, or over-application.
- Prevention: Seal only on a dry slab; follow temperature/humidity guidance; apply thin coats.
Problem: Bubbles or Roller Marks
- Likely causes: Shaking product, rolling too aggressively, applying in heat, or using the wrong roller.
- Prevention: Stir gently, use recommended roller nap, and avoid applying in direct sun or extreme temps.
Problem: The Floor Is Too Slippery
- Likely causes: High-gloss film on a smooth slab, especially when wet.
- Prevention: Choose lower-sheen options or systems designed for better traction; consider adding a manufacturer-approved anti-slip additive where appropriate.
Maintenance: Keeping a Sealed Concrete Floor Looking Good
- Sweep regularly to prevent grit from acting like sandpaper.
- Use a pH-neutral cleaner when possible; harsh chemicals can dull some finishes over time.
- Wipe spills quicklysealer buys time, not immortality.
- Use mats in high-traffic areas and felt pads under furniture.
- Recoat when water no longer beads or the finish looks worn (timelines vary by sealer type and traffic).
FAQ
Do I need to etch concrete before sealing?
Sometimes. Some coatings require a specific surface profile for adhesion, especially on smooth slabs. Other sealers (like many penetrating products)
may not need etching but still require thorough cleaning and a dry surface. Follow the product directionsthis is not a one-size-fits-all step.
How many coats of concrete sealer should I apply?
Many products perform best with two thin coats. Thick coats are more likely to puddle, dry unevenly, or stay tacky. Always follow the label’s
coverage rates and recoat window.
Can I seal over an old sealer?
Maybe, but it’s risky if you don’t know what’s already on the floor. Some products are compatible; others will peel if applied over an incompatible coating.
When in doubt, test a small area or consult the manufacturer guidance. If the old sealer is failing, it usually needs to be removed first.
Real-World Experiences: What Usually Happens When You Seal Concrete Floors ()
If you read enough “I sealed my concrete floor” stories, you start to notice patterns. Not dramatic, Hollywood patternsmore like
practical, predictable ones. The first is the Optimism Phase: someone looks at a dusty garage slab and thinks,
“How hard can it be? It’s just… painting, but on rock.” That optimism lasts right up until the Cleaning Reality Check,
when they realize the floor has been collecting oil mist, tire residue, and invisible grime for years. The most successful DIYers
usually say the same thing afterward: the cleaning took longer than the sealing, and it mattered more.
The second common experience is the Moisture Surprise. Basements are famous for this. A homeowner may do everything “right”
with scrubbing and drying, then a month later see cloudy patches or peeling near a wall. Often, the issue isn’t the sealer itselfit’s moisture
vapor moving through the slab. In many cases, people end up switching strategies: instead of a thick, film-forming coating, they choose a breathable
penetrating sealer, improve drainage outside, run a dehumidifier, or address a gutter/downspout issue. The lesson they share is simple:
concrete is part of a whole system (soil, water, air), and sealing works best when the system isn’t fighting you.
Garages have their own storyline: the Hot Tire Test. It’s one thing for a finish to look great on day two.
It’s another to survive a car that just drove 20 minutes in summer heat and parks on the same spot every night.
People who pick garage-specific coating systems and follow cure times tend to be happiest long-term. People who rush the timeline
(“It felt dry, so I parked on it”) often get tire marks, soft spots, or peeling where the tire sits. The fix usually involves sanding,
recoating, and learning patience the hard way.
Then there’s the Sheen Regret. A glossy finish looks amazing in photosuntil you realize it highlights every tiny patch,
roller mark, and repaired crack. Some homeowners love that bright, reflective look; others quickly decide they prefer satin or matte because it’s
more forgiving and less slippery. A surprisingly common “win” is choosing a lower-sheen sealer that still blocks stains but doesn’t turn the floor into a mirror.
Finally, many people mention the Maintenance Upgrade as the best part. Once sealed, dusting decreases, spills wipe up faster,
and mopping feels less like punishment. Even when the project isn’t perfect, most homeowners say the floor becomes easier to live with.
The best advice repeated across real jobs is boringbut true: test moisture, prep thoroughly, apply thin coats, and respect cure times.
Concrete rewards patience. It also punishes shortcuts with impressive consistency.
Conclusion
Sealing a concrete floor is one of those projects where the final result is mostly decided before you open the sealer.
Pick the right product for your location (basement, garage, or outdoors), confirm moisture won’t sabotage adhesion, clean and prep thoroughly,
then apply thin, even coats with proper cure time. Do that, and your concrete floor can go from dusty and stain-prone to durable, easier to clean,
and genuinely nicer to look atwithout turning into a peeling, cloudy science experiment.