Table of Contents >> Show >> Hide
- What a Power Window Motor Actually Does
- Signs the Window Motor Is Bad
- Tools and Supplies You Will Want First
- Before You Remove Anything, Diagnose the Problem
- How to Replace a Power Window Motor: Step by Step
- 1. Disconnect the battery if required
- 2. Remove the interior door panel
- 3. Peel back the vapor barrier
- 4. Support the window glass
- 5. Disconnect the motor and regulator fasteners
- 6. Remove the regulator if necessary
- 7. Swap the motor
- 8. Reinstall the assembly
- 9. Test before reassembly
- 10. Reinstall the water shield and door panel
- Common Mistakes to Avoid
- Should You Replace Only the Motor or the Whole Regulator Assembly?
- How Much Does It Cost to Replace a Power Window Motor?
- When It Is Smarter to Let a Pro Handle It
- Real-World Experiences Replacing a Power Window Motor
- Conclusion
If your car window moves slower than Monday morning, makes a sad little click, or refuses to go up right when rain clouds start gathering like movie villains, the power window motor may be the culprit. The good news: replacing a power window motor is absolutely doable for a careful DIYer with patience, basic tools, and a healthy respect for sharp sheet metal hiding inside the door. The less-good news: sometimes the motor is not the only problem. A bad regulator, a faulty switch, a blown fuse, damaged wiring, or even dirty window channels can impersonate a dead motor like an award-winning method actor.
This guide walks you through how to replace a power window motor the smart way. We will cover symptoms, diagnosis, tools, step-by-step replacement, common mistakes, cost expectations, and real-world lessons that make the job smoother. Whether your window is stuck down, stuck up, or moving like it is charging by the inch, this article will help you figure out what is wrong and how to fix it without turning your door panel into a puzzle with leftover pieces.
What a Power Window Motor Actually Does
The power window motor is the electric muscle behind your window glass. When you press the switch, the motor spins and drives the window regulator, which lifts or lowers the glass inside the door. In many vehicles, the motor and regulator are separate parts. In others, they are sold together as one assembly. That detail matters because some cars let you replace only the motor, while others practically beg you to replace the entire regulator and motor unit at once.
Think of it this way: the motor provides the energy, and the regulator translates that energy into movement. If the motor fails, the glass may not move at all. If the regulator fails, the motor may still run, but the window may tilt, bind, drop into the door, or make alarming noises that sound expensive. Often, the two parts age together, which is why many DIYers and pros replace both when access is already open.
Signs the Window Motor Is Bad
Classic power window motor symptoms
A bad power window motor usually announces itself before it fully quits. The window may move slowly, hesitate, require multiple button presses, or make clicking sounds without actually lifting the glass. In some cases, the motor works intermittently, which is one of the most annoying kinds of failure because it convinces you everything is fine right up until the day it is very much not fine.
Signs it may be something else
Before you order parts, make sure you are not blaming the wrong component. If all the windows stop working at once, the issue is more likely a fuse, relay, body control module problem, or a shared electrical fault. If you hear the motor humming but the glass does not move, the regulator is a stronger suspect than the motor. If one switch does not work but the master switch does, the local switch may be bad. And if the window only hesitates a bit on the way up, dirty or dry guides may just need silicone lubricant instead of a dramatic replacement surgery.
One more clue: if the window drops crooked, falls into the door, or moves unevenly, that points more toward regulator failure than a simple burned-out motor. Good diagnosis saves money, time, and the emotional pain of replacing the wrong part twice.
Tools and Supplies You Will Want First
Set up your tools before you start. Stopping halfway through to hunt for a Torx bit is how “I’ll knock this out before lunch” becomes “why is my car still in pieces at sunset?”
- Trim removal tool or door panel tool
- Flat-head screwdriver and Phillips screwdriver
- Socket set, usually including 8mm, 10mm, and 11mm sizes
- Torx bits, often T25 or T27 depending on the vehicle
- Ratchet and extensions
- Painter’s tape to secure the glass
- Gloves and safety glasses
- Razor blade or scraper for the vapor barrier
- Drill and drill bits if your regulator or motor is riveted
- Rivet gun or suitable bolts and nuts if required by the design
- Silicone spray for window channels
- Replacement motor or motor-and-regulator assembly matched to your exact year, make, model, and door location
It is also wise to have your vehicle-specific repair information nearby. Power window jobs are similar across most cars, but the hidden screws, clip locations, connector styles, and reinitialization procedures can vary a lot.
Before You Remove Anything, Diagnose the Problem
Start with the basics. Check the fuse and verify that power window functions are not disabled by a window lock switch. Press the window switch and listen carefully. No sound at all may mean no power, a bad switch, broken wiring, or a dead motor. A click or hum with no glass movement often suggests the regulator has failed.
If you are comfortable testing electrically, remove the door panel enough to access the motor connector and check for voltage while pressing the switch. If the motor gets power but does not run, the motor is likely bad. If the motor runs when jumped directly from the battery but not from the car’s circuit, the issue is elsewhere in the wiring or switch circuit. That five-minute test can save you from replacing good parts just because the door sounded suspicious.
How to Replace a Power Window Motor: Step by Step
1. Disconnect the battery if required
If your door contains side airbags or your service information recommends depowering the system, disconnect the negative battery cable before you begin. Better safe than accidentally waking up an airbag. If the car uses automatic window indexing or memory features, be ready to reset or initialize them later.
2. Remove the interior door panel
Look for screws hidden behind trim caps, inside the pull handle, near the latch, and along the bottom edge of the panel. Use a trim tool to pop loose the retaining clips, then lift the panel up and away. Disconnect electrical connectors for the switch panel, courtesy light, and any speakers or other accessories attached to the panel.
Be patient here. Door panels are held on by a mix of screws, hooks, and plastic clips that never seem thrilled about being disturbed. Slow and steady beats broken tabs and creative vocabulary.
3. Peel back the vapor barrier
Behind the panel, you will usually find a plastic or foam water shield. Peel it back carefully without tearing it. This barrier matters more than people think. It keeps moisture inside the door from soaking the door panel and wiring. If you rip it badly and never reseal it, future-you may get to enjoy wet carpet, warped trim, or a mysteriously unhappy speaker.
4. Support the window glass
If the glass is still attached and partly movable, position it so you can access the regulator fasteners. Then raise the window by hand if needed and secure the glass to the top of the door frame with painter’s tape. Use more tape than you think you need. Gravity is undefeated, and auto glass is not cheap.
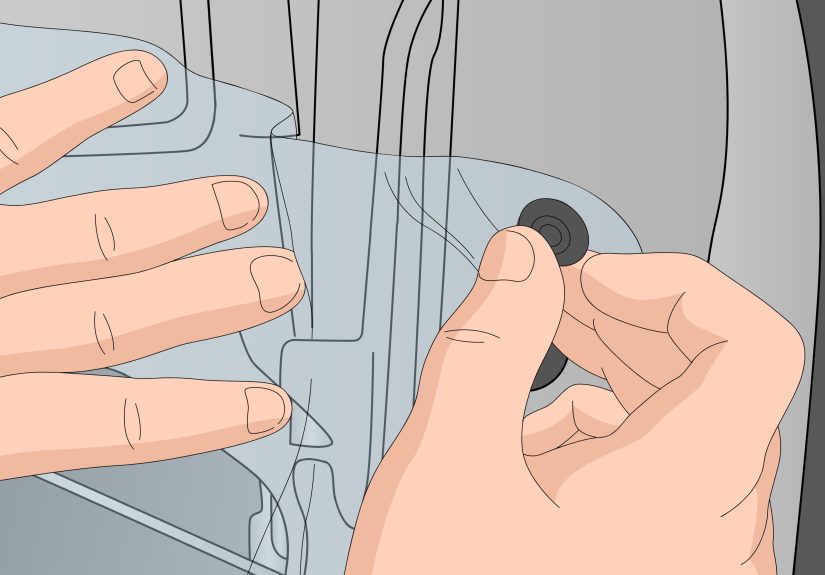
5. Disconnect the motor and regulator fasteners
Unplug the motor wiring connector. Remove the bolts or screws securing the motor. On some vehicles, the motor is mounted directly to the regulator with Torx screws. On others, the entire regulator and motor assembly must come out together. If the assembly is riveted in place, drill out the rivets carefully and keep one hand on the glass if anything is still attached.
6. Remove the regulator if necessary
In many doors, you cannot remove the motor cleanly unless the regulator comes out too. Remove the fasteners holding the regulator tracks and guides, then work the assembly through the access hole in the door shell. This is usually the moment where the mechanism catches on everything except your hopes. Rotate, tilt, and guide it out gently rather than forcing it.
7. Swap the motor
Once the regulator is out, remove the old motor from the regulator. Some regulator designs are under spring tension, so hold the mechanism securely and follow the correct removal sequence. Install the new motor in the same orientation and tighten the mounting hardware evenly. If your new part includes a full regulator assembly, this step gets easier because you are replacing the whole mechanism instead of performing tiny surgery on a tired old one.
8. Reinstall the assembly
Feed the regulator and motor back into the door. Reconnect the mounting points loosely at first so you have room to align everything. Reattach the glass to the regulator once the tracks are in place. If the original design used rivets, install new rivets or use the correct hardware specified for the replacement kit. Then tighten everything fully.
9. Test before reassembly
Reconnect the switch temporarily and test the window before putting the door back together. This is not optional. This is the part that saves you from reassembling the whole door only to discover the glass is binding, the connector is loose, or the window goes down perfectly and comes back up with the confidence of a shopping cart with one bad wheel.
Run the window through a full cycle several times. Watch for smooth travel, even alignment, and normal speed. If the glass drags, inspect the channels and apply silicone lubricant. If the motor runs but the travel is wrong, double-check the glass attachment points and track alignment.
10. Reinstall the water shield and door panel
Once everything works, reinstall the vapor barrier carefully so it seals against the door. Reconnect the door panel harnesses, hook the panel back into position, snap in the clips, and reinstall the screws and trim covers. Clean fingerprints off the glass, because no repair feels finished until you wipe away the evidence.
Common Mistakes to Avoid
- Skipping diagnosis: A blown fuse or bad switch is cheaper than a motor. Confirm the failure before buying parts.
- Not securing the glass: Unsupported glass can drop, shatter, or injure your hand.
- Ripping the vapor barrier: It is not just packaging. It is functional.
- Forgetting spring tension: Some regulators can snap unexpectedly when the motor is removed.
- Testing too late: Always test the window before reinstalling the panel.
- Ignoring the tracks: A dry or dirty guide can make a new motor seem weak.
- Ordering the wrong part: Front left, front right, rear left, and rear right are not interchangeable in many applications.
Should You Replace Only the Motor or the Whole Regulator Assembly?
If your vehicle allows a separate motor replacement and the regulator is in good shape, replacing only the motor can save money. But if the cables are frayed, the regulator is bent, the window drops unevenly, or the assembly has high mileage, replacing the full power window regulator and motor assembly often makes more sense. It saves labor, reduces the chance of repeat failure, and turns one annoying repair into one finished repair.
In practical terms, replacing the full assembly is often easier for first-time DIYers. It is less fiddly, more predictable, and usually gives you fresh hardware and alignment points. The part may cost more, but your weekend may thank you.
How Much Does It Cost to Replace a Power Window Motor?
If you hire a shop, the average cost for a window regulator motor replacement commonly lands in the mid-hundreds, though the final number depends on the vehicle and whether the motor and regulator are separate or combined. Luxury vehicles and doors with trickier access usually cost more. Some common vehicles are on the affordable end; others seem to price window parts like they are handcrafted jewelry.
DIY repair can be much cheaper. If the motor alone costs relatively little and you already own the tools, your main investment is time. If you need a regulator assembly, drill bits, trim tools, and a rivet gun, the price rises, but it can still beat shop labor by a wide margin.
When It Is Smarter to Let a Pro Handle It
Call a professional if the door has side airbags and you are unsure how to work around them, if the glass is already broken, if corrosion has turned every fastener into a hostage situation, or if the vehicle needs scan-tool initialization after replacement. Also consider handing the job off if the regulator is under heavy spring tension and you are not comfortable managing it. There is no shame in deciding that your knuckles and schedule deserve mercy.
Real-World Experiences Replacing a Power Window Motor
The first time most people replace a power window motor, they expect the hard part to be the motor. It usually is not. The hard part is the door panel that hides one last screw like it is protecting state secrets, the clip that refuses to pop loose without sounding broken, or the vapor barrier adhesive that sticks to your glove, your sleeve, and apparently your soul. Once the panel is off, the job becomes less mysterious and more mechanical. You start to realize that a car door is basically a metal envelope full of tracks, wires, sharp edges, and old dust.
A common real-world surprise is how often the motor is only half the story. Plenty of people go in convinced the motor is dead because the window slowed down for weeks. Then they open the door and find a regulator cable that is frayed, a guide track that is dry, or a glass mount that has shifted. That is why experienced DIYers talk so much about diagnosis. The window system is simple in theory, but in practice, several worn parts can create the same symptom. The best repair is not the one that sounds right; it is the one that survives testing.
Another lesson people learn quickly is that painter’s tape is the unsung hero of this job. The window glass may feel secure until the second you remove the last fastener. Then it reminds you that gravity is always clocked in. More than one do-it-yourself mechanic has watched the glass slide unexpectedly and realized, too late, that “I’ll hold it with one hand” was not a real plan. Taping the glass up high and out of the way makes the whole job calmer. Calm is good. Calm means fewer broken parts and fewer dramatic speeches in the driveway.
There is also the emotional roller coaster of the first test cycle. You reconnect the switch, turn the key, and press the button with the seriousness of a rocket launch. If the glass glides down and back up smoothly, you feel like a genius. If it tilts, binds, or makes an awful clack, your confidence briefly leaves your body. But that moment is normal. Small alignment corrections are common. Tracks need to sit right, glass needs to be centered, and hardware often needs a final tweak. Experienced mechanics test the window multiple times before reinstalling the panel for exactly this reason.
One more practical experience worth mentioning: even after the repair is complete, some vehicles need the auto-up or auto-down feature reset. Drivers sometimes think the new motor is faulty because one-touch operation no longer works immediately. In reality, the module may just need to relearn the window’s travel range. That tiny detail can turn a perfectly successful repair into thirty minutes of unnecessary panic if you do not expect it.
And finally, there is the deeply satisfying part. When the door panel goes back on, the trim snaps into place, and the glass moves like it belongs in a healthy car again, the repair feels bigger than it is. A working power window fixes convenience, security, weather protection, and that little daily ritual of ordering coffee without opening the whole door like it is 1978. It is one of those repairs that pays you back every single day. Not bad for a part most people never think about until the rain starts.
Conclusion
Replacing a power window motor is one of those DIY car repairs that looks intimidating until you understand the order of operations. Diagnose first, remove the door panel carefully, protect the glass, inspect the regulator, replace the failed part, and test everything before buttoning the door back up. Do that, and you can save money, avoid repeat repairs, and restore one of the small but glorious luxuries of modern driving: pressing a button and having the window actually listen.
If your car window will not roll up or down, do not assume the motor is automatically guilty. But if your testing confirms it is the problem, the fix is very manageable with the right tools and a little patience. Just remember: tape the glass, respect the clips, and never trust the “one last hidden screw” to reveal itself without a fight.
Note: Article based on real repair guidance and cleaned for web publishing without citation artifacts.


