Table of Contents >> Show >> Hide
- Before You Touch Anything: Safety First (Yes, Even If You’re Annoyed)
- Gather Your “Plastic Rescue Kit”
- Method 1: Glass or Ceramic Smooth-Top (Radiant or Induction)
- Method 2: Electric Coil Burners (and Drip Pans)
- Method 3: Gas Stovetops (Grates, Burner Caps, and the “Crumb Canyon”)
- Method 4: Stainless Steel or Porcelain-Enamel Surfaces
- What Not To Do (A.K.A. How People Turn a Small Mess Into a Big One)
- How To Get Rid of the Burning Plastic Smell
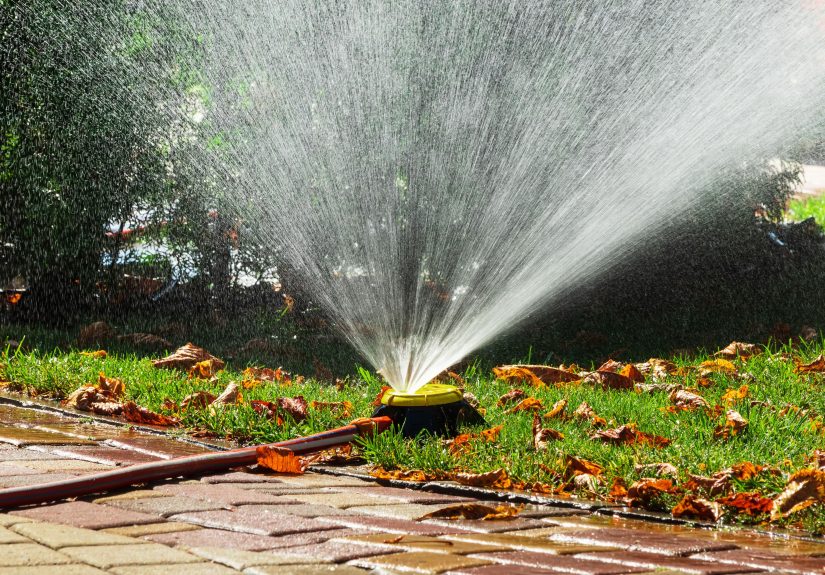
- How To Prevent Melted Plastic Accidents (Without Giving Up Cooking)
- Conclusion: You Can Fix This (And Your Stovetop Will Forgive You)
- Kitchen Stories & Lessons Learned (Experience Notes)
- SEO Tags
Melted plastic on a stovetop is one of those kitchen bloopers that feels dramatic in the momentsmoke, smell, regretthen turns into a surprisingly
fixable cleanup job. The trick is to match the removal method to your stovetop type (glass/ceramic, gas, or electric coils), use the right tools,
and avoid the handful of “helpful” ideas that can scratch, stain, or make the fumes worse.
Below you’ll find safe, step-by-step methods, plus what not to do, how to get rid of the lingering odor, and how to prevent an encore
performance from that plastic cutting board that had no business near a burner.
Before You Touch Anything: Safety First (Yes, Even If You’re Annoyed)
When plastic melts, it can release irritating fumes and leave sticky residue that’s easier to smear than remove. So before you go full “rage scrub,”
do this:
- Turn off the heat immediately and remove the plastic item if it’s safe to do so.
- Ventilate fast: turn on the range hood, open windows, and use a fan to push air outside.
- Keep kids and pets away until the smell clears and the surface is cool.
- Let the stovetop cool unless you’re following a “warm-surface” method for glass cooktops (more on that soon).
- Check your appliance manual if you have itsome brands recommend specific cleaners and scrapers.
If the plastic is actively smoking and you can’t ventilate well, step away for a few minutes while the air clears. If anyone has coughing,
wheezing, dizziness, or trouble breathing, get fresh air right away and consider calling your local poison information line for guidance.
Gather Your “Plastic Rescue Kit”
You don’t need a professional cleaning cartjust the right basics.
Best tools for most stovetops
- Cooktop scraper (razor scraper made for glass/ceramic cooktops) or a single-edge razor in a proper holder
- Plastic scraper (like a nylon pan scraper or old gift card)
- Microfiber cloths or soft cotton rags
- Non-scratch pad (no steel woolever)
- Dish soap and warm water
- Baking soda (for a gentle paste)
- Ice in a zip-top bag (yes, really)
Optional helpers (use with care)
- Glass/ceramic cooktop cleaner (brand-name cooktop cream works great)
- Rubbing alcohol for light residue
- Acetone-based nail polish remover for stubborn film on cool surfaces (spot-test first)
One important rule: avoid abrasive powders and rough pads on glass/ceramic cooktops. Scratches aren’t just uglythey can make
future cleanup harder and may weaken the surface over time.
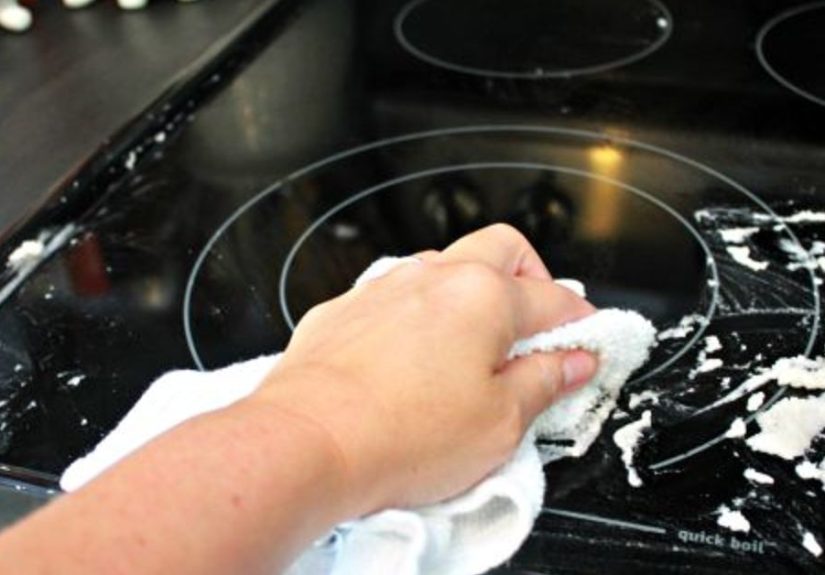
Method 1: Glass or Ceramic Smooth-Top (Radiant or Induction)
Smooth-top cooktops (often called “glass” cooktops) are durable, but they demand gentle technique. Your goal is to remove plastic without scratching
the surface or baking residue into a permanent mark.
Step-by-step removal
- Cool it downor make it “warm, not hot.”
If the plastic is still soft, let it cool until it’s no longer gooey. Many manufacturer guides recommend scraping certain spills while the surface
is still warm (with oven mitts) because residue lifts more easily before it fully hardens. If it’s already rock-hard, you can work cold using the
ice trick below. - Use the ice trick to make plastic brittle.
Put ice cubes in a zip-top bag and set it on the plastic for 10–15 minutes. The cold makes many plastics less flexible so they “snap” off in
chunks instead of smearing. - Gently lift big pieces with a plastic scraper.
Start with a nylon scraper, old gift card, or plastic spatula to see if the plastic pops up. If it does, you just saved yourself razor-blade time.
- Scrape with a cooktop razor at a low angle.
Hold the scraper at roughly a 30–45° angle and use short, controlled strokes. Keep the blade flat and steadythink “shave” not
“chisel.” Wipe the blade frequently so you’re not dragging grit across the surface. - Polish away residue with cooktop cleaner.
Once the bulk is gone, apply a small amount of ceramic/glass cooktop cleaner and rub with a non-scratch pad or paper towel. Buff dry with a clean
cloth until the surface looks even and streak-free. - For a thin plastic film, spot-clean carefully.
If you can still feel a waxy layer, try rubbing alcohol first. If that doesn’t work, a small amount of acetone-based nail polish remover on a
cotton ball can help dissolve stubborn residue on a cool surface. Spot-test in an inconspicuous area and keep the room ventilated.
Afterward, wipe with a damp cloth and finish with cooktop cleaner.
Example: the “melted food container lid” situation
If a thin lid melted into a flat puddle, ice is your best opener. Chill, lift the edges with a plastic scraper, then use the razor at a low angle to
peel it away. Finish with cooktop cream to remove the hazy outline the plastic can leave behind.
Method 2: Electric Coil Burners (and Drip Pans)
Electric coil burners are a different beast. Plastic can wrap around the coil or drip into the pan beneath. You want to remove as much as possible
mechanically, and only use heat in a controlled waybecause burning plastic residue is basically “air freshener” from the Bad Place.
Step-by-step removal for coils
- Turn everything off and let the coil cool completely.
Unplug the range if you can do so safely, or turn off the breaker if needed for peace of mind while you work.
- Remove the coil (if your model allows it).
Many coil burners lift out gently. If yours doesn’t, don’t force itwork with what you’ve got and focus on the drip pan and accessible areas.
- Freeze and chip (best first move).
If the plastic is thick, chilling the coil (or drip pan) can make it brittle. Some people place removable parts in a freezer for a short time.
Once hardened, use a wooden or plastic tool to chip away plastic without gouging the metal. - Use gentle heat only if necessaryand ventilate hard.
For plastic that refuses to budge, you can warm the coil briefly so the plastic softens enough to scrape with a wooden utensil. Run the range hood
and open windows. Keep the heat low to moderate and stay right therethis is not a “set it and forget it” moment. - Clean the drip pan separately.
Remove the drip pan and soak in warm, soapy water. For stuck-on bits, use a baking soda paste (baking soda + a little water), let it sit, then
scrub with a non-scratch pad. If the pan is heavily damaged or permanently gunked, replacement drip pans are often inexpensive and make the stove
look brand-new again.
Practical tip
If plastic dripped into hidden areas inside the range and you can’t safely access it, it may continue to smell when the burner heats. In that case,
a service call can be worth itespecially if you notice smoke after you’ve cleaned what you can see.
Method 3: Gas Stovetops (Grates, Burner Caps, and the “Crumb Canyon”)
Gas ranges usually give you more removable partsgreat for cleaning, but it means melted plastic can sneak into corners. The good news: grates and
caps can often be soaked and scrubbed without risking scratches to a glass surface.
Step-by-step removal for gas ranges
- Cool everything and remove grates and burner caps.
Set parts on a protected surface near the sink (a towel on the counter works).
- Scrape off cooled plastic.
Use a plastic scraper first. For stubborn spots on grates, a cooktop scraper can helpjust avoid gouging enamel or chipping finishes.
- Soak and scrub.
Soak grates and caps in hot, soapy water. For baked-on residue, apply a baking soda paste and let it sit 15–30 minutes before scrubbing with a
non-scratch pad. - Clean the stovetop surface underneath.
Wipe with warm, soapy water. Use a soft toothbrush or cotton swab around burner bases and seams. Keep water out of ignition areas and burner ports.
- Rinse, dry thoroughly, and reassemble.
Moisture can cause ignition issues, so towel-dry parts well and let them air dry a bit before putting everything back.
Example: plastic wrap stuck to a grate
Plastic wrap tends to melt thin and cling. Cooling helps. Peel what you can, then soak the grate in hot soapy water and work the residue with a
baking soda paste. If a faint film remains, repeat rather than escalating to aggressive abrasives.
Method 4: Stainless Steel or Porcelain-Enamel Surfaces
Some stovetops have stainless trim or enamel areas around burners. These finishes can scratch, chip, or dull if you attack them with the wrong tools.
Steps that work without wrecking the finish
- Chill plastic with ice so it breaks off in pieces.
- Lift gently with a plastic scraper, then wash with warm soapy water.
- Use baking soda paste for stubborn residue; let it sit before scrubbing.
- For stainless steel, scrub with the grain using a soft pad to reduce visible scuffing.
If you’re unsure whether a surface is coated, painted, or enamel, assume it’s delicate and start with the gentlest method. You can always go
strongerbut you can’t un-scratch a finish.
What Not To Do (A.K.A. How People Turn a Small Mess Into a Big One)
Some “tips” float around the internet like bad advice confetti. Skip these:
- Don’t pour cold water on a hot glass cooktop. Sudden temperature changes can damage glass/ceramic surfaces.
- Don’t use steel wool or abrasive pads on glass/ceramic (or shiny stainless trim).
- Don’t attack with a knife held steeplythis is how scratches and chips happen.
- Don’t use harsh oven cleaner on glass cooktops unless your manufacturer explicitly says it’s safe.
- Don’t “burn it off” at high heat indoors. That’s a shortcut to a house that smells like a melted action figure factory.
Also: if plastic melted because it was stored on the stove (no judgmentmany of us use the stovetop as bonus counter space), take that as a
sign to create a new landing spot for trays, lids, and cutting boards. Your future self will thank you.
How To Get Rid of the Burning Plastic Smell
Even after the plastic is gone, odors can hang aroundespecially if residue heated up. Here’s how to reset your kitchen air without turning it into a
perfume battle:
- Ventilate: run the range hood, open windows, and use a fan aimed outward for 20–60 minutes.
- Wipe down nearby surfaces (backsplash, counters) with warm soapy watersmell particles can settle.
- Replace or wash hood filters if the odor lingers, especially after a smoky melt.
- Use baking soda: set out a bowl overnight to absorb stubborn smells.
If the smell returns every time you cook, there may still be residue under a burner, inside the drip pan area, or in a seam. Re-check removable parts
and clean again.
How To Prevent Melted Plastic Accidents (Without Giving Up Cooking)
Prevention is mostly about habitsnot superhero reflexes.
- Keep plastics off the stovetop, even “for a second.” Seconds become distractions fast.
- Create a “hot zone” rule: nothing but cookware belongs on the cooktop when cooking is happening.
- Use heat-safe utensil rests (silicone, ceramic, or metal) instead of parking spoons on the rim of a hot pan.
- Turn pot handles inward so they don’t bump plastic containers sitting nearby.
- Do a burner check before leaving the kitchenespecially after boiling or frying.
Conclusion: You Can Fix This (And Your Stovetop Will Forgive You)
Removing melted plastic from a stovetop is mostly a game of patience and the right technique: cool (or carefully warm) the mess, harden it with ice
when helpful, scrape at a low angle with the correct tool, then polish away residue with a cooktop-safe cleaner. Different stovetops need different
strategiesglass cooktops like razor scrapers and cooktop cream, coil burners may need controlled warming and extra ventilation, and gas grates often
respond beautifully to a soak-and-scrub routine.
And remember: the best “hack” is the boring onekeeping plastics off the stovetop in the first place. It’s not glamorous, but neither is explaining
to a guest why your kitchen smells like a melted Tupperware museum.
Kitchen Stories & Lessons Learned (Experience Notes)
If you ask people how plastic ended up on a stovetop, the answers are almost never “I made a terrible choice on purpose.” It’s usually a chain of
tiny, extremely relatable decisions: someone sets a cutting board down “just for a second,” a phone buzzes, a timer goes off, and suddenly the kitchen
is auditioning for a low-budget smoke machine.
One pattern shows up again and again: panic-cleaning makes the mess worse. When plastic is hot, it behaves like bubblegum with a
grudge. People try to wipe it, and the plastic smears into a thinner, wider film that clings more stubbornly than the original blob. The calm move is
to back away, ventilate, and let it cool until it’s solid enough to lift. It feels slower, but it’s actually faster because you’re not spreading the
problem across a larger area.
Another common lesson: the first tool you try should be the gentlest one. Kitchens are full of items that can scrapespatulas, bench
scrapers, butter knivesbut not all scraping is created equal. People who start with a plastic scraper (or even an old credit card) often remove
surprisingly large chunks without leaving marks. The razor scraper becomes the specialist tool, not the opening act. That “start soft, escalate
carefully” mindset keeps you from turning a simple cleanup into a permanent scratch.
There’s also the “invisible residue” phase that tricks almost everyone. After the big pieces are gone, the cooktop can look fine at a glance, but feel
slightly tacky when you run a fingertip over it. That’s when frustration hitsbecause it’s not dramatic enough to see clearly, but it’s annoying enough
to feel. The best outcomes usually come from treating that film like a finishing step: cooktop cleaner (or a gentle polish), clean cloths, and a little
patience. Trying to brute-force it with abrasives is the moment many people learn that glass cooktops don’t show damage until the light hits them just
right… forever.
Electric coil stoves have their own “experience badge.” People often assume the only solution is to burn plastic off. The more successful cleanups
tend to happen when the residue is removed mechanically firstchilled, chipped, and scrapedthen only warmed briefly if needed. Ventilation becomes a
real character in the story here. Kitchens that have a strong hood vent and a window nearby recover quickly; kitchens that don’t tend to make people
swear they’ll never store anything above the stove again (until the next holiday brings a mountain of baking sheets).
Gas stovetops add a different lesson: cleaning is easier when you disassemble. People who try to scrub around grates and burner caps
in place usually spend longer and get worse results. The “aha” moment is realizing that pulling parts off, soaking them, and cleaning the surface
underneath is fasterand it prevents grime from collecting in those little seams where crumbs go to start new lives.
Finally, the most useful long-term takeaway is embarrassingly simple: create a designated “not-hot” parking zone. A tray, a cutting board, a matany
stable spot that is not the cooktop. Because in real kitchens, the stovetop often acts like bonus counter space, and melted plastic is the tax
you pay when bonus counter space forgets it can literally turn on. Once people establish that safe landing spot, the “melted plastic incident” tends
to become a one-time story… the kind told with a laugh, not a sigh.