Table of Contents >> Show >> Hide
- Step 1: Meet the Pattern Envelope
- Step 2: Choose the Right Pattern Size
- Step 3: Unfolding the Pattern Tissue Without Losing Your Mind
- Step 4: Reading the Instruction Sheet (a.k.a. The Roadmap)
- Step 5: Fabric Prep and Pattern Layout
- Step 6: Follow the Steps and Check Fit as You Go
- Quick Sewing Pattern Symbols Cheat Sheet
- Real-World Experiences: What Beginners Learn the Hard Way
- Conclusion: Your Sewing Pattern Is a Roadmap, Not a Mystery Novel
If you’ve ever unfolded a sewing pattern and thought, “Ah yes, I’ve accidentally enrolled in Fabric Algebra 101,” you’re not alone. Those squiggles, dotted lines, arrows, and mysterious triangles can look more like a treasure map than a fun weekend project. The good news? Once you learn how to read a sewing pattern, it turns from chaos into a clear, step-by-step roadmap to clothes, bags, and home décor you actually want to show people.
In this guide, we’ll walk through the whole process: from the pattern envelope and size charts to the symbols printed on the tissue itself and the instruction sheets inside. Think of this as your friendly sewing interpreter, helping you decode the jargon and diagrams so you can stop stressing and start stitching.
Step 1: Meet the Pattern Envelope
Before you even touch the tissue paper, take a good look at the pattern envelope. This is the “cover” of your sewing book. On the front, you’ll usually see:
- Brand and pattern number or name (for example, “Simplicity 1234” or “Rose Dress”)
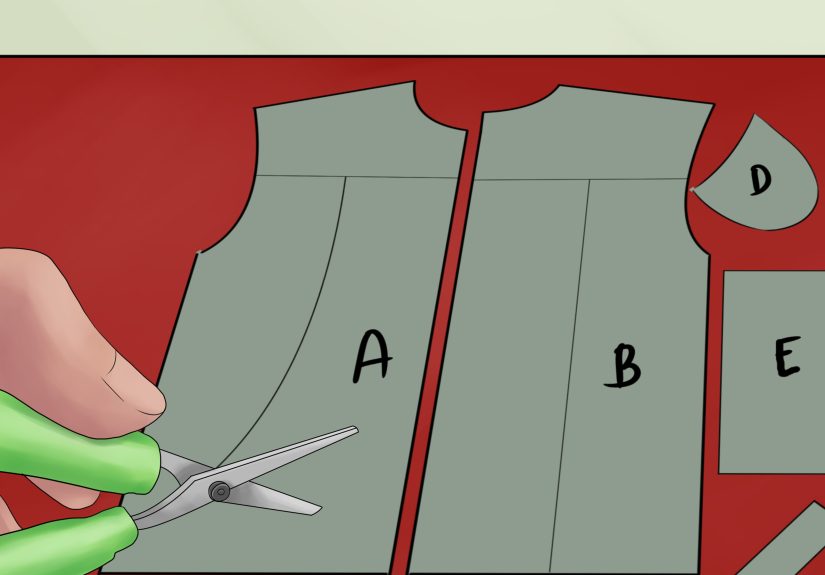
- Garment style options (different views labeled A, B, C, etc.)
- Suggested difficulty level (beginner, intermediate, advanced)
Flip the envelope over and you’ll see the really important stuff:
- Body measurements and size chart for bust, waist, hips, and sometimes height
- Fabric suggestions (e.g., light-weight cotton, linen, knit, denim)
- Yardage requirements based on your size and fabric width
- Notions list (zippers, buttons, elastic, interfacing, thread)
- Finished garment measurements for some patterns, which help you understand ease
Think of the envelope as the menu and the pattern as the recipe. Before you “order,” check that the style, fabric, and required skills match your taste, your stash, and your current stress level.
Step 2: Choose the Right Pattern Size
Here’s the first big surprise: sewing pattern sizes are not the same as ready-to-wear clothing sizes. If you usually wear a size 8 in store-bought clothes, your pattern size might be a 12 or 14. Don’t panic. Don’t cry. Just measure.
- Take accurate body measurements. For most garment patterns, you’ll measure:
- Bust: around the fullest part, parallel to the floor
- Waist: at the natural waistline (often where you bend)
- Hips: around the fullest part of your hips and seat
- Compare your measurements to the pattern’s size chart. Look for the column that best matches your numbers.
- When in between sizes, blend if needed. Many patterns are multi-sized. You can draw a smooth line between a smaller bust size and a larger hip size so the pattern better matches your shape.
- Check the finished garment measurements. These tell you how big the garment will be after sewing, including ease (the extra room you have for moving and breathing). If you like a closer fit, you might size down. If you want a roomy, comfy garment, you might stick with the pattern’s recommendation.
Pro tip: If you’re nervous about fit, make a quick “muslin” (test version) using inexpensive fabric. It’s like a dress rehearsal before the opening night.
Step 3: Unfolding the Pattern Tissue Without Losing Your Mind
Once you’ve chosen your size, it’s time to take a deep breath and unfold the pattern tissue. Yes, it will be huge. Yes, it will look like someone dropped a plate of spaghetti lines on thin paper. Here’s how to make sense of it.
Cutting Lines and Multiple Sizes
Look for the outlines of each piece. Most home sewing patterns show several sizes on the same tissue. Each size is usually represented by:
- Different line styles (solid, dashed, dotted)
- Or clearly labeled size numbers printed along the cutting lines
Follow the line that matches your size all the way around the pattern piece. If you’re blending sizes, smoothly transition from one size line to another at the bust, waist, or hip.
Key Sewing Pattern Symbols to Know
Most pattern companies use a shared “symbol language.” Once you know the basics, you’ll be able to read almost any pattern.
- Grainline arrow: A long arrow printed on the pattern piece. This shows how to align the piece with the fabric’s grain. You’ll usually place the arrow parallel to the fabric selvedge so your garment hangs correctly and doesn’t twist.
- Fold line: A line (sometimes with the words “Place on fold”) that tells you to line that edge up with the folded edge of your fabric. You don’t cut along this edge; it creates a symmetrical piece when opened.
- Notches: Little triangles or short lines along the cutting edge. These are matching points that help you line up seams, like sleeve to armhole or front to back pieces. You can cut the triangles outward or snip tiny clips into the seam allowance.
- Darts: Diamond or wedge shapes with dots and lines that you fold and stitch to add shaping around bust, waist, or shoulder.
- Dots, squares, and other markers: These indicate where to match up pieces, place pockets, start or stop stitching, or pivot at corners.
- Lengthen/shorten lines: Parallel lines across a piece that show where it’s safe to add or remove length without distorting the design.
- Button and buttonhole markings: Lines and symbols showing where to add closures on shirts, dresses, or jackets.
If you’re making a printable guide or working from a “with pictures” tutorial, this is a great place to add close-up photos or diagrams of each symbol right on the pattern tissue.
Step 4: Reading the Instruction Sheet (a.k.a. The Roadmap)
Next up: the instruction sheet, sometimes called the “guide sheet.” This is where the pattern company walks you through the project step by step.
What You’ll Usually Find Inside
- Overview and garment views: A recap of each version (View A, B, C) and what’s different (sleeve length, collar type, skirt style).
- Cutting layout diagrams: Little drawings showing how to place the pattern pieces on the fabric, depending on width, size, and whether the fabric has a nap or directional print.
- List of pieces: A diagram or list showing all pattern pieces and their numbers so you can check you have everything.
- Step-by-step instructions with illustrations: Each step usually has a short text description and a simple line drawing showing what to do.
- Glossary or special notes: Explanations of terms like “baste,” “staystitch,” “ease-stitch,” or “understitch.”
Read through the instructions at least once before you start cutting. You don’t have to memorize them, but getting a general sense of “what comes next” will save you from surprises halfway through.
If a step confuses you, try this combo:
- Re-read the step slowly.
- Study the illustration carefully.
- Look at your actual pattern pieces and fabric in front of you.
- Search for a short video or blog tutorial showing that step in action.
Seeing the same concept explained in a different way is often enough for the instructions to suddenly “click.”
Step 5: Fabric Prep and Pattern Layout
Now that you understand what you’re making, it’s time to prep the fabric and put the pattern pieces in place.
- Prewash and press your fabric. This helps shrinkage happen before you cut and sew, not after your first wash.
- Fold the fabric as shown in the layout diagram. Usually right sides together, selvedges matching, unless the instructions say otherwise.
- Lay pattern pieces according to grainline. Use a ruler or tape measure to ensure the grainline arrow is parallel to the selvedge at both ends.
- Place pieces on the fold where indicated. Line up those “place on fold” edges exactly with the fabric fold.
- Pin or weight the pattern down. Pins, pattern weights, or even canned goods (yes, really) work to keep things from shifting as you cut.
- Transfer markings. Before removing the pattern pieces, mark your notches, darts, dots, and any other symbols onto the fabric using tailor’s chalk, washable pen, or tailor’s tacks (thread loops).
If your pattern includes a note like “seam allowances included” or “add seam allowances,” pay close attention. Many commercial patterns include a standard 5/8-inch seam allowance, but some indie patterns use 3/8 inch or 1/4 inch. That difference matters when it’s time to sew.
Step 6: Follow the Steps and Check Fit as You Go
After cutting, you can start following the instructional steps in order. A few sanity-saving tips:
- Baste first, commit later. Use a long stitch length to temporarily sew key seams so you can try the garment on and adjust before sewing permanently.
- Press every seam. Pressing as you go makes the final garment smoother and more professional-looking.
- Try on during construction. Slip the garment on at key pointsafter joining side seams, attaching sleeves, or sewing the waistbandto check ease and length.
- Take notes. If you discover that you always need an extra inch in the sleeves or less ease at the waist, jot it down on the pattern envelope or instruction sheet for next time.
Remember: sewing patterns are not exams. You’re allowed to deviate, adjust, or even cheat a little (with shortcuts) as your skills grow.
Quick Sewing Pattern Symbols Cheat Sheet
Here’s a handy reference you can keep next to your machine:
- Grainline arrow: Align parallel to fabric selvedge.
- Fold line: Place on fabric fold; do not cut along this edge.
- Notches: Match pieces at these points for accurate seam alignment.
- Darts: Fold and stitch to create shaping.
- Dots/squares: Match, pivot, or place features (pockets, pleats, buttons).
- Lengthen/shorten lines: Safest place to add or remove length.
- Cutting lines: Follow the line style for your chosen size.
If you’re creating a “with pictures” version like a wikiHow-style tutorial, you can photograph each symbol on the tissue next to its matching fabric marking so beginners can see the one-to-one relationship.
Real-World Experiences: What Beginners Learn the Hard Way
Guides and diagrams are great, but sometimes the best lessons come from real-life “oops” moments. Here are some common experiences new sewists have when learning how to read a sewing patternand what they wish they’d known sooner.
1. The “Wrong Size” Surprise
Many beginners cut the size that matches their store-bought clothes, only to end up with a garment that’s way too big or far too tight. The emotional arc goes like this: joy (cutting!), confidence (sewing!), horror (trying on!). The fix? Always use body measurements and the pattern’s size chart, and pay attention to the finished garment measurements. Once you realize patterns have built-in ease, you’ll stop fighting the numbers and start working with them.
2. Ignoring Grainlines (and Paying for It)
Another classic experience: “I just threw the pieces on the fabric however they fit.” It feels efficientuntil the skirt twists, the pants legs torque, or the shoulder seams pull in odd directions. After one or two warped garments, most sewists become grainline fanatics, measuring from the arrow to the selvedge on both ends to keep pieces perfectly aligned.
3. Forgetting to Transfer Markings
When you’re excited, it’s tempting to skip over those little dots, triangles, and dart legs and just start sewing. But halfway through construction, you suddenly need to know where a pocket goes or where a dart should endand the pattern piece is back in the envelope. Experienced sewists quickly learn that carefully transferring every marking at the cutting stage saves a lot of guesswork and unpicking later.
4. Misreading the Seam Allowance
A frequent newbie story: “I sewed everything with a 1/4-inch seam because that’s what my quilting tutorial said… then my dress didn’t fit.” Different patterns use different seam allowances, and garment patterns in particular often assume 5/8 inch unless otherwise stated. Once you get burned by a seam allowance mix-up, you start highlighting that detail on the instruction sheet and double-checking your sewing machine’s guide marks.
5. Overlooking the “View” Details
Many patterns include multiple views, and it’s easy to accidentally grab a piece that belongs to View C when you’re making View A. That leads to bonus ruffles or mystery facings. With experience, sewists start circling the pieces they actually need on the instruction sheet and crossing out views they’re not using, which keeps the process calmer and the pattern pieces under control.
6. Learning to Slow Down
A lot of beginners try to blitz through a garment in one evening. The reality: reading a pattern is a skill, and your brain may need a bit of processing time. Many sewists report that when they step away after a confusing step and come back latersometimes even the next daythe instructions suddenly make sense. Over time, you learn that “slow is smooth and smooth is fast” is absolutely true in sewing.
7. Gaining Confidence Over Time
The most encouraging shared experience? Patterns that once looked impossible eventually feel familiar. After a few projects, you recognize darts, notches, and ease without thinking. You start tweaking designs, combining elements from different patterns, or even drafting simple pieces yourself. What used to be fabric algebra turns into a creative language you can actually speak.
If you’re just starting out, know this: every experienced sewer you admire had a first pattern they didn’t fully understand. Keep your seam ripper handy, your iron plugged in, and your sense of humor intact, and you’ll get more confident with every project.
Conclusion: Your Sewing Pattern Is a Roadmap, Not a Mystery Novel
Learning how to read a sewing pattern is less about memorizing every symbol and more about understanding the overall system: the envelope tells you what you’re making and what you need; the size chart helps you pick the right pattern size; the tissue shows you how to cut and align your pieces; and the instruction sheet guides you through construction, one step at a time.
With practice, you’ll be able to glance at a pattern and instantly understand how it works. Pair that understanding with clear photos or illustrationsjust like a “with pictures” tutorialand suddenly sewing projects that once felt intimidating become totally doable. So go ahead: unfold that tissue, grab your fabric, and let your next garment, bag, or pillow cover be the pattern-reading victory that kicks off your sewing era.


