Table of Contents >> Show >> Hide
- What Is the Tanning Mitt Paint Hack?
- Best Surfaces for Painting With a Tanning Mitt
- Tools and Materials You’ll Need
- Prep Work: The Part Everyone Wants to Skip (But Shouldn’t)
- How to Paint With a Tanning Mitt (Step-by-Step)
- 1) Suit up: glove under the mitt
- 2) De-lint the mitt (30 seconds that saves your finish)
- 3) Load paint the right way (less is more)
- 4) Apply with smooth, controlled passes
- 5) Work in short sections and keep a wet edge
- 6) Feather the edges (the streak-free secret)
- 7) Detail the tight spots with a small angled brush
- 8) Let it dry, then add a second coat
- How to Use a Tanning Mitt for Crisp Lines Near Walls
- Common Problems (and Easy Fixes)
- Pro-Level Tips to Make the Finish Look “Done,” Not “DIY-ish”
- FAQ: Quick Answers Before You Start Painting With a Mitt
- Conclusion: A Weird Little Hack That Actually Delivers
- Extra: Real-World Experiences Using the Tanning Mitt Paint Hack (500+ Words)
If you’ve ever painted trim or a banister and thought, “Wow, I just invented a brand-new texture called Visible Brush Regret,” you’re not alone. The internet has been obsessed with a surprisingly effective workaround: painting with a tanning mitt (yes, the fluffy glove you’d normally use for self-tanner). It sounds like a prank your friend would dare you to do… until you try it and realize your handrail looks smoother than your latest life decision.
This guide breaks down the tanning mitt paint hack in a practical, streak-free, “you can totally do this on a weekend” wayplus where it shines, where it fails, and how to keep the finish looking intentional (instead of “I painted this while a cat head-butted my elbow”).
What Is the Tanning Mitt Paint Hack?
The hack is simple: you use a clean self-tanning mitt as an applicator to spread paint on small, fiddly, or rounded surfacesthink banisters, stair spindles, chair legs, pipes, columns, ornate trim profiles, and narrow baseboards. Instead of bristles leaving tracks, the mitt’s soft, low-profile fibers lay down paint more like a microfiber pad or mini foam roller, which can reduce brush marks and drips.
Why it works (the non-magic explanation)
- Even pressure: Your hand naturally keeps pressure consistent, which helps prevent ridges and heavy edges.
- Wrap-around contact: A mitt can “hug” curves and corners, covering multiple sides of a rounded rail in one pass.
- Less bristle drag: Brushes can leave lines when paint starts to tack; a mitt glides and “soft-tips” the surface.
- Fast reload + fast blend: You can apply paint, then lightly feather it without overworking.
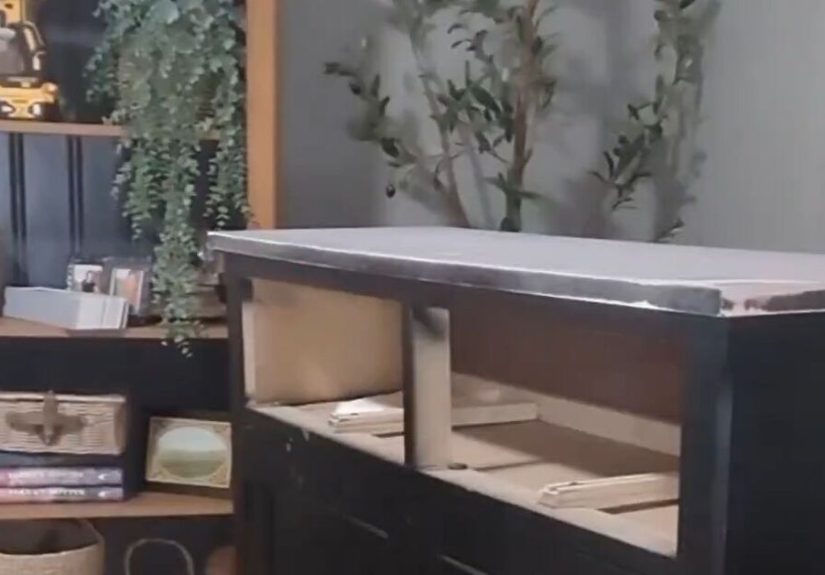
Best Surfaces for Painting With a Tanning Mitt
This is not a “paint your whole living room with a glove” situation. The tanning mitt technique is best for smaller surfaces where brushes tend to leave marks or where rollers can’t fit.
Great candidates
- Stair handrails and rounded banisters
- Spindles, balusters, and stair parts with curves
- Baseboards and trim with profiles (especially the top edge)
- Chair legs, table legs, and furniture rails
- Pipes, thin columns, metal railings (with the right primer/paint)
- Fence pickets and narrow slats (especially when brushing feels painfully slow)
Not-so-great candidates
- Large walls: You’ll get uneven texture and hate yourself by square foot three.
- Very rough texture: Mitt fibers can snag, lint, or skip over deep texture.
- High-traffic floors: This isn’t a method issuejust don’t “mitt” a floor unless you enjoy redoing floors.
- Super glossy cabinetry without prep: Cabinets need serious prep and the right products; the mitt can help, but it’s not a shortcut for prep.
Tools and Materials You’ll Need
You can keep this simple, but the right setup is the difference between “wow” and “why is my railing fuzzy?”
The essentials
- Clean tanning mitt (low-lint, dense, preferably with a thumb pocket for control)
- Disposable nitrile gloves (wear under the mitttrust me)
- Paint appropriate for the surface (trim/door enamel for trim and rails; exterior paint for outdoor pieces)
- Primer (if needed for bare wood, stains, glossy surfaces, or metal)
- Sandpaper (fine grit for scuff-sanding; sanding sponge is great for curved parts)
- Degreaser or mild cleaner + microfiber cloth
- Drop cloth and painter’s tape (optional but helpful)
- Small angled brush for tight corners and detail work
Nice-to-have upgrades
- Mini foam roller for flat trim faces or “final tipping-off” (especially on furniture)
- Lint roller to de-fuzz the mitt before you start
- Small paint tray or disposable plate (yes, a plate works; no, you shouldn’t use your good plates)
Prep Work: The Part Everyone Wants to Skip (But Shouldn’t)
The tanning mitt is a finishing trick, not a permission slip to paint over dust, hand oils, or mystery kitchen splatter from 2019. Prep is what keeps the paint from chipping and helps it level out.
Step 1: Clean like you mean it
Handrails and baseboards are oil magnets. Clean with a mild degreaser (or warm water + a little dish soap), then rinse/wipe with clean water and let dry. If it feels slick to the touch, keep cleaning. Paint hates slick.
Step 2: Scuff-sand for grip
Lightly sand glossy surfaces so primer/paint can grab on. You’re not carving a sculpturejust dulling the shine. Wipe off dust with a damp microfiber cloth and let it dry.
Step 3: Prime when needed
Prime bare wood, stained wood, repaired patches, metal, or anything glossy that tends to reject paint. The right primer prevents tannins, stains, and “why is it peeling?” surprises.
How to Paint With a Tanning Mitt (Step-by-Step)
1) Suit up: glove under the mitt
Put on a disposable glove first, then the tanning mitt. This keeps paint off your skin and prevents the mitt from soaking through to your hand. Also: if you skip the glove, you’ll spend the rest of the day explaining why your palm is “accent wall chic.”
2) De-lint the mitt (30 seconds that saves your finish)
Roll the mitt with a lint roller or slap it against your hand a few times. If the mitt sheds fibers, don’t use it for your topcoat. Low-lint matters most with semi-gloss or high-gloss trim paint because shine highlights everything.
3) Load paint the right way (less is more)
Pour a small amount of paint into a tray or onto a disposable plate. Don’t dunk the mitt like it’s a donut. Instead, use one of these methods:
- Pat-and-spread: Lightly pat the mitt into paint, then rub your gloved hands together to distribute it evenly.
- Brush-to-mitt: Load a brush and “butter” a small amount of paint onto the mitt for better control (great for trim paint).
4) Apply with smooth, controlled passes
Use light, even pressure. For a handrail, wrap your hand around the rail and slide along the grain, rotating your wrist to cover the top and sides. For spindles or narrow trim, use your fingers like a precision toolglide rather than scrub.
5) Work in short sections and keep a wet edge
Paint behaves best when you don’t overwork it. Do 1–3 feet at a time, then move on. If you keep rubbing as it starts to dry, you can create drag marks or uneven sheen.
6) Feather the edges (the streak-free secret)
When you stop a section, lightly feather the end so your next section blends in. Think “soft fade,” not “hard stop.” This is especially important on glossy trims and rails where overlap lines love to show up later.
7) Detail the tight spots with a small angled brush
The mitt is great, but it can’t teleport paint into inside corners, ornate crevices, or the tight junction where rail meets post. Use a small angled brush to cut in those areas first, then blend with the mitt while everything is still wet.
8) Let it dry, then add a second coat
Most trim and rail projects look best with two thin coats. The mitt encourages thin coats naturallyperfect. Follow the paint can’s recoat time and resist “just one more swipe” when it’s tacky.
How to Use a Tanning Mitt for Crisp Lines Near Walls
Can the mitt replace cutting-in? Sometimesespecially along baseboards or trim where you want a smooth, controlled pass. Here’s the move:
- Brush the corner first: Use an angled brush to place paint precisely right at the seam.
- Mitt-smooth the field: Immediately smooth the broader face with the mitt to reduce brush texture.
- Blend with the wall roller (if applicable): On wall projects, roll close to the edge while the cut-in area is wet to avoid “picture framing.”
Translation: the mitt can help you get a cleaner, more uniform finish, but you still want the classic pro sequencecut in, then roll, while maintaining a wet edge.
Common Problems (and Easy Fixes)
Problem: Lint or fuzz in the finish
- Cause: Mitt shedding, or too much friction on tacky paint.
- Fix: Switch to a lower-lint mitt, lint-roll before use, and avoid rubbing once paint starts drying.
Problem: Streaks or dull patches
- Cause: Uneven loading or overworking drying paint.
- Fix: Load smaller amounts more often; work in shorter sections; feather edges.
Problem: Drips at the underside of rails
- Cause: Too much paint on the mitt, gravity doing what gravity does.
- Fix: Use thinner coats; do a quick underside check after each section and wipe drips immediately.
Problem: Chipping later
- Cause: Poor prep (oils, glossy surface, no primer), not the mitt.
- Fix: Clean, scuff-sand, prime, and use a durable enamel or trim paint designed for adhesion and leveling.
Pro-Level Tips to Make the Finish Look “Done,” Not “DIY-ish”
- Choose the right paint sheen: Satin or semi-gloss is common for trim and rails because it’s durable and wipeable, but it shows flawsso thin coats matter.
- Don’t skip sanding between coats (when needed): If the first coat feels gritty, a very light sand can make the second coat look factory-smooth.
- Use lighting like a detective: Shine a lamp along the rail to spot drips and uneven sheen while the paint is still wet.
- Keep your strokes consistent: Follow the grain on wood. Random direction changes can show up as sheen shifts.
- Stop touching it: Modern paints often level as they dry. The more you fuss, the more texture you create.
FAQ: Quick Answers Before You Start Painting With a Mitt
Do I need painter’s tape?
Not always. For rails and spindles, you can often skip tape if you have a steady hand and do careful prep. For baseboards near carpet or when you want ultra-crisp lines, tape can still be helpfuljust press it down well and remove it at the right time.
Can I use this on doors or cabinets?
You can, but it’s not the easiest path. Large flat surfaces usually look best with a foam roller (and proper technique) or a sprayerplus serious prep on cabinets. The mitt is better as a detail tool: rails, edges, profiles, and tight areas.
Oil-based paint or water-based paint?
Most DIY trim paints today are water-based enamels designed to level nicely. They’re easier to clean up and typically play well with mitt application. Oil-based products can work but are messier and require different cleanupchoose based on your project and comfort level.
How do I clean the mitt after painting?
If it’s a cheap mitt and you used it as a “single-project hero,” you may choose to toss it. If you want to clean it: rinse immediately (for water-based paint), work in mild soap, rinse until clear, and air-dry completely. The sooner you clean, the better your odds.
Conclusion: A Weird Little Hack That Actually Delivers
Painting with a tanning mitt is one of those rare DIY hacks that’s both funny and genuinely useful. It won’t replace the roller for walls, and it won’t magically fix bad prep, but for rails, spindles, trim profiles, and other “why is this shaped like a pretzel?” surfaces, it can produce a smoother, more streak-free finish with less effort.
Do your prep, use thin coats, keep a wet edge, and treat the mitt like a finesse toolnot a paint sponge. Your future self will thank you every time you walk up the stairs and don’t notice brush marks screaming for attention.
Extra: Real-World Experiences Using the Tanning Mitt Paint Hack (500+ Words)
The first time you try the tanning mitt method, it feels a little ridiculouslike you’re about to give your staircase a spray tan. But that “this can’t possibly work” moment is exactly why it’s so satisfying when it does. In real projects, the biggest surprise is how quickly you get into a rhythm. With a brush, your brain is busy managing bristle angle, pressure, and the fear of drips. With the mitt, your hand does what hands are good at: gripping, sliding, and adjusting naturally as the shape changes.
On a rounded stair rail, the mitt shines because it lets you cover the top curve and side faces in one smooth glide. The trick is learning how much paint is “enough.” Most people overload on their first pass (because that’s what we do when we’re nervous). The result is usually a couple of drips hiding under the rail like tiny paint goblins. After that, you start using smaller reloads and checking the underside after each sectionproblem solved. Once you get the hang of it, your finish looks more uniform because you aren’t leaving those slightly thicker brush “start and stop” points.
Baseboards are a different kind of win. If you’ve ever tried painting baseboards with a brush and ended up with visible strokes, the mitt acts like a built-in “smoother.” A real-world approach that works well is: do a quick, careful cut along the top edge with a small angled brush, then immediately run the mitt along the baseboard face to even out texture and sheen. It’s not about going faster (though you often do); it’s about getting that consistent look where the baseboard doesn’t appear to change texture every time you blink.
Furniture legs and spindles can feel like the Olympics of awkward painting. With the mitt, you can “pinch” the leg lightly and slide downward, keeping the coat thin and even. This is especially helpful on turned legs and decorative spindles where a brush tends to pool paint in grooves. The mitt doesn’t eliminate pooling entirely, but it reduces it because you’re spreading paint rather than pushing it into details. A small brush still matters for deep crevicesthink of it as your detail partner, not your competition.
The most common mistake people report (and you’ll probably do once) is overworking the paint when it starts to dry. The mitt feels so smooth that it tempts you into “just one more swipe.” That’s when you get drag marks or weird sheen patches, especially with semi-gloss. The fix is simple: work smaller, stop sooner, and trust the paint to level. Another practical lesson: lighting changes everything. Under overhead lights, your rail may look flawless; under a side lamp, you’ll spot a drip you didn’t know existed. A quick inspection with a handheld light while the paint is wet can save you from sanding later.
The other big “experience” takeaway is mitt quality. Not all tanning mitts behave the same. Some are plush and dense (great), while others shed lint or have seams that leave faint lines (not great). If you notice fuzz in your first coat, don’t keep going and hope it magically disappearsswitch mitts, lint-roll it, or use a mini foam roller for the final pass on flatter areas. The goal is a finish that looks intentional and durable, not like your banister is wearing a sweater.
Bottom line: the tanning mitt hack is most successful when you treat it like a finishing tool for tricky shapes. Pair it with solid prep, thin coats, and a little patience, and it can genuinely upgrade your DIY resultswhile also giving you the right to say, “Yes, I painted that with a tanning mitt,” and enjoy the confused respect that follows.


