Table of Contents >> Show >> Hide
- What Is Elbow Breadth?
- Why Measure Elbow Breadth?
- What You Need Before You Start
- How to Measure Elbow Breadth in 11 Steps
- Step 1: Understand exactly what you are measuring
- Step 2: Choose the arm you will measure
- Step 3: Remove bulky clothing from the area
- Step 4: Stand or sit in a stable position
- Step 5: Raise the upper arm forward
- Step 6: Bend the elbow to 90 degrees
- Step 7: Rotate the arm correctly
- Step 8: Locate the two bony landmarks
- Step 9: Place the caliper tips on the widest bony points
- Step 10: Read and record the number carefully
- Step 11: Repeat the measurement and average it
- Common Mistakes to Avoid
- How to Make Your Elbow Breadth Measurement More Accurate
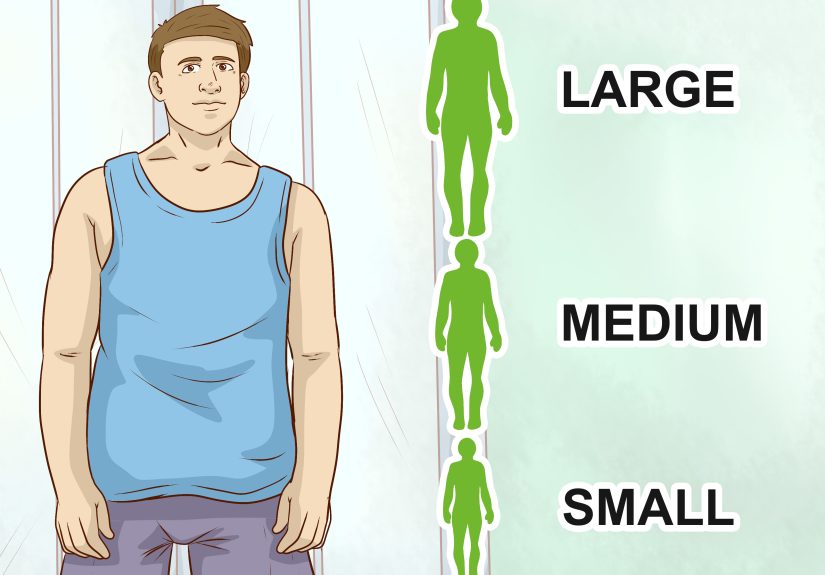
- What the Number Can Tell You
- Experiences Related to Measuring Elbow Breadth
- Final Thoughts
- SEO Tags
Measuring elbow breadth sounds like one of those oddly specific tasks that only appears in a textbook, a lab, or a very competitive conversation about body proportions. But it is actually a practical anthropometric measurement used in research, fitness assessments, nutrition work, and body frame evaluation. If you do it correctly, elbow breadth can give you a useful snapshot of skeletal frame size. If you do it incorrectly, you mostly get a random number and a strong desire to blame the caliper.
This guide explains exactly how to measure elbow breadth in a clear, beginner-friendly way. You will learn what elbow breadth means, which landmarks to find, how to position the arm, how to use a caliper, and how to avoid the common mistakes that make measurements less reliable. Whether you are collecting data for school, fitness, health tracking, or plain old curiosity, these 11 steps will help you get a clean, repeatable result.
What Is Elbow Breadth?
Elbow breadth is the distance across the elbow at its widest bony points. In anthropometry, it usually refers to the biepicondylar breadth of the humerus, meaning the distance between the bony prominences on the inside and outside of the elbow. These landmarks are associated with the medial and lateral sides of the elbow near the epicondyles of the humerus.
This is not the same thing as elbow circumference. Circumference wraps around the joint with a tape. Breadth measures the width across it, usually with a sliding caliper. That difference matters. If you substitute a tape measure and “eyeball confidence,” you are no longer measuring elbow breadth. You are inventing a new sport.
Why Measure Elbow Breadth?
Elbow breadth is often used as part of anthropometric assessment because it reflects skeletal dimensions more than soft tissue. In practical terms, that means it can help estimate body frame size and can be useful in research, nutrition assessment, and body-composition-related work. It can also be used when comparing repeated measurements over time, as long as the method stays consistent.
The real value is consistency. A single measurement can be interesting. A correctly repeated measurement is useful. If you always use the same arm position, the same landmarks, and the same type of caliper, your results become much more meaningful.
What You Need Before You Start
- A sliding caliper or spreading caliper
- A pen, notes app, or data sheet
- A mirror or helper if you are measuring yourself
- A chair or clear standing space
- Patience, because bony landmarks do not RSVP in advance
A small sliding caliper is ideal for elbow breadth. If you are working in a classroom, clinic, or lab, use the instrument recommended by your setting. If you are measuring yourself at home, accuracy will improve a lot if someone else helps you identify the landmarks and read the caliper.
How to Measure Elbow Breadth in 11 Steps
Step 1: Understand exactly what you are measuring
Before you touch the caliper, know the target. Elbow breadth is the widest distance across the elbow joint at the major bony points. You are looking for the inside and outside bony prominences of the distal humerus, not the soft tissue around them. Starting with the right definition prevents you from measuring “whatever feels elbow-ish,” which is not an approved scientific category.
Step 2: Choose the arm you will measure
Many protocols measure the right side unless a study or clinician says otherwise. The most important rule is consistency. If you measure the right elbow today, measure the right elbow next time too. If you want extra detail, you can measure both sides and note them separately, but do not combine them into one number.
Step 3: Remove bulky clothing from the area
Roll up sleeves or wear clothing that leaves the elbow exposed. Thick fabric can make it harder to locate the bony landmarks and can interfere with the caliper tips. You want direct access to the joint, not a measurement of your sweatshirt’s emotional support padding.
Step 4: Stand or sit in a stable position
Get into a balanced, comfortable posture. You may stand upright or sit, depending on your setting, but your position should be steady. Avoid twisting, leaning, or shrugging the shoulder. If your body shifts during the measurement, the caliper angle may shift too, and your result can drift.
Step 5: Raise the upper arm forward
Bring the upper arm forward so it is roughly perpendicular to the body. In many standard descriptions, the upper arm is elevated so the proximal segment is parallel to the floor. This helps standardize the measurement and makes the elbow landmarks easier to access. Think of it as a simple “stop right there” arm position, but more scientific.
Step 6: Bend the elbow to 90 degrees
Flex the elbow so the joint forms a right angle. The forearm should point upward, and the position should feel natural rather than strained. A sloppy angle can change the apparent width of the elbow and make your measurement less reproducible. If needed, use a mirror or helper to check that the bend looks close to 90 degrees.
Step 7: Rotate the arm correctly
Position the arm so the fingers point up and the back of the wrist is oriented toward the measurer. This is one of those small details that seems fussy until you realize it helps align the elbow in a standard way. Standard positioning reduces guesswork and improves the odds that repeated measurements are comparable.
Step 8: Locate the two bony landmarks
Use your fingers to feel for the most prominent bony points on both sides of the elbow. One is on the inside of the elbow region and one is on the outside. These are the points the caliper will span. Take your time here. Good landmarking is the difference between a measurement based on bone and a measurement based on optimism.
If the person has swelling, pain, or recent injury around the joint, do not force the assessment. Comfort and safety matter, and inflamed tissue can also make the landmarks harder to identify accurately.
Step 9: Place the caliper tips on the widest bony points
Open the sliding caliper and place the tips gently on the two identified landmarks. The caliper should span the greatest breadth across the elbow joint and stay aligned with the axis of the upper arm rather than drifting at an odd diagonal. You want firm contact with the bony points, but not enough pressure to cause discomfort.
A useful mental check is this: if the caliper feels unstable, or if one tip is slipping into soft tissue, pause and reset. A clean setup is faster than redoing a messy reading three times.
Step 10: Read and record the number carefully
Once the caliper is in the correct position, read the measurement to the nearest increment your tool allows, often to the nearest 0.1 centimeter. Record it immediately. Do not trust your memory, especially if you are doing multiple body measurements in a row. Memory has a funny way of turning 6.2 into 6.8 the moment you look away.
Write down the side measured, the date, the unit used, and any notes that might matter later, such as “measured standing” or “subject had limited extension due to soreness.” Small notes can save a lot of confusion later.
Step 11: Repeat the measurement and average it
For better reliability, repeat the measurement at least two more times. If your readings are very close, average them. If one number is clearly off, redo the setup and measure again. Repeated readings are one of the easiest ways to improve accuracy because they help catch small placement errors.
For example, if your three measurements are 6.3 cm, 6.4 cm, and 6.3 cm, your average elbow breadth would be 6.33 cm, which you might round according to the conventions of your project or setting. This is much more dependable than taking one quick reading and calling it a day.
Common Mistakes to Avoid
- Using a tape measure instead of a caliper: that measures around the elbow, not across it.
- Missing the bony landmarks: soft tissue placement can inflate the number.
- Changing the elbow angle: a bent arm that is too open or too closed affects the width.
- Tilting the caliper: the tool should be aligned properly, not wandering off at a creative angle.
- Skipping repeat measurements: one reading is fine for curiosity, but averaging is better for usable data.
- Measuring during pain or swelling: comfort, safety, and accuracy all suffer.
How to Make Your Elbow Breadth Measurement More Accurate
If accuracy matters, keep the method the same every time. Measure at a similar time of day, use the same caliper, use the same side of the body, and use the same posture and arm position. If possible, have the same trained person take the measurement each time. Standardization is the secret sauce of anthropometry, minus the sauce.
It also helps to practice finding the landmarks before you take the official reading. Many first-time measurement errors happen because the measurer rushes. Slow down, feel the joint carefully, and do a test placement of the caliper before you record anything.
What the Number Can Tell You
Elbow breadth can contribute to frame-size assessment and anthropometric profiling. On its own, it is just one number. In context, it becomes more useful. Researchers and health professionals may compare it with height, weight, age, sex, or other body measurements depending on the purpose of the assessment.
That said, elbow breadth is not a stand-alone diagnosis tool. It will not tell you whether you are healthy, athletic, injured, or destined to dominate trivia night. It is one well-defined skeletal measurement that becomes meaningful when used appropriately and consistently.
Experiences Related to Measuring Elbow Breadth
People who measure elbow breadth for the first time usually have the same reaction: “This seemed easier in theory.” The challenge is not the caliper itself. It is learning to trust your fingers when you search for the exact bony landmarks. At first, the elbow can feel like a crowded neighborhood of tendons, skin, and angles. Then, once you slow down and actually palpate the inside and outside of the joint, the landmarks become much easier to recognize.
Another common experience is discovering that posture changes everything. Someone may think they are holding a perfect 90-degree angle, only to see in a mirror that the elbow is drifting open or the shoulder is hiking upward like it is trying to escape the assignment. Once people correct their position, the measurement often becomes more repeatable right away. It is one of those moments where technique quietly beats effort.
Helpers also learn fast that “gently” is an important word. If the caliper presses too hard, the person being measured will tense up, pull away, or give you a look that says the session has become personal. A light, steady touch makes the process smoother and usually produces a cleaner reading. Good anthropometry is not dramatic. It is calm, boring, and surprisingly satisfying when the numbers line up.
Students in fitness, nutrition, or health science settings often say the biggest surprise is how much repeat measurement matters. The first reading may differ from the second because the caliper was slightly tilted or the tips were placed a millimeter too low. By the third attempt, confidence grows, the landmarks are clearer, and the number stabilizes. That moment is useful because it teaches a bigger lesson: body measurement is not just about tools, but about method.
Some people also notice small side-to-side differences when they measure both elbows. That can happen, especially in people who favor one arm for work, sport, or daily tasks. The important thing is not to panic and assume your skeleton is staging a rebellion. Minor asymmetry is common in human bodies. What matters most is documenting which side you measured and staying consistent in future assessments.
There is also the very real experience of trying to measure your own elbow breadth without help. Can it be done? Sort of. Is it elegant? Not even a little. Self-measurement often turns into a dance involving mirrors, awkward wrist angles, and a caliper that seems determined to escape at the exact wrong moment. Most people get better results when another person takes the reading while they hold the correct posture.
Over time, measuring elbow breadth becomes less mysterious and more mechanical. You prepare the area, position the arm, locate the landmarks, place the caliper, read the number, and repeat. That routine gives people confidence. What started as a weirdly specific body measurement turns into a straightforward skill. And honestly, that is part of the charm. It is nerdy, precise, and oddly satisfying when the process works exactly the way it should.
Final Thoughts
Learning how to measure elbow breadth is mostly about mastering a simple sequence and respecting the details. Use the right tool, position the arm correctly, identify the bony landmarks, take the reading carefully, and repeat it for reliability. Done properly, this small measurement can provide useful information about skeletal frame size and body structure.
If you remember only one thing, let it be this: consistency beats speed. A careful elbow breadth measurement is much more valuable than a rushed one. And once you get the hang of it, you may never look at an elbow the same way again.