Table of Contents >> Show >> Hide
- Why This Fossil Project Is So Popular
- What You Need
- Before You Start: A Few Smart Safety Rules
- How to Make Fossils Using Plaster of Paris: 13 Steps
- Step 1: Pick an Object With Good Texture
- Step 2: Prepare Your Work Area
- Step 3: Build Your “Sediment” Base
- Step 4: Press the Object Into the Surface
- Step 5: Remove the Object Carefully
- Step 6: Inspect and Clean the Mold
- Step 7: Mix the Plaster of Paris
- Step 8: Pour the Plaster Slowly
- Step 9: Tap Out the Air Bubbles
- Step 10: Let It Set Without Fussing With It
- Step 11: Remove the Cast From the Mold
- Step 12: Let the Fossil Dry Completely
- Step 13: Finish, Paint, and Label Your Fossil
- Tips for Better DIY Fossils
- Common Mistakes and How to Fix Them
- What This Project Teaches About Real Fossils
- Experience Section: What It Feels Like to Make Fossils at Home or in a Classroom
- Conclusion
If you have ever looked at a fossil in a museum and thought, “Wow, nature really knows how to leave a receipt,” this project is for you. Making fossils with Plaster of Paris is a fun, surprisingly satisfying craft that turns a shell, leaf, toy dinosaur, or textured object into a fossil-like cast you can hold in your hand. It is part science activity, part art project, and part excuse to get a little messy in the name of learning.
Now, to be clear, you are not creating a real fossil that future paleontologists will discover under your kitchen table in ten million years. What you are making is a model of a mold fossil and a cast fossil. That still makes this one of the best hands-on ways to understand how fossils form, why impressions matter, and why tiny details can tell a huge story.
Whether you are doing this as a school activity, a rainy-day project with kids, or a solo craft because you enjoy making your living room look like a tiny natural history museum, this guide walks you through how to make fossils using Plaster of Paris in 13 steps. You will also find safety tips, troubleshooting advice, and a few tricks for getting cleaner, more realistic results.
Why This Fossil Project Is So Popular
There is a reason DIY fossil crafts keep showing up in classrooms, camps, and family science afternoons: they work. You do not need expensive tools, advanced art skills, or the patience of an actual paleontologist hunched over a sandstone slab for six months. You just need a mold material, a textured object, and a batch of plaster mixed to the right consistency.
The project is also great for teaching the difference between two important fossil ideas:
- Mold fossil: the impression left behind when an organism or object presses into soft material.
- Cast fossil: the solid copy formed when that impression fills in and hardens.
In other words, one is the negative space, and the other is the positive form. Think of it as the difference between a footprint in mud and what would happen if that footprint filled up and turned solid. Science can be weirdly elegant like that.
What You Need
- Plaster of Paris
- Cold water
- A mixing bowl or disposable cup
- A spoon or craft stick for stirring
- Modeling clay, air-dry clay, or damp sand
- A shallow container, pie tin, tray, or bowl
- A fossil-making object such as a shell, leaf, twig, plastic dinosaur, coin, pine cone, or clean bone
- Petroleum jelly or a tiny bit of oil, optional
- Newspaper or a washable table covering
- Paper towels
- Craft paint, optional
- Fine sandpaper, optional
Before You Start: A Few Smart Safety Rules
Plaster of Paris is beginner-friendly, but it is not magical fairy dust. Set up your workspace first so you are not panic-cleaning while the mixture hardens in your spoon.
- Cover your table with newspaper or a disposable mat.
- Use a container you do not mind getting messy.
- Mix small batches because plaster starts setting fairly quickly.
- Do not pour leftover plaster down the sink. It can harden and clog plumbing.
- Do not use Plaster of Paris to make casts of hands, feet, or any body part.
- If kids are involved, adult supervision is a very good idea.
Once your setup is ready, it is time for the fun part: making something that looks like it belongs in a tiny gift shop next to a plastic T. rex.
How to Make Fossils Using Plaster of Paris: 13 Steps
Step 1: Pick an Object With Good Texture
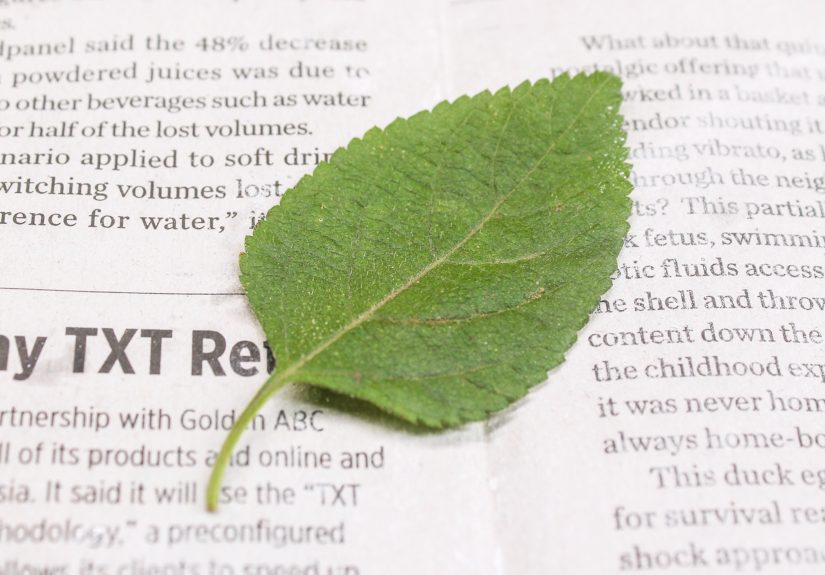
Start with something that has ridges, veins, grooves, or a clear outline. Seashells are the classic choice because they leave sharp, detailed impressions. Leaves can work beautifully, especially if the veins are pronounced. Small toy dinosaurs, coins, pine cones, and textured buttons can also make fun fossil-like forms.
If the object is flimsy, fuzzy, or squishy, it probably will not give you a clean impression. Fossil crafts reward texture, not chaos.
Step 2: Prepare Your Work Area
Lay down newspaper and gather everything before you mix the plaster. This matters more than people think. Once plaster is mixed, the clock starts ticking. You do not want to be searching for a spoon while your future fossil turns into a bowl-shaped rock.
Step 3: Build Your “Sediment” Base
Press modeling clay or damp sand into a shallow tray, bowl, or pie tin. Flatten the surface enough that your object can leave a clear impression. If you are using clay, make it thick enough to hold its shape without cracking. If you are using damp sand, pack it firmly so it does not collapse when you remove the object.
This base represents the soft sediment where an organism might leave an imprint in nature.
Step 4: Press the Object Into the Surface
Gently but firmly press your object into the clay or sand. You want a clear impression, not a dramatic plunge to the center of the earth. For shells and leaves, press evenly. For toys or harder objects, apply pressure carefully so the edges and texture transfer well.
If your first try looks weak, no shame. Smooth the surface and try again. Fossil greatness is often a second attempt.
Step 5: Remove the Object Carefully
Lift the object straight up if possible. Twisting or yanking can distort the mold. What remains behind is your mold fossil model, which is the impression or cavity.
If the object sticks, a tiny dab of petroleum jelly or a whisper-thin coat of oil on the object before pressing can help on the next try. Do not overdo it, though, or the details may blur.
Step 6: Inspect and Clean the Mold
Before mixing plaster, check the impression. Remove crumbs, loose bits of clay, or collapsed sand edges. A clean mold makes a better cast. If the edges are rough, patch them now. This is the fossil equivalent of fixing your hair before a photo.
Step 7: Mix the Plaster of Paris
In a clean container, combine Plaster of Paris with cold water according to the package directions. A common craft ratio is about 2 parts plaster to 1 part water, stirred until it reaches a smooth, creamy consistency. It should flow, but not like soup. Think pancake batter, not swamp water.
Stir gently enough to avoid packing in lots of air bubbles, but thoroughly enough that dry powder disappears. Mix only what you can use right away.
Step 8: Pour the Plaster Slowly
Pour the plaster into the mold a little at a time rather than dumping it in like you are filling a pothole. Slow pouring helps the mixture settle into the small details. Start at one edge and let it spread across the impression naturally.
If you are making a thicker fossil piece, add enough plaster to create a solid backing so the finished cast does not snap easily.
Step 9: Tap Out the Air Bubbles
Once the mold is filled, gently tap the tray or container on the table a few times. This helps trapped air rise to the surface. Bubbles are the tiny villains of fossil crafts because they love stealing detail from shell ridges and leaf veins.
You can also use the back of a spoon to smooth the top if needed.
Step 10: Let It Set Without Fussing With It
Now comes the hard part: leaving it alone. Plaster of Paris usually starts to firm up fairly quickly, but “looks set” and “is fully ready” are not the same thing. Let the cast rest undisturbed for at least an hour before attempting removal. For sturdier handling, several more hours or overnight is even better.
Yes, patience is annoying. Yes, it improves the result.
Step 11: Remove the Cast From the Mold
Once the plaster has hardened, gently peel away the clay or tip the cast out of the sand. If you used a tray, flex it slightly if needed. Work slowly, especially around delicate edges. Your solid piece is the cast fossil model.
If a little clay sticks to the surface, brush it off with your fingers or a dry soft brush. Avoid scrubbing when the plaster still feels damp.
Step 12: Let the Fossil Dry Completely
This step is easy to underestimate. Even if the fossil feels firm, it may still contain moisture inside. Let it dry completely before painting, sanding, or heavy handling. Thicker pieces may need overnight drying or longer.
A fully dried fossil cast looks cleaner, feels harder, and takes paint much better. Rushing this step is how people end up fingerprinting their own paleontology masterpiece.
Step 13: Finish, Paint, and Label Your Fossil
When fully dry, you can leave the fossil plain white or paint it in tan, gray, brown, or sandstone tones for a more natural look. A little dry-brushing can make ridges and grooves stand out. If the edges are rough, smooth them lightly with fine sandpaper.
Want to make the project feel even more museum-worthy? Label the object used, the type of fossil model, and the “discovery site.” Suddenly your shell fossil from the kitchen table sounds much more impressive when it becomes “Specimen recovered from the North Dining Room Formation.”
Tips for Better DIY Fossils
- Use textured objects: Flat, featureless items are disappointing. Shells and veiny leaves are stars.
- Keep your mold surface smooth: Cracks and crumbs show up in the final cast.
- Use small batches of plaster: Fresh plaster behaves better than a half-hardened cup of regret.
- Tap the mold: It is one of the easiest ways to improve detail.
- Let the cast dry fully: The longer cure time usually gives you a stronger, cleaner result.
- Try multiple materials: Clay, sand, and even salt dough can produce slightly different fossil effects.
Common Mistakes and How to Fix Them
The plaster is too runny
Add a little more plaster and stir gently. A thin mixture may not hold detail well.
The cast has bubbles
You probably stirred too aggressively or skipped the tapping step. Mix more gently next time and tap the container after pouring.
The object sticks in the mold
Use less pressure, choose a sturdier mold base, or lightly coat the object with petroleum jelly before pressing it in.
The fossil breaks when removed
The cast may be too thin or not dry enough. Make the backing thicker next time and wait longer before demolding.
The details look blurry
Your object may not have enough texture, or the clay/sand surface may have been too soft. Firmer packing usually helps.
What This Project Teaches About Real Fossils
This activity is simple, but it captures a real scientific idea. In nature, organisms can leave impressions in mud or sediment. If the original material decays or dissolves, a mold remains. If minerals later fill that space and harden, a cast forms. Your Plaster of Paris fossil is a fast, hands-on model of that basic process.
It also highlights something paleontologists know well: tiny surface details matter. A ridge, a curve, a line pattern, or a shallow impression can reveal what kind of organism existed, how it moved, or what kind of environment it lived in. That is one reason fossil casts are so useful for study and display.
Experience Section: What It Feels Like to Make Fossils at Home or in a Classroom
If you have never tried a fossil craft before, the experience is part of the charm. At first, it feels almost too simple. You press a shell into clay, mix a chalky powder with water, pour it in, and wait. It does not exactly scream “epic science adventure.” Then the cast comes out, and suddenly everyone in the room becomes deeply invested in sedimentary detail.
One of the best parts is that the project feels different depending on who is doing it. With kids, it usually turns into a mix of science lesson and treasure hunt. They start by choosing objects in a very serious way, as if the right shell might determine the fate of the fossil record. They press too hard, then not hard enough, then proudly hold up a leaf imprint that honestly looks pretty fantastic. There is usually at least one moment where someone asks if this means they are basically a paleontologist now. The correct answer is: emotionally, yes.
For adults, the experience can be weirdly relaxing. There is something satisfying about smoothing clay, watching plaster transform from powder to liquid to solid, and revealing a shape that looks ancient even though it was born on your countertop an hour ago. It scratches that same itch as pottery, baking, and model-making. You follow a process, trust the timing, and get a tangible result you can actually display.
There is also an element of surprise every time. Two shells that look similar can produce totally different casts. A leaf that seems ordinary can reveal a beautiful vein pattern once the plaster dries. A toy dinosaur can come out looking less like a plastic party favor and more like a mysterious museum fragment from a very dramatic reptile. That moment of turning over the finished cast is what keeps people making more than one. Nobody stops at a single fossil if there is still plaster left in the bowl.
In group settings, the project becomes even more fun because people start comparing results. Someone gets a near-perfect shell spiral. Someone else creates an accidental abstract blob and insists it is rare. Another person paints theirs in earthy browns and instantly raises the class standard. It becomes part art critique, part excavation fantasy, and part gentle competition.
The small frustrations are part of the experience too. Sometimes the plaster sets faster than expected. Sometimes a cast snaps because it was too thin. Sometimes the fossil looks amazing from one side and like a potato from the other. But even those moments are useful because they make the process feel hands-on and real. You learn quickly that texture matters, timing matters, and patience definitely matters.
What makes this project memorable is that it connects your hands to a much bigger idea. You are not just making a craft. You are modeling how impressions get preserved, how shapes tell stories, and how a simple cast can stand in for something ancient. That makes the finished fossil feel more meaningful than a typical weekend project. It is creative, educational, a little messy, and honestly kind of addictive. Once you make one good fossil, you start looking around the house thinking, “I wonder what this leaf, shell, button, or toy would look like preserved for the ages.”
Conclusion
Learning how to make fossils using Plaster of Paris is one of those projects that delivers more than you expect. It is easy enough for beginners, interesting enough for older kids and adults, and flexible enough to work as a science lesson, craft activity, or rainy-day boredom cure. More importantly, it turns the idea of mold and cast fossils into something you can actually see and touch.
Choose a textured object, make a clean impression, mix your plaster carefully, and give the cast time to dry. Do that, and you will end up with a fossil model that is fun to make, fun to paint, and oddly hard to stop talking about. Not bad for a bowl of plaster and a shell from the craft drawer.