Table of Contents >> Show >> Hide
- Why Make Your Own Wooden Chess Pieces?
- Planning Your DIY Chess Set
- Tools and Materials You’ll Need
- Step 1: Cut the Blanks for All 32 Pieces
- Step 2: Choose Your Shaping Method
- Step 3: Refine Details and Give Each Piece Its Identity
- Step 4: Sanding, Weighting, and Finishing
- Step 5: Pairing Your Pieces with a Board
- Safety Tips and Time-Saving Tricks
- Real-World Experiences: What You Learn While Making DIY Wood Chess Pieces
Store-bought chess sets are nice, but nothing beats the bragging rights of saying,
“Oh this old thing? I made the pieces myself in the garage.” DIY wood chess pieces
look great, feel solid in the hand, and let you put your own spin on a classic game.
The best part: you don’t need a professional woodshop to pull it offjust some basic
tools, a little patience, and a willingness to vacuum up a heroic amount of sawdust.
In this guide, we’ll walk through how to make DIY wood chess pieces in a way that
echoes the practical spirit of a Family Handyman project: simple, efficient,
and friendly to weekend warriors. We’ll cover planning your set, choosing wood and
tools, shaping the pieces using a lathe, carving knife, or basic saws, and finishing
them so they look like they belong on a handcrafted wooden chessboardnot a kid’s
block bin.
Why Make Your Own Wooden Chess Pieces?
Custom style that matches your board
When you build your own chessboard, standard plastic pieces can look a little out of
place. Handmade wooden chess pieces let you match species (like maple and walnut),
echo design details from the board, and control the proportions so everything feels
like a unified set. You decide whether the style is classic Staunton, sleek and
minimalist, mid-century modern, or rustic and chunky.
Budget-friendly and sustainable
Quality wooden chess sets can be pricey. DIY pieces, on the other hand, can be made
from offcuts and scrap hardwood that might otherwise become firewood. Short pieces
of dowel, leftover 1x stock, and cutoffs from other projects are perfect for pawns
and rooks. You’re upcycling and getting a custom set at the same time.
A skill-building woodworking project
Making 32 pieces is fantastic practice for repetitive, controlled cuts and shaping.
Whether you’re turning on a lathe, carving with a knife, or cutting simple silhouettes
on a bandsaw, you’ll get better with each pawn. By the time you reach the kings,
your technique will be noticeably smootherand you’ll have a playable trophy to show
for it.
Planning Your DIY Chess Set
Decide on the overall style
Before you touch a saw, sketch or choose a style for your pieces. A few popular
approaches:
- Traditional-inspired: Simplified versions of classic Staunton
pieces with turned or carved curves and familiar silhouettes. - Minimalist blocks: Mid-century–style designs where each piece is
just a clever arrangement of geometric shapescubes, cylinders, and angled cuts.
These are easier to make with basic tools and still look surprisingly sophisticated. - Rustic hand-carved: More organic shapes carved with a whittling
knife, great if you like a folk-art look and don’t mind a few charming
imperfections.
Match your pieces to your chessboard
If you already have a board, use it to guide the size of your pieces. For standard
play, many boards use squares around 2″ to 2.25″ with a king roughly 3.5″ to 4″
tall. A simple rule of thumb: the king’s base should be about three-quarters of the
square width. That gives your pieces enough breathing room so the board doesn’t feel
crowded or strangely empty.
If you’re planning to build the board too, decide early on your square size and aim
for a king in the 3.5″–3.75″ range for a classic feel. Pawns are usually about half
to two-thirds the king’s height; the other pieces scale between those two.
Tools and Materials You’ll Need
You can keep this project relatively simple. At minimum, you’ll want:
Wood and layout materials
- Wood species: Two contrasting hardwoods, such as maple and walnut,
cherry and ash, or birch and stained oak. One becomes the “light” side, the other
the “dark” side. - Blanks: Small blocks or dowels, typically around 1″ × 1″ in
cross-section and 2″–4″ long depending on the piece. - Layout tools: Pencil, ruler, and maybe a simple cardboard or
plywood template for consistent heights and profiles.
Cutting and shaping tools
- Saw: A miter saw, bandsaw, or even a handsaw for cutting blanks
to length. - Lathe (optional): Great for turned designs with smooth curves,
but not required. - Carving knife or chisels: For adding detail, facets, and simple
curved profiles. - Drill or drill press: For adding weight, drilling small decorative
recesses, or dowel joinery. - Sanding tools: Sanding block, sanding sponges, or a small
power sander, plus sandpaper in 120, 180, 220, and 320+ grits.
Finishing supplies
- Finish: Wipe-on polyurethane, Danish oil, or a penetrating oil
finish gives a warm, hand-rubbed look. - Felt and glue (optional): For the bases, so your pieces glide
instead of scratching the board. - Weights (optional): Steel washers, lead-free shot, or nuts to add
heft inside drilled bases.
Step 1: Cut the Blanks for All 32 Pieces
Start by cutting all your blanks. Working in batches keeps your pieces consistent
and saves you a ton of setup time. A simple size scheme that works on most
home-sized boards looks like this:
- Pawns (16 pieces): 1″ × 1″ × 2″ blocks or 1″ diameter dowel cut to
2″ long. - Rooks (4 pieces): 1″ × 1″ × 2″ or 2.25″ blocks.
- Knights (4 pieces): 1″ × 1″ × 2.5″ blocks to leave room for the
horse head shape. - Bishops (4 pieces): 1″ × 1″ × 3″–3.25″ blanks.
- Queens (2 pieces): 1″ × 1″ × about 3.5″.
- Kings (2 pieces): 1″ × 1″ × about 3.75″–4″ blanks.
Label the bottom of each blank lightly in pencil (P, R, N, B, Q, K) so you don’t
mix them up later. It’s amazing how fast a queen turns into a slightly tall bishop
if you stop paying attention.
Step 2: Choose Your Shaping Method
How you turn these blocks into recognizable chessmen depends on the tools you’re
comfortable with. Here are three flexible approaches.
Option 1: Turned chess pieces on the lathe
If you have a small lathe, turning chess pieces is an ideal skill-builder. Mount a
blank between centers and:
- Rough it to a cylinder with a spindle roughing gouge, then mark key heights with
a pencil and calipersbase, collar, body, and head. - Use a spindle gouge and skew chisel to form beads, coves, and shoulders. Start
with pawns, since their simple shape lets you dial in your technique. - Turn paired pieces (like two rooks) side-by-side or back-to-back so you can keep
their dimensions nearly identical. - Sand on the lathe, working through the grits until the surfaces feel glassy.
For kings and queens, you’ll add crown detailsslightly taller bodies, more pronounced
collars, and a small finial or cross on top. The knight is often left partly square
so you can cut a horse profile on the bandsaw later.
Option 2: Hand-carved chess pieces
No lathe? No problem. You can carve surprisingly elegant pieces with a sharp knife
and some patience:
- Secure the blank with a clamp or in a vise. Never carve toward your hand or body.
- Start with pawns. Chamfer the corners to create an octagon, then round it further
into a rough cylinder. Carve a small collar and a rounded head at the top. - For rooks, carve a straight-sided tower with a slightly flared base and top, then
use careful stop cuts to notch the familiar battlements. - Bishops get a rounded top with a diagonal cut or groove as their “mitre.” Knights
get a simple horse head profile carved from the upper half of the block. - Kings and queens share a similar main body; distinguish them with the crown:
a cross-like notch for the king, and multiple small grooves or points for the
queen.
Hand-carved sets often have subtle variations from piece to piece, which is part of
their charm. Aim for consistency, not perfectionthis is chess, not mass production.
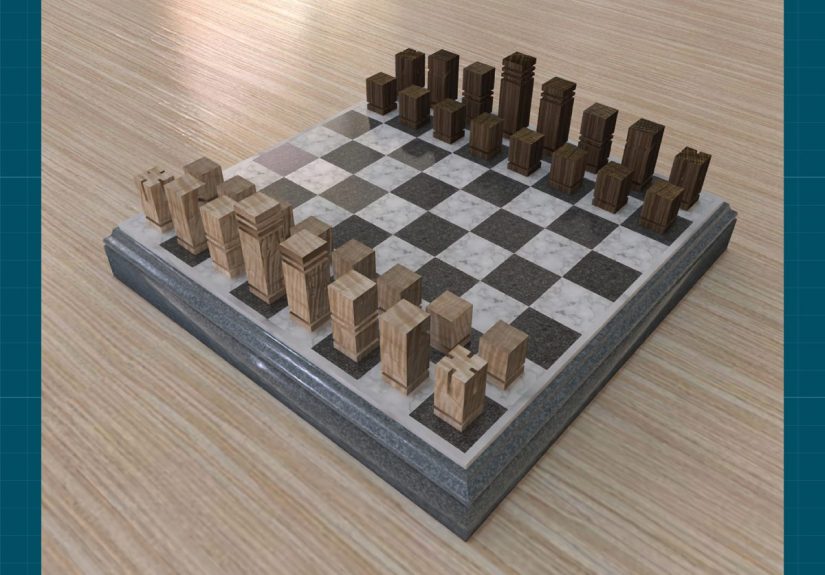
Option 3: Simple geometric “shop style” pieces
If you want a clean, modern set with minimal fuss, lean into basic shapes:
- Pawns: Short cylinders or rectangular blocks with a chamfered top.
- Rooks: Tall rectangles with a few shallow saw kerfs across the
top to suggest a castle. - Knights: L-shaped blocks or rectangles with a single angled cut to
hint at a horse’s head. - Bishops: Rounded or beveled tops with a single diagonal kerf.
- Queens and kings: Similar tall forms; give the queen a multi-step
crown of stacked chamfers and the king a cross-shaped saw cut or a small glued-on
finial.
These designs can be cut with a miter saw, bandsaw, or even a coping saw. They’re
ideal if you want your set done in a weekend and appreciate a modern, minimalist
aesthetic.
Step 3: Refine Details and Give Each Piece Its Identity
Once the rough shaping is done, go back and emphasize the details that help you tell
each piece apart at a glance:
- Pawns: Keep them the simplest and shortest, with a clear,
roundish top. - Rooks: Deepen the tower notches slightly so they read clearly from
across the board, but don’t weaken the walls. - Knights: Sharpen the nose and back of the head. A single groove
where the “mouth” would be is often enough. - Bishops: Make sure the diagonal cut is crisp and centered; that’s
the bishop’s visual signature. - Queens: Give them more decorative grooves or beads around the
“crown” area and slightly more mass than the bishops. - Kings: Tallest piece, with a clear cross or distinct finial.
You should be able to pick out the king instantly in your peripheral vision.
Stand your pieces on the board and squint from a few feet away. If you can easily
tell what’s what, you’re in good shape. If not, adjust the height or silhouette of
whichever pieces are confusing youoften the queen and king, or the rook and bishop.
Step 4: Sanding, Weighting, and Finishing
Sanding for smooth handling
Since chess pieces are handled constantly, smoothness matters. Break all sharp edges
and work through the grits:
- Start at 120 grit to remove tool marks and carve lines.
- Move to 180 and 220 grit for refining the shape.
- Finish with 320 or higher on the areas people touch the mosttops, collars, and
the base edges.
Sand lightly at each stage; you’re not trying to shrink the pieces, just to erase
the scratch pattern from the previous grit.
Optional: Adding weight and felt
For a more substantial feel, drill shallow holes in the bottoms of your pieces and
drop in a washer or some lead-free shot. Glue a felt disc over the opening. Weighted
pieces stand more securely and feel satisfyingly “serious” when you set them down.
Finishing for beauty and durability
Choose a finish that’s easy to renew and feels pleasant in the hand:
- Oil finishes (Danish oil, tung oil blends): Penetrate the wood,
enrich the grain, and leave a soft sheen. - Wipe-on poly: Offers more protection with a slightly more “finished”
look, still simple to apply with a rag. - Wax topcoat: A final buffed wax layer can make pieces feel silky
and reduce fingerprint smudges.
Apply thin coats, wipe off the excess, and let the pieces dry fully between coats.
Keep finish out of the felt if you’ve already attached ityour nose will thank you
later.
Step 5: Pairing Your Pieces with a Board
If you haven’t built the board yet, now’s a good time to make sure everything
matches. For a standard 3.5″–3.75″ king, a board with 2″–2.25″ squares usually looks
and feels right. The king’s base should cover roughly three-quarters of the square
so your pieces neither feel cramped nor lost.
Building the board itself is a separate project, but it’s very friendly to
DIYers: rip strips of light and dark wood, glue them in alternating patterns,
cross-cut, re-glue, then frame and finish. Once your pieces and board are finished
in similar sheens, the whole set will look intentionally designed instead of
cobbled together.
Safety Tips and Time-Saving Tricks
- Respect small parts: Use clamps, jigs, or a small parts
sled when cutting and sanding. Keep fingers away from blades and spinning tools. - Batch your work: Do all your cutting, then all your rough
shaping, then all your sanding. You’ll work faster and keep pieces more consistent. - Make a story stick: A scrap with marked heights for pawns, rooks,
knights, bishops, queens, and kings keeps you from guessing every time. - Label everything: Lightly pencil labels on the bottoms until
finishing. It’s easy to mix up a bishop and queen while you’re in sanding mode. - Take your time on the first pawn: Once you’re happy with it,
use it as a reference for the other fifteen.
Real-World Experiences: What You Learn While Making DIY Wood Chess Pieces
On paper, making wooden chess pieces sounds like a straightforward checklist: cut
thirty-two blanks, shape them, sand, finish, done. In practice, it’s the kind of
project that quietly teaches you a lotabout woodworking, patience, and even how
your brain handles repetition.
The first surprise for many DIYers is how different “identical” actually looks in
real life. You might measure everything down to the sixteenth of an inch, yet the
first rook and the second rook still feel slightly different. One has a slightly
beefier base, the other a taller crown. This is normal. The trick is to chase
family resemblance, not perfect clones. Line up the pieces in groups:
pawns in a row, rooks side by side, and adjust the outliers rather than obsessing
over every tiny variation.
Another lesson: fatigue is real. The first four pawns are slow and careful, the next
eight are faster, and the last four are where you’re tempted to cut corners. This is
where batching your work and setting small goals helps. Do eight pieces in an
evening, then stop. You’ll come back fresher, and it shows in the detailscrisper
notches on rooks, cleaner diagonals on bishops, smoother faceting on knight heads.
You’ll also discover which tools you genuinely like. Some woodworkers start out
convinced they’ll carve everything by hand, then fall in love with the precision of
the drill press and the repeatability of simple jigs. Others fire up the lathe and
realize they actually prefer the character of knife marks and faceted surfaces. By
the time you’re done, you’ll know more about your own shop habits than you did when
you startedwhat feels safe, what feels fun, and what you never want to do thirty-two
times in a row again.
And then there’s finishing. On a cutting board, a tiny uneven patch of sheen might
not bother you. On a chess set, where you’re constantly picking up and rotating the
pieces, you will notice. The experience of wiping finish around a tiny collar or
crown teaches you to be intentional: tip off drips, work in thin coats, and rotate
pieces between coats to catch runs before they cure. It’s fussybut in the
satisfying way that makes you feel like a craftsperson, not just a weekend hobbyist.
Finally, the moment you set up your first game with pieces you’ve made yourself is
hard to beat. Every pawn trade, every rook lift, every queen sacrifice suddenly has
a physical weight to it because you remember shaping that exact piece. Friends and
family will ask where you bought the set, and you get to shrug and say, “Actually,
I made it.” That little slice of pride is the real payoffalong with the excuse to
keep making more custom sets in different styles and woods.
In the end, building DIY wood chess pieces isn’t just about creating a playable set.
It’s about learning to work accurately on a small scale, developing your eye for
proportion, and proving to yourself that you can take a familiar object, break it
into simple shapes, and build it back up with your own hands. The next time you see
a wooden game or decor piece in a store, you’ll find yourself thinking, “I could
probably make that.” And you’ll be right.


