Table of Contents >> Show >> Hide
- Why Marble Mosaic + Old Window Frames Work So Well
- Materials and Tools You’ll Want (and a Few You’ll Be Glad You Have)
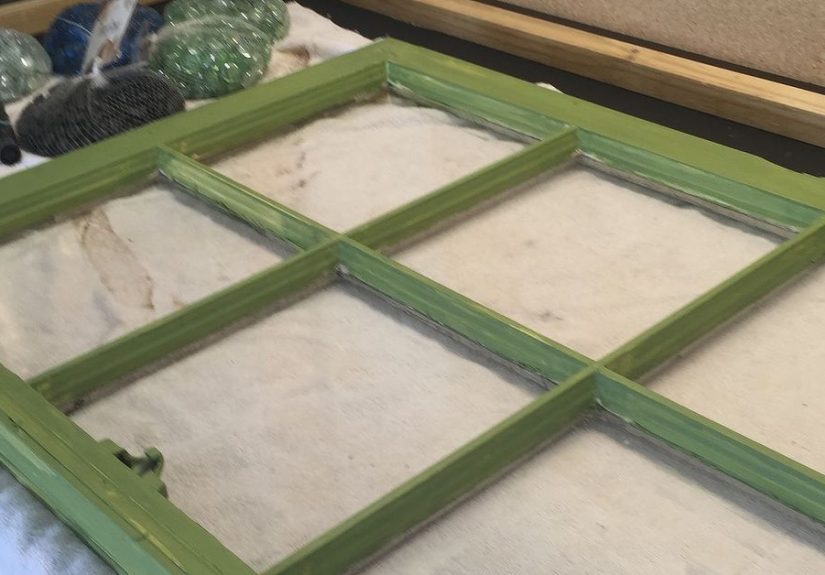
- Step 1: Choose a Window Frame That’s Worth the Effort
- Step 2: Build a Stable Mosaic Base (This Is the Make-or-Break Part)
- Step 3: Design Your Mosaic Before You Touch Mortar
- Step 4: Prep the Marble Mosaic Pieces
- Step 5: Set the Mosaic with Thin-Set Mortar
- Step 6: Grout Without Panic
- Step 7: Seal the Marble and Grout for a Longer-Lasting Finish
- Troubleshooting: Fixes for Common Mosaic Problems
- Care and Maintenance (So It Stays Pretty)
- Conclusion: Your Old Window Just Got a Glow-Up
- Real-World Experiences DIYers Often Have (and What to Do About Them)
Got an old window frame collecting dust in the garage? Perfect. You’re one glittery step away from turning “trash” into
“wait… you made that?!” A marble mosaic on a vintage window frame is one of those DIY projects that looks
high-end and complicatedeven though the real secret ingredient is patience (and maybe a snack break every 20 minutes).
In this guide, you’ll learn how to prep an old window frame, create a stable base, set marble mosaic pieces, grout like a
confident adult, and seal everything so it stays gorgeous. We’ll also talk about common mistakes (because grout haze has
humbled the best of us) and how to avoid them.
Why Marble Mosaic + Old Window Frames Work So Well
Marble instantly adds a “custom designer detail” vibewithout requiring a designer budget. Meanwhile, old window frames
bring character: aged wood, vintage proportions, and that charming “I definitely thrifted this on purpose” energy.
Put them together and you get upcycled window decor that can work as wall art, a headboard-style accent, a hanging
message board, or even a statement piece on a covered porch (with the right materials and sealing).
Materials and Tools You’ll Want (and a Few You’ll Be Glad You Have)
Core materials
- Old window frame (wood is easiest to work with)
- Marble mosaic tile (sheets on mesh are beginner-friendly)
- Backer panel (cement backer board is best; sealed plywood can work for indoor art)
- Thin-set mortar (use white for light marble)
- Grout (unsanded or a “high-performance” grout works well for small joints and delicate stone)
- Sealer (penetrating sealer for marble and grout)
Tools that make life easier
- Safety glasses, gloves, and a dust mask (especially during scraping/sanding)
- Putty knife or scraper
- Sandpaper or sanding block
- Drill/driver + screws (for attaching a backer)
- Tile nippers (optional, for shaping edges)
- Notched trowel (small V-notch is great for mosaics)
- Rubber grout float
- Large sponge + microfiber cloths
- Painter’s tape and a pencil/marker for layout lines
Step 1: Choose a Window Frame That’s Worth the Effort
Not every old window frame is a good candidate. You want one that’s structurally solid: no major rot, no frame corners
falling apart when you look at them sternly, and no weird warping that would make a flat mosaic impossible.
Important safety note about old paint
If your frame is older (especially pre-1978 in the U.S.), there’s a real chance the paint contains lead. That doesn’t mean
you can’t use itit means you should avoid creating dust. If you suspect lead paint, consider skipping aggressive sanding
and scraping. Instead, clean the surface and encapsulate it with an appropriate primer/paint, or work with a professional
if major paint removal is needed.
Remove or stabilize the glass
You have two main options:
- Remove the glass panes and install a backer panel behind the frame openings (most durable and easiest to
mosaic on). - Keep the glass and use it as a visual “window” element while mosaicking only the wood sections (nice for
mixed-media designs).
If the glass is loose, don’t gamble. Remove it or secure it properlyyour future self does not want a surprise “glass
confetti” moment.
Step 2: Build a Stable Mosaic Base (This Is the Make-or-Break Part)
Mosaics don’t like movement. Wood expands and contracts with humidity, and that can lead to cracked grout or tiles popping
loose if your base isn’t stable. The most reliable solution is to attach a cement backer board panel behind the frame openings
or across the whole back, depending on your design.
Option A: Cement backer board (best for long-term durability)
- Measure the back of your frame and cut the cement board to size.
- Test-fit it so it sits flat against the frame.
- Attach it using appropriate screws (following the board’s fastening guidelines).
- If you’ll mosaic directly on the backer board, wipe it clean and make sure it’s dust-free before applying mortar.
Option B: Sealed plywood (good for indoor decorative art)
If this is strictly indoor wall decor (not a tabletop, not outdoors), sealed plywood can work as a mosaic backer. The key is
sealing it well so it doesn’t drink moisture from mortar or warp over time. Many mosaic artists use a PVA-style sealer or
similar prep method before applying thin-set.
Prep the frame surface
Clean the frame thoroughly. Remove grime, flaking paint, and loose debris. Lightly sand glossy finishes so primer and paint
can bond better (again, be cautious with dust if lead paint is possible). Repair small dings or cracks, then prime and paint
if you want a clean, finished look around your mosaic.
Step 3: Design Your Mosaic Before You Touch Mortar
Mosaic is part craft, part puzzle, part “why do I have grout in my hair?” Planning saves time and materials.
Easy design approaches that look custom
- Classic border + center field: a marble border around each pane with a simple pattern in the middle.
- Monogram or house number: leave negative space for a letter/number, then tile around it.
- Ombre fade: blend from light marble to darker tones across the frame.
- Geometric blocks: use small rectangles/squares to create a modern grid pattern.
Layout tips
Dry-lay your mosaic sheets (or loose pieces) on the surface first. Mark centerlines and borders with pencil. For sheet mosaics,
you can trim the mesh backing with scissors or a utility knife to fit panes and edges. The goal is to avoid skinny slivers of tile
at the edgesthose are the first to crack, chip, or make you mutter dramatic DIY curses.
Step 4: Prep the Marble Mosaic Pieces
If you’re using marble mosaic sheets, inspect them for chips and inconsistencies. Marble is natural stone, so variation is normal
(and honestly part of the charm). For custom edges or curves, tile nippers can help shape individual pieces. Always wear eye
protection when cutting tiletiny fragments have main-character energy and will launch themselves like they’re auditioning for an action movie.
Step 5: Set the Mosaic with Thin-Set Mortar
Thin-set mortar is the go-to for a strong, lasting bond. For light-colored marble, white mortar helps avoid shadowing or discoloration.
How to apply thin-set for mosaics
- Work in small sections so the mortar stays workable.
- Spread mortar using a small notched trowel (a V-notch is often ideal for mosaics).
- Press the mosaic in gently but firmly. A grout float can help flatten sheets evenly.
- Check for squeeze-out between pieces. Clean excess mortar before it dries.
- Let it cure according to the mortar instructions (usually at least 24 hours).
Indoor craft shortcut (when mortar feels like “a lot”)
For purely decorative indoor pieces, some DIYers use strong adhesives designed for tile or mosaic work. If you go this route,
choose an adhesive recommended for stone, follow cure times exactly, and understand it may not be as durable as mortar in humid
environments.
Step 6: Grout Without Panic
Grout does two jobs: it locks pieces in place and gives your mosaic that polished, finished look. For marble mosaics with tight joints,
unsanded grout (or a high-performance grout that works in small joints) is often a safer choice because sand can scratch delicate stone.
Grouting steps
- Mix grout to a peanut-butter-like consistency if using powdered grout. Let it slake (rest) if the product requires it.
- Apply grout with a rubber float held at an angle, pressing grout into joints.
- Scrape excess off diagonally with the float (don’t pull grout out of joints).
- Wait briefly until grout starts to firm up, then wipe gently with a damp sponge. Rinse the sponge often.
- Buff haze with a dry microfiber cloth once the surface is dry.
A marble-specific cleaning warning
You may see tips online recommending vinegar for grout haze. That can be fine on some ceramic or porcelain tilebut marble is different.
Acidic cleaners can etch marble and dull the surface. Stick with a stone-safe, pH-neutral cleaner and gentle buffing methods.
Step 7: Seal the Marble and Grout for a Longer-Lasting Finish
Marble is porous. Grout is often porous. Sealing helps protect against stains, moisture, and the inevitable “someone touched it with
snack hands” moment.
When to seal
- Optional pre-seal: Some people seal marble before grouting to reduce grout staining and make cleanup easier.
If you do, avoid sealing the edges where grout needs to bond. - Post-seal: A common approach is to grout first, clean thoroughly, let it cure, then apply sealer to stone and grout.
Finish details
- Add hanging hardware rated for the piece’s weight.
- Touch up paint on the frame if needed.
- For display pieces, add felt pads to protect the wall.
Troubleshooting: Fixes for Common Mosaic Problems
“My tiles look uneven.”
That’s usually too much mortar or inconsistent pressure when setting sheets. Next time, use a smaller notch trowel and press with a float
to level the surface.
“My grout is cracking.”
Movement is the usual culprit. A more stable backer (cement board) and proper cure times help. Also make sure joints are fully packed.
“My marble looks cloudy.”
Cloudiness can be grout haze or etching. For haze, try gentle buffing and a stone-safe cleaner. Avoid acidic “quick fixes.”
Care and Maintenance (So It Stays Pretty)
- Dust regularly with a soft cloth.
- Clean with a pH-neutral, stone-safe cleaner if needed.
- Avoid vinegar, lemon, and harsh abrasives on marble.
- Re-seal periodically if water stops beading on the surface (follow your sealer’s guidance).
Conclusion: Your Old Window Just Got a Glow-Up
Making a marble mosaic on an old window frame is the perfect blend of practical craft and “I have excellent taste” energy.
The biggest keys are a stable backing, the right mortar and grout for marble, and patient cleanup. Once it’s sealed and hung,
you’ve got a one-of-a-kind piece that looks like it came from a boutiqueexcept you made it, which is honestly cooler.
Real-World Experiences DIYers Often Have (and What to Do About Them)
Let’s talk about the part most tutorials politely skip: the “experience” of mosaicking, which is roughly 60% creativity and 40% learning
new ways to say “oops” in your head. Here are some very common first-timer momentsand how experienced DIYers typically handle them.
1) The design looks perfect… until you actually place the sheets.
On paper, your pattern is flawless. In real life, your old window frame might be slightly out of square, the wood might have subtle dips,
and your mosaic sheets might not line up like they promised. This is normal. Many DIYers find that cutting sheets into smaller sections
(instead of trying to lay one big piece) gives better control. It also helps to start from the center of a pane and work outward so your
edges stay balanced instead of “skinny-tile city.”
2) Thin-set feels like frosting… and you want to ice everything.
It’s incredibly tempting to spread mortar across the whole surface like you’re decorating a cake. Then you realize mortar has a working time
and starts skinning over while you’re still deciding where your next piece goes. A common “aha” moment is switching to smaller sections
not because you can’t handle it, but because mortar is basically a clock with opinions. DIYers also learn quickly that the right trowel notch
matters. Too much mortar causes squeeze-out into joints, and then you’re scraping tiny lines like you’re doing grout archaeology.
3) Grouting is when confidence meets humility.
The first swipe of grout is satisfying… and then suddenly everything looks messy. This is the phase where many people panic-clean too early,
wiping grout out of joints. The more experienced move is to wait until the grout begins to firm up, then wipe gently and diagonally with a damp
sponge, rinsing often. Another common realization: your rinse water becomes swamp soup fast. Changing it frequently makes a huge difference in haze
and cleanup time.
4) Color decisions feel simpleuntil they aren’t.
DIYers often underestimate how much grout color changes the final look. A light grout blends and feels airy; a darker grout outlines each piece
and emphasizes pattern. Many people who want a “soft marble spa vibe” pick a grout close to the marble tone. People going for “bold graphic mosaic”
pick contrast. A popular real-world tip is to test grout color on a small hidden section or spare tile first, because dry grout can look different
than wet grout (and different under your room lighting).
5) The finished piece looks incredible… but you notice one crooked line forever.
This is practically a rite of passage. The funny thing is that guests almost never see what you see. Most viewers take in the whole piecethe texture,
the shine, the vintage frame vibenot the one spot where spacing is slightly off. If it truly bugs you, DIYers sometimes pop out a single tile (if the
mortar hasn’t fully cured) and reset it, or they “design their way out” with a decorative trim detail. But the most common outcome? You learn, you laugh,
and your next mosaic is even better.
6) The biggest win is realizing you can do “fancy” things.
This project often gives people a confidence boost because it teaches transferable skills: surface prep, layout planning, working with mortar and grout,
and finishing natural stone properly. After one marble mosaic window frame, DIYers start looking at other possibilitiestray tops, planter panels, stepping
stones (with the right outdoor materials), or accent insets on furniture. The experience becomes less about “following steps” and more about learning a craft.
In other words: yes, you may get grout on your elbow. But you’ll also get a stunning upcycled piece that looks custom, and the kind of DIY confidence that
makes you walk past overpriced decor like, “Nice try. I have thin-set at home.”