Table of Contents >> Show >> Hide
- What You Need Before You Start
- Step 1: Decide Between an Upgrade and a Clean Install
- Step 2: Create a Bootable Windows USB (Two Best Methods)
- Step 3: Boot Your PC from the USB Drive
- Step 4: Install Windows (The Actual Installation Part)
- Step 5: Finish Setup, Updates, and Drivers
- Troubleshooting: The “Why Is My Computer Like This?” Section
- Security and Sanity Tips (Small Steps, Big Payoff)
- Real-World Experiences and Lessons (Extra )
- Conclusion
Installing Windows from a USB flash drive sounds like something only a “my keyboard has RGB, therefore I am qualified” person would do.
Good news: it’s actually straightforward. Better news: it’s usually faster (and less error-prone) than dusty DVDs and mystery recovery partitions.
In this guide, you’ll learn the easiest, most reliable way to install Windows 11 (and Windows 10, if you’re working with older devices),
how to boot from the USB, and what to do when your PC decides it has never heard of “USB” in its entire life.
We’ll cover both “I want a fresh, clean install” and “I just want Windows back without drama,” plus troubleshooting for common
installation hiccups. Grab a snack. You’re about to become the person everyone texts when their laptop starts acting possessed.
What You Need Before You Start
Quick checklist (the stuff that saves future-you)
- A USB flash drive (8GB or larger; 16GB+ is nicer). Everything on it will be erased.
- A working computer to create the installer (Windows PC is easiest, but Mac/Linux can work with the ISO method).
- Stable internet to download Windows installation files.
- Your Windows license (product key) or a digital license tied to your Microsoft account.
- A backup of anything you care about (photos, school files, documents, game saves, etc.).
- Optional but smart: a charger plugged in (laptops) and a little patience (computers sense fear).
One big warning (said with love)
A clean install can wipe the drive you choose. If you delete partitions or format the wrong disk, your files won’t politely
walk back onto the computer. Back up first. If you’re unsure, pause and confirm which drive is which before clicking “Next.”
Step 1: Decide Between an Upgrade and a Clean Install
Option A: Upgrade/repair install (keeps files, when possible)
If your current Windows still boots (even if it’s grumpy), you might be able to run the installer from within Windows to repair or upgrade.
This is great when you want to keep your files and apps. It’s not always possible if Windows won’t start or if the system is badly corrupted.
Option B: Clean install (fresh start, best for major issues)
A clean install is the “new phone, who dis?” approach. It’s ideal when you’re:
- Replacing a hard drive/SSD
- Dealing with persistent malware or severe slowdowns
- Switching from Windows 10 to Windows 11 cleanly
- Selling or handing down a PC
If you choose clean install, plan to reinstall apps and restore files from your backup afterward. (Yes, even the one app you forgot you installed
in 2019 and “might need someday.”)
Step 2: Create a Bootable Windows USB (Two Best Methods)
There are lots of ways to make a Windows installer USB. Two methods dominate because they’re reliable:
Microsoft’s Media Creation Tool (easiest) and ISO + Rufus (more control).
Option A (Recommended): Use Microsoft’s Media Creation Tool
This is the simplest path for most people. It downloads Windows and builds the bootable USB in one guided process.
Use it when you want “easy mode” and fewer decisions.
- Download the official Windows installer tool from Microsoft’s Windows download page (Windows 11 or Windows 10).
- Run the tool as administrator (right-click → Run as administrator), then accept the license terms.
- Choose Create installation media (USB flash drive).
- Pick the language and edition (the tool often matches your current system automatically).
- Select USB flash drive, choose your USB from the list, and let it create the installation media.
When it’s done, you’ll have a bootable USB that works on most modern PCs with UEFI firmware. Label it something obvious like
“WINDOWS INSTALL” so you don’t accidentally use it as a snack-storage device later.
Option B: Download the ISO and Use Rufus (More Control)
This method is great if:
- The Media Creation Tool is failing or crashing on your current machine
- You need specific partition settings (GPT/UEFI vs MBR/Legacy)
- You want more visibility into what’s being written to the USB
- Download the official Windows ISO from Microsoft’s software download page.
- Download Rufus from its official site and run it (it’s typically portable, so it doesn’t “install” like a big program).
- Plug in your USB drive, open Rufus, and select your USB under Device.
- Under Boot selection, choose your downloaded Windows ISO.
- For most modern PCs, pick:
- Partition scheme: GPT
- Target system: UEFI (non-CSM)
- Click Start and confirm the warnings (yes, it will wipe the USB).
If you’re installing on older hardware that only supports Legacy BIOS, you may need MBR + BIOS (or BIOS/UEFI-CSM),
but most systems from the last several years are happiest with GPT + UEFI.
Step 3: Boot Your PC from the USB Drive
Now the fun part: convincing your computer to boot from the USB instead of pretending it didn’t hear you.
Most PCs have a one-time boot menu key you press during startup.
Common boot menu keys (popular brands)
- Dell: often F12 for the one-time boot menu
- Lenovo: often F12 (sometimes Fn + F12), or a Novo button on some models
- HP: often Esc for Startup Menu, then F9 for Boot Device Options
Boot steps (works for most PCs)
- Insert the USB installer into the PC you want to install Windows on.
- Shut down completely (not just “Restart” if the PC is acting weird).
- Turn it on and immediately tap the boot menu key repeatedly (don’t hold ittap like you’re trying to win a rhythm game).
- Select the USB device from the boot menu and press Enter.
If you see two USB options: choose the UEFI one
Some boot menus show the USB twice, like:
UEFI: USB Drive and USB Drive. If you’re installing on a modern PC, pick the UEFI entry.
This helps Windows install in UEFI mode (which is what you want for most Windows 11 systems).
Step 4: Install Windows (The Actual Installation Part)
If everything worked, you’ll see the Windows Setup screen. Congratsyou’ve passed the “boot from USB” boss fight.
Now it’s mostly clicking the correct buttons and not selecting the wrong drive.
1) Choose language and keyboard
Confirm your language, time, and keyboard layout. If you pick the wrong keyboard layout, you’ll later type your password and wonder why
it looks like your keyboard learned a new dialect overnight.
2) Click “Install now” and handle the product key
- If you have a product key, enter it when prompted.
- If your PC has a digital license, you can often choose “I don’t have a product key” and activate later after setup.
3) Choose the install type
You’ll usually see two options:
- Upgrade: Keeps files/apps (typically only works when started from inside Windows, not always from USB boot).
- Custom: Install Windows only: This is the clean install route.
4) Select the drive and partitions (most important screen)
This is where people accidentally erase the wrong drive. Take your time.
For a clean install on the main system drive:
- Select the drive where Windows is currently installed (usually the internal SSD).
- If you’re doing a full wipe, delete partitions on that drive until it shows Unallocated Space.
(Only do this if you have a backup and are sure you picked the correct drive.) - Select the unallocated space and click Next. Windows will create the needed partitions automatically.
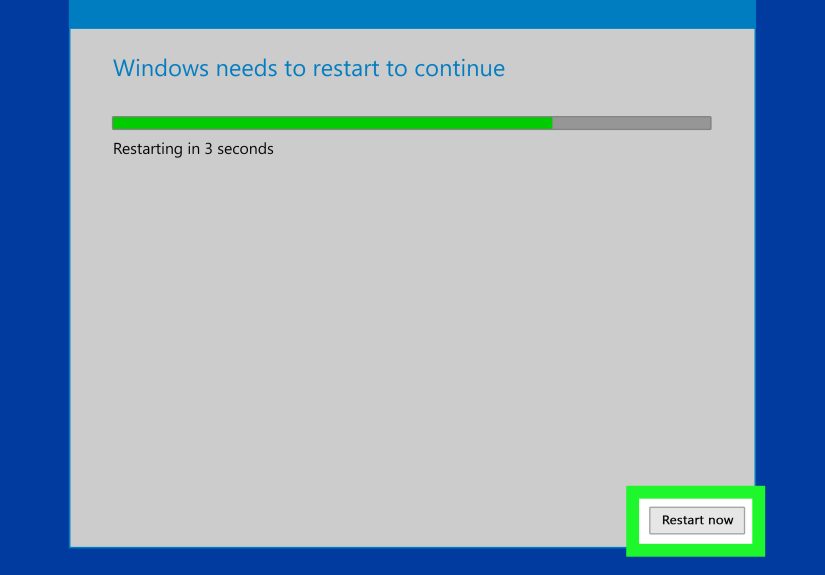
Windows will now copy files, install features, and restart several times. If it restarts and tries to boot from the USB again,
you may see the “Press any key to boot from USB” prompt. Don’t press a key after the first restart unless you’re sure
it needs to boot back into the installer. Usually, you want it to continue installing from the internal drive.
Step 5: Finish Setup, Updates, and Drivers
Out-of-box setup (OOBE)
After installation, Windows will guide you through region, keyboard, Wi-Fi, account sign-in, privacy options, and device name.
If you’re setting up a family PC, pick a device name that won’t embarrass you later in your Wi-Fi device list.
(“DESKTOP-BEASTMODE” is funny until it shows up at Grandma’s house.)
Do updates early
Once you reach the desktop:
- Run Windows Update until there are no more updates available.
- Restart when prompted (yes, againWindows loves restarts like cats love knocking things off tables).
- Install vendor drivers if needed (graphics, Wi-Fi, chipset), especially if a device isn’t working properly.
Activation check
Go to Settings → System → Activation. If it didn’t activate automatically, you may need to sign in with the Microsoft account
tied to your license or enter your product key.
Troubleshooting: The “Why Is My Computer Like This?” Section
Problem: The USB drive doesn’t show up in the boot menu
- Try a different USB port (USB-A ports on the back of desktops are often more reliable than front panel ports).
- Use a different flash drive (some cheap drives are great at holding photos and terrible at being bootable).
- Recreate the USB using the Media Creation Tool or Rufus (a bad write = a bad boot).
- Check BIOS/UEFI settings for USB boot being disabled.
- If Secure Boot blocks the USB, you may need to adjust Secure Boot settings temporarily.
(Do this carefully; re-enable protections after installation if your system supports them.)
Problem: “Windows cannot be installed to this disk” (GPT/MBR mismatch)
This error usually means your boot mode and your disk partition style disagree.
Example: you booted in Legacy mode but the drive is GPT, or you booted in UEFI mode but the drive is MBR.
Fix options:
- Preferred: Boot the installer in UEFI mode and install to a GPT disk (best for modern systems).
- If you’re doing a clean install and don’t need the data on the target drive, you can delete partitions to unallocated space and let
Windows recreate them. This often resolves partition-layout confusion. - Advanced: using command-line tools to clean/convert the disk is possible, but it erases dataonly do this if you’re 100% sure and backed up.
Problem: The installer loops back to the beginning
- After the first restart, remove the USB or make sure you don’t boot from it again.
- If you see “Press any key to boot from USB,” don’t press anything unless you’re intentionally restarting the install.
Problem: No internet or missing Wi-Fi during setup
Some PCs need a specific network driver. If Wi-Fi doesn’t show up, try Ethernet if available.
After installation, you can install network drivers from the manufacturer’s support site if needed.
Problem: Media Creation Tool fails on your current PC
If the tool won’t run reliably, use the official ISO download method and create the USB with Rufus instead. This avoids relying on the tool
that’s failing on your system.
Security and Sanity Tips (Small Steps, Big Payoff)
- Back up before you start (worth repeating).
- Disconnect extra external drives during install so you don’t accidentally select the wrong one.
- Use official Microsoft downloads to avoid tampered installation files.
- Update BIOS/UEFI only if necessary and only using official manufacturer guidancedon’t “randomly update BIOS” as a hobby.
- After install: update Windows, enable security features, and install reputable drivers.
Real-World Experiences and Lessons (Extra )
In the real world, installing Windows from a USB drive is rarely a straight line. It’s more like a small quest:
you start with confidence, encounter a boot menu that disappears in 0.4 seconds, and end up Googling “why won’t my PC boot from USB”
at 1:12 a.m. Here are the most common “I wish someone told me this earlier” momentsso you can skip the late-night drama.
The classic mistake: forgetting the USB gets wiped
People often grab “any USB” and then realize it was the one holding family photos, a school project, or a folder named “IMPORTANT DO NOT DELETE.”
Both Media Creation Tool and Rufus will erase the drive. The best move is to dedicate a flash drive to installs (label it!)
or copy your files off first. Future-you will be ridiculously grateful.
Boot menu timing is a sport
Many laptops flash the brand logo for a moment and then jump straight into Windows. If you press the boot key too late, nothing happens.
If you press it too early, sometimes nothing happens (computers are whimsical like that). The trick is: shut down fully, power on,
and start tapping the key immediately. If your laptop has “Fast Boot,” it can make the window even shorterso disabling Fast Boot in BIOS/UEFI
(temporarily) can help when you’re struggling to access menus.
“UEFI: USB” vs “USB” is not a meaningless duplicate
Seeing two USB entries confuses a lot of people. But it matters. On modern PCs, choosing the UEFI version usually means Windows installs
in the newer UEFI mode with GPT partitions. That typically improves compatibility with Windows 11 requirements and modern security features.
If you pick the non-UEFI option on a system that expects UEFI, you can trigger the dreaded partition mismatch errors and waste time.
When in doubt: pick the UEFI entry, especially for Windows 11.
The “wrong drive” anxiety is realand justified
The drive selection screen in Windows Setup is powerful and unforgiving. A helpful habit is to unplug any external hard drives and extra USB storage
before you install. On desktops, if you have multiple internal drives, note their sizes beforehand (for example: “My Windows SSD is 512GB,
my storage drive is 2TB”). That way, when Setup lists drives, you’re less likely to format the wrong one. If you’re installing to a brand-new SSD,
it often shows as unallocated space, which makes the decision easier.
Installation is easy. “After install” is where performance is won
A clean Windows install can feel fast for five minutes… until the system finishes indexing, downloads updates, installs drivers,
and decides it’s time for a restart marathon. The real “pro move” is to run Windows Update repeatedly until it’s truly done,
then install key drivers (especially graphics and Wi-Fi), and only then start reinstalling apps. This order prevents you from troubleshooting
problems that would have solved themselves after updates.
Finally, remember: the goal isn’t just “Windows boots.” The goal is “Windows boots, updates cleanly, activates properly, and your files are safe.”
Do it once, do it carefully, and you’ll have a reliable systemand a handy USB installer you can reuse whenever Windows decides to audition for a drama series.
Conclusion
Installing Windows from a USB flash drive is one of the most useful PC skills you can learn. The winning formula is simple:
create the installer using official Microsoft tools (or ISO + Rufus), boot from the USB using your device’s boot menu, choose the correct
install type, and be extra careful on the drive selection screen. After setup, updates and drivers do the heavy lifting to get your system stable.
Do it right once, and you’ll never fear a broken Windows install againplus you’ll become the unofficial tech hero of your friend group.


