Table of Contents >> Show >> Hide
- 1. Start Smart: Safety, Codes & Planning
- 2. Choosing the Right Materials for Outdoor Wiring
- 3. How to Install Above-Ground Outdoor Wiring
- 4. How to Install Underground Outdoor Wiring
- 5. Common Mistakes to Avoid
- 6. Long-Term Maintenance & Safety Habits
- 7. Real-World Experiences & Pro Tips (Extra )
- 8. Conclusion & SEO Summary
Planning to power a backyard shed, light up your patio, or finally retire that
sketchy orange extension cord that’s been “temporary” for three summers?
Installing outdoor electric wiringboth above ground and undergroundcan be a
safe, clean, and code-compliant DIY project if you plan it right,
use the correct materials, and know when to call in a licensed electrician.
This guide walks you through how to install outdoor electric wiring above
and below ground based on current U.S. best practices, with practical tips,
real-world examples, and just enough humor to keep you from crying over a trench.
1. Start Smart: Safety, Codes & Planning
Know your goal (and your limits)
Before you touch a breaker, define exactly what you’re powering:
a couple of string lights, a fountain pump, a full workshop in a detached garage,
or a hot tub that doubles as a time machine for your utility bill.
The load determines wire size, breaker rating, and whether you need a
simple branch circuit or a subpanel.
Outdoor electrical work in the U.S. is governed by the
National Electrical Code (NEC), adopted (often with tweaks) by local authorities.
Many projectsespecially new circuits, underground runs, detached buildings,
spas, and poolsrequire permits and inspection.
Always check with your local building department before you start and follow their rules.
DIY vs. call an electrician
- DIY-friendly: Adding a receptacle from an existing outdoor GFCI box, installing a few exterior lights, or running a short, clearly defined underground branch circuit where local code allows.
- Hire a pro: Service upgrades, subpanels, hot tubs, pools, complex voltage drop calculations, aluminum feeders, questionable existing wiring, or if any part of this article makes you sweat more than your attic in July.
Non-negotiable safety steps
- Turn off the correct breaker and verify with a non-contact voltage tester.
- Use GFCI protection for almost all outdoor 125–250V receptacles.
- Use weather-resistant (WR) devices and in-use (bubble) covers in wet locations.
- Assume all outdoor boxes and conduit are in a wet location: use wet-rated conductors.
- Before digging, call 811 to have underground utilities marked.
2. Choosing the Right Materials for Outdoor Wiring
Approved cable & wire types
- NM-B (Romex): Indoor only. Not for outdoors, not for underground. No exceptions “because it’s in PVC.”
- UF-B cable: Rated for wet locations and direct burial. Great for many simple outdoor branch circuits when installed at correct depth and protected where exposed.
- THWN-2 / XHHW-2 conductors: Wet-rated single conductors pulled in conduit; the go-to choice for underground runs, feeders to sheds/garages, and exposed raceways.
Conduit options
- PVC Schedule 40/80: Sunlight-resistant; widely used above ground (supported properly) and underground. Schedule 80 where subject to physical damage.
- EMT (thin-wall steel): Great above ground on walls; not for direct burial.
- RMC/IMC (rigid metal): Can be buried or exposed; very tough, often overkill for small residential runs but excellent protection.
Essential outdoor hardware
- Weatherproof, gasketed metal or PVC boxes rated for wet locations.
- WR-rated receptacles, GFCI devices, and extra-duty in-use covers.
- Approved wire connectors rated for wet locations inside enclosures.
- Conduit straps and clamps rated for exterior use.
3. How to Install Above-Ground Outdoor Wiring
Scenario: Add an outdoor outlet or light from an existing circuit
- Kill the power: Turn off the breaker and confirm with a tester.
- Choose the route: Short, protected, and neat. Run conduit along solid surfaces (siding, masonry, posts) where it’s less likely to be kicked, hit, or used as a soccer goal.
- Drill & seal: If exiting from indoors, drill a properly sized hole, use a bushing, and seal around the conduit with exterior-grade sealant to keep water and bugs out.
- Run conductors: Pull THWN-2 conductors in conduit or use UF-B only where allowed and protected. All conductors of the circuit (hot, neutral, ground) must be in the same raceway.
- Boxes & terminations: Mount a weatherproof box, use a WR/GFCI or GFCI-protected receptacle, tighten all connections, and install an in-use cover if exposed to weather.
- Support the conduit: Strap PVC or EMT at code-compliant intervals (commonly within a few feet of each box and regularly along the run) and keep runs level and tidy.
- Test: Restore power, test GFCI, verify correct polarity, and ensure everything operates as expected.
Above-ground wiring’s main enemies are UV, water, and physical abuse.
Using the right conduit, fittings, and devices keeps your setup safe and
your future self grateful.
4. How to Install Underground Outdoor Wiring
Step 1: Plan the circuit
For a typical shed or landscape circuit, many homeowners use a 20A,
120V circuit with 12 AWG copper. Long runs (over ~100 ft) may require a larger gauge to reduce voltage drop.
Heavier loads (EV chargers, big tools, multi-circuit sheds) often justify a
240V feeder and a small subpanel. Oversizing wire now is cheaper than re-trenching later.
Step 2: Choose burial method (typical NEC-based guidance)
Exact depths depend on the NEC edition adopted in your area and local amendments, but common residential guidelines include:
- UF-B direct burial (120/240V circuits): Commonly requires about 24 in. of cover.
- PVC or other approved conduit with THWN-2 conductors: Often about 18 in. of cover for typical branch circuits.
- Low-voltage (<30V) landscape lighting cable: Shallower depths (often around 6 in.) are typical, but still must be protected.
“Cover” means the distance from finished grade down to the top of the cable or conduit.
Trench depth must be slightly deeper than the required cover. Always confirm with your local code official before you dig.
Step 3: Mark and dig
- Call 811 and wait for utilities to be marked.
- Mark a straight, logical path from the house to your shed, post, or patio.
- Dig the trench to the appropriate depth with smooth sides and a flat bottom; avoid large rocks.
Step 4: Install conduit or cable
- Conduit method: Lay PVC in the trench with solvent-welded joints, using long-sweep elbows. Pull THWN-2 conductors after the glue cures.
- Direct burial UF-B: Lay on a bed of loose soil or sand; no sharp stones. Protect UF-B in conduit where it emerges from the ground and anywhere it’s exposed.
- Place warning tape 12 in. or so above the wiring before backfilling.
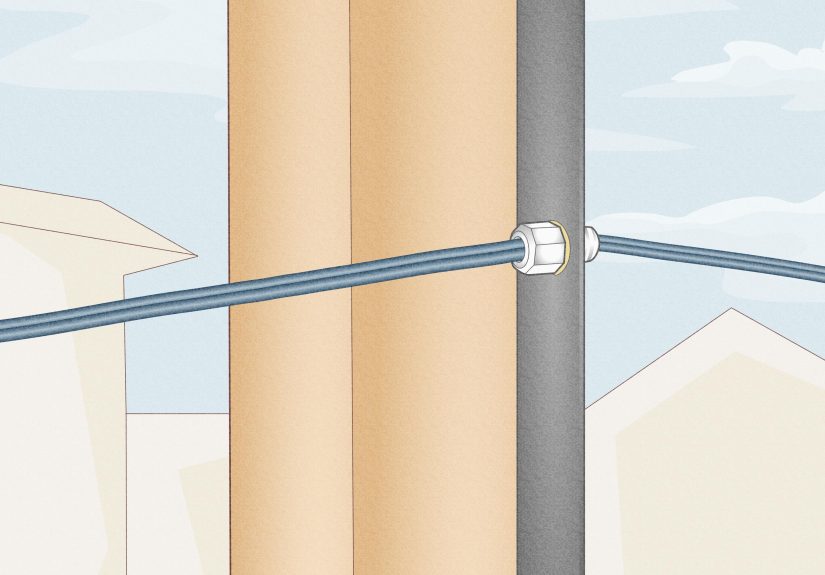
Step 5: Transitions & terminations
- Where cable or conduit comes up out of the ground, protect it to at least 8 ft above grade (or as required) with rigid PVC, RMC, or similar.
- Use listed LB fittings and weatherproof boxes at entry/exit points.
- Terminate in a subpanel or outdoor box with proper grounding and bonding.
Step 6: Inspection & testing
If a permit is required, have the trench and wiring inspected before backfilling.
Once approved, backfill carefully, restore power, and test GFCIs, breakers, and loads.
Keep a simple sketch of your underground route with measurements; future-you with a shovel will be thrilled.
5. Common Mistakes to Avoid
- Using indoor NM-B cable outdoors or underground.
- Burying cable too shallow “because it’s just a light.”
- Skipping GFCI protection for exterior outlets and circuits.
- Sharing conduit between low-voltage and 120/240V circuits.
- Leaving splices buried without approved, accessible, weatherproof boxes.
- Relying on extension cords as permanent wiring (they’re guests, not roommates).
6. Long-Term Maintenance & Safety Habits
- Test GFCI devices monthly using their built-in test button.
- Check covers, boxes, and conduit annually for cracks, rust, or loose fittings.
- Trim vegetation around fixtures and boxes so you can see potential damage early.
- Update your “as-built” sketch if you add new runs or junction boxes.
7. Real-World Experiences & Pro Tips (Extra )
Outdoor wiring looks simple on paper, but anyone who’s actually dug a trench in August
knows the truth: the technical part is only half the story. The rest is planning,
patience, and learning from other people’s bad decisions so you don’t make them yourself.
One common experience from homeowners is underestimating distance.
A shed that “looks about 40 feet away” turns out to be a 90-foot run once you follow
a code-compliant path, avoid trees and patios, and reach a suitable spot on the house.
That difference can affect wire size and voltage drop. The smart move:
measure with a tape, add extra for vertical rises, and throw in a bit more for
clean routing. Nobody has ever regretted buying wire that was five feet too long;
plenty have regretted being five feet short at dusk.
Another recurring lesson: people wish they had installed an extra conduit.
Pros routinely pull one set of conductors and leave a spare empty conduit in the same trench.
Later, when you want landscape lighting, data, cameras, or another circuit,
you aren’t re-renting a trencher. An extra length of PVC is cheap insurance and
a very satisfying “past me was a genius” moment.
Many DIYers also report that transitions are where things go wrong:
exposed UF-B chewed by weed trimmers, conduit stubs that stop too low,
boxes without proper strain relief, or fittings that aren’t rated for wet locations.
The fix is boring but effective: treat every point where cable leaves the earth,
meets siding, or enters a box as a vulnerable spot. Use the right fittings,
strap conduit solidly, and keep everything tight, sealed, and supported.
A wobbly box today is a moisture problem tomorrow.
Then there’s the inspection story. Homeowners who pull permits and have an inspector
check their trench almost always say the same thing afterward:
“It wasn’t that scary, and I’m glad I did it.”
Inspectors often catch small issues earlylike missing caution tape,
improper fittings, or slightly shallow sectionsbefore they’re buried forever.
That five-minute correction can prevent a failure years later.
People who skip permits sometimes share a very different story:
a failed sale or home inspection where unpermitted wiring becomes an expensive
negotiation point. Doing it to code, on record, protects you legally and financially.
Finally, folks who’ve lived with their outdoor wiring for a few seasons emphasize maintenance.
Snow shovels, lawn equipment, pets, UV, and shifting soil all work against you.
A quick spring and fall walk-aroundchecking covers, conduit, boxes, and GFCIscatches small problems
while they’re still cheap. Outdoor electrical systems age gracefully when installed
with quality materials, realistic burial depths, and a little respect for water and physics.
If you take one big lesson from real-world experience, let it be this:
think long-term. Use better materials than the bare minimum, go a little deeper
than you’re tempted to, protect what’s exposed, label everything, and document your work.
Future projects, future owners, and future you will all be safer and happier.
8. Conclusion & SEO Summary
Installing outdoor electric wiring above and below ground isn’t about being flashy;
it’s about being precise, safe, and code-compliant. With the right cable,
conduit, burial depth, weatherproof devices, and protective gear, you can power your
patio, shed, or garden lighting reliably for years. Respect the NEC and local rules,
don’t cut corners underground where you can’t see them, and involve a licensed electrician
whenever you’re unsure. Safe wiring is quiet wiring: it just works.


