Table of Contents >> Show >> Hide
- The Quick Recipe (If You’re the “Just Tell Me What to Do” Type)
- Materials and Tools
- Pick the Right “Glue” (Spoiler: It’s Usually Not Glue)
- Step 1: Make Sure Your Paver Can Actually Bond
- Step 2: Plan Your Mosaic (Before You Mix Anything That Hardens)
- Step 3: Mix Thinset Mortar the Right Way
- Step 4: Glue (Set) the Mosaic Tiles to the Concrete Paver
- Step 5: Grout the Mosaic
- Step 6: Seal for Outdoor Longevity (Optional, Usually Smart)
- Step 7: Install the Finished Paver (So It Doesn’t Rock, Crack, or Collect Water)
- Common Mistakes (And How to Avoid Them)
- FAQ
- Real-World Experiences: What Usually Happens (So You’re Not Surprised)
- 1) The paver drinks your mortar like it’s happy hour
- 2) Mortar oozes up between tiles (a classic)
- 3) Your mosaic sheet slides a little as you press
- 4) The edges look messier than the center
- 5) Weather becomes your unsolicited project manager
- 6) Grout haze makes you question your eyesight
- 7) Freeze-thaw is the long game
- 8) The best mosaics are “imperfect on purpose”
Want to turn a plain concrete paver into a one-of-a-kind mosaic stepping stone? Excellent choice.
It’s like giving your yard jewelryexcept this jewelry can survive rain, sun, and that one friend who always “forgets” to wipe their shoes.
The trick is simple: use the right mortar (not “whatever glue is closest”), prep the paver so it can actually bond,
and protect the project while it cures. Do that, and your mosaic won’t pop off the first time the weather gets dramatic.
The Quick Recipe (If You’re the “Just Tell Me What to Do” Type)
- Pick a paver that’s unsealed and solid. If water beads on it, you’ll need to de-seal or roughen it.
- Clean + roughen the surface so mortar can grip.
- Use polymer-modified thinset mortar for outdoor durability (white for glass mosaics).
- Press mosaic sheets in firmly for full coverage, then let cure.
- Grout (choose the right type for your joint size and tile material), then cure again.
- Seal (optional but smart outdoors) once grout is cured.
Materials and Tools
What you’ll need
- Concrete paver (common sizes: 12″ x 12″ or 16″ x 16″)
- Mosaic tiles (sheet-mounted is easiest)
- Polymer-modified thinset mortar rated for exterior use (white recommended for glass and light-colored tile)
- Grout (sanded or unsanded depending on joint width; exterior-rated is ideal)
- Grout sealer (penetrating sealer recommended for outdoor cementitious grout)
- Optional: concrete cleaner/degreaser, rubbing alcohol for final wipe, painter’s tape
Tools that make life easier
- Bucket + margin trowel (or sturdy mixing stick)
- Drill + mixing paddle (nice-to-have, not mandatory for one paver)
- Notched trowel (often 3/16″ V-notch or small square notch for mosaics)
- Rubber grout float
- Sponge + microfiber cloth
- Tile nippers (for small cuts) and/or a wet saw (for lots of cuts)
- Gloves, safety glasses, and a dust mask/respirator (especially if cutting or grinding)
Pick the Right “Glue” (Spoiler: It’s Usually Not Glue)
For outdoor mosaic tiles on concrete, the most reliable adhesive is polymer-modified thinset mortar.
It’s cement-based, bonds well to concrete, and handles moisture and temperature swings better than most “grabby” adhesives.
Best all-around choice: polymer-modified thinset mortar
Look for a mortar labeled for interior/exterior use and described as polymer-modified
(sometimes “fortified” or “latex-modified”). For glass mosaics, pick bright white mortar so the color stays crisp
instead of turning “mystery gray.”
When epoxy is worth considering
Epoxy mortars and epoxy grouts can be extremely durable and stain-resistant, but they’re usually overkill for one stepping stone.
They also have a shorter working time and require more careful cleanup. If you’re making a piece that will live in constant water
(like a fountain shelf), epoxy starts to make more sense.
What to avoid outdoors: mastic and many premixed adhesives
Organic mastics (often sold in tubs) can work for certain indoor wall projects, but outdoors they can struggle with moisture and temperature changes.
If the bucket says “premixed thinset,” read closelymany of those are actually mastic-style adhesives, not true cement thinset.
Outdoors, you want mortar that cures chemically, not something that depends on air-drying like a forgotten bowl of guacamole.
Step 1: Make Sure Your Paver Can Actually Bond
Concrete pavers vary. Some are sealed. Some have dusty residue. Some have a surface so smooth it could host a
curling tournament. Your mortar needs a clean, open surface to lock into.
Do the water-drop test (fast and oddly satisfying)
- Put a few drops of water on the paver.
- If it soaks in within about a minute, the surface is generally absorbent enough.
- If it beads up or sits there like it paid rent, the paver may be sealed or too dense on top.
If it’s sealed or too slick, roughen it
For a single paver, the simplest fix is mechanical: sand or grind the top surface lightly to remove sealer and create tooth.
(Do this outside, wear eye protection, and avoid breathing dust.)
After roughening, sweep and wipe the surface clean.
Clean like you mean it
Wash off dirt, algae, grease, and loose concrete dust. Let it dry fully. Right before spreading mortar, do a final wipe so you’re bonding to concrete,
not to “yesterday’s patio vibes.”
Step 2: Plan Your Mosaic (Before You Mix Anything That Hardens)
Lay your mosaic tiles on the paver dry first. This helps you:
- Center the design (so it doesn’t look like it slid off mid-sneeze)
- Decide where cuts go (best near edges)
- Check spacing and grout line consistency
A simple example layout
If you’re new to mosaics, try a bold border + simple center motif. For a 12″ x 12″ paver:
use a 1″ border strip around the edges, then fill the center with a geometric star, initials, or a sunburst.
You’ll get a “wow” effect without needing a PhD in Tiny Tile Geometry.
Step 3: Mix Thinset Mortar the Right Way
Thinset is forgivingbut only if you don’t sabotage it. Follow the bag instructions for water ratio and mixing time.
Too much water weakens the bond; too little makes it unworkable and reduces coverage.
How to mix (small-batch friendly)
- Add water to the bucket first, then powder (less clumping).
- Mix until smooththink “creamy peanut butter,” not “soupy cereal.”
- Let it slake (rest) for a few minutes.
- Remix briefly without adding more water.
Pro tip: Only mix what you can use within the working time. Mortar that starts to stiffen isn’t “fine if you stir harder.”
It’s “fine if you enjoy heartbreak.”
Step 4: Glue (Set) the Mosaic Tiles to the Concrete Paver
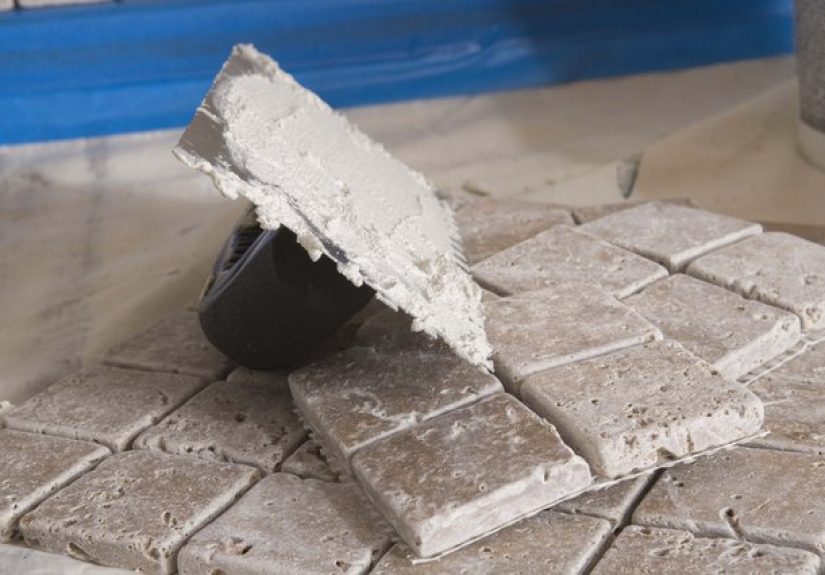
1) “Key in” a thin coat
Use the flat side of your trowel to press a thin layer of mortar into the concrete. This helps the mortar grab the pores and texture of the paver.
2) Comb mortar with a notched trowel
Comb fresh mortar with your notched trowel, holding it at about a 45° angle to create uniform ridges.
For most mosaic sheets, a smaller notch (like a V-notch) helps prevent mortar from squeezing up between tiny tiles.
3) Set the mosaic sheets
- Place the sheet down gently, then press firmly.
- Use your hands, a grout float, or a beating block to press evenly.
- Lift one corner occasionally to check coverage.
Aim for high coverage outdoors. You don’t want hollow spots where water can sit, freeze, and turn your art into a tile pop-up book.
For glass mosaics, aim for near-complete coverage so it looks consistent and stays put.
4) Clean squeeze-out while it’s fresh
If mortar oozes into grout joints, scrape it out gently with a small tool or toothbrush while it’s still soft.
Future-you will thank present-you for not turning grout day into an archaeological dig.
5) Protect and cure
Let the paver cure flat and undisturbed. Keep it out of rain and harsh sun while curing.
If it’s chilly, windy, or very dry, curing can take longer. Many mortars need at least a day before grouting,
and some installations benefit from longer cure timeespecially outdoors.
Step 5: Grout the Mosaic
Grout locks everything together, fills joints, and helps block water intrusion.
Choosing the right grout depends on joint width and tile type.
Sanded vs. unsanded (quick rule)
- Unsanded grout: usually best for very narrow joints (often under 1/8″) and for scratch-prone surfaces.
- Sanded grout: better for wider joints and areas needing extra strength.
If you’re using soft or glossy tile that can scratch, do a small test or choose a grout option designed for delicate surfaces.
Grouting steps
- Mix grout according to directions (don’t freehand it like pancake batter).
- Let grout rest briefly if instructed, then remix.
- Use a rubber float to pack grout into joints at a diagonal angle.
- Wait a few minutes, then wipe with a damp sponge (light pressure, rinse often).
- After haze forms, buff with a dry microfiber cloth.
Outdoor curing matters
Fresh grout needs protection. Keep it above cool temperatures and shield it from rain while curing.
Outdoor grout is a marathon, not a microwave.
Step 6: Seal for Outdoor Longevity (Optional, Usually Smart)
Many outdoor mosaics benefit from a penetrating grout sealer, which helps resist stains and reduces water absorption.
Don’t seal too earlylet grout cure first per product directions.
Sealing tips
- Seal only when grout is cured (often 1–3 days, sometimes longerfollow your grout’s instructions).
- Apply sealer carefully to grout lines; wipe excess off tile faces.
- Consider a second coat if recommended for outdoor exposure.
Note: Sealer isn’t a force field. It helps, but good coverage, good grout, and proper cure time do the heavy lifting.
Step 7: Install the Finished Paver (So It Doesn’t Rock, Crack, or Collect Water)
Your mosaic paver will live longer if it sits on a stable, well-draining base.
A wobbly paver is basically a stress test for grout lines.
A simple, solid base
- Dig a shallow bed a bit larger than the paver.
- Add compacted gravel or crushed stone for drainage.
- Add a thin leveling layer of sand or stone dust.
- Set the paver and check for level (or a slight slope for runoff).
- Pack edges so it doesn’t shift.
Common Mistakes (And How to Avoid Them)
Mistake: Using “random glue”
Outdoor mosaics need mortar designed for moisture and temperature changes. Polymer-modified thinset is the go-to.
Mistake: Bonding to dust, sealer, or grease
Mortar needs a clean, open surface. If water beads on the paver, roughen it.
Mistake: Skipping coverage checks
Pull up a corner early. Fix coverage while it’s easy, not after it’s fused to the Earth’s crust.
Mistake: Rushing cure time
If you grout too soon or install it outside in bad weather too early, you risk bond failure and cracking.
FAQ
Can I glue mosaic tile to a concrete paver without grout?
You can, but it’s not ideal outdoors. Grout helps lock tiles together and reduces spaces where water can collect.
Do I need to seal the concrete paver before starting?
Usually nosealing first can reduce bond strength. You want mortar to bond to concrete, not to a slick coating.
Sealing grout later is often the better move.
What if my paver is already sealed?
Roughen/remove the sealer from the tile-setting surface so mortar can grab. The water-drop test is your quick clue.
Can I use glass mosaic tiles on a stepping stone?
Yes, but choose slip-aware designs (glass can be slick), ensure strong coverage, and avoid sharp edges where shoesand toeswill meet them.
Real-World Experiences: What Usually Happens (So You’re Not Surprised)
You can follow every step and still have a few “character-building moments.” Here are common real-life experiences people run into
when gluing mosaic tiles to a concrete paverand how to handle them without spiraling into a dramatic monologue aimed at your bucket of mortar.
1) The paver drinks your mortar like it’s happy hour
Some pavers are thirsty. They’ll pull moisture out of thinset fast, which can shorten working time and reduce bond quality.
If your mortar starts skinning over quickly, work in smaller sections and consider lightly dampening (not soaking) the paver beforehand
so it doesn’t rob the mix. The goal is “slightly damp,” not “mini swimming pool.”
2) Mortar oozes up between tiles (a classic)
This happens when the notch is too large, you press too hard, or the mortar is too loose. For mosaics, smaller notches help,
and sheet-mounted mosaics often need less mortar than you expect. If ooze happens, don’t panicscrape it out while it’s fresh.
If you wait until tomorrow, it becomes “mortar archaeology,” complete with chisel noises and regret.
3) Your mosaic sheet slides a little as you press
Thinset gives you working time, which is greatuntil you realize the sheet can shift if you push sideways.
Press straight down, then adjust alignment gently. Many people find it easier to start with the center sheet, get it perfect,
and build outward so the design stays centered.
4) The edges look messier than the center
Totally normal. Cuts and partial tiles near the perimeter can look chaotic during the dry layout stage.
A trick: plan a border. Even a simple single-row border creates a clean frame and makes the center design look intentional.
It’s the mosaic equivalent of putting your bed in the corner so the rest of your room looks tidy.
5) Weather becomes your unsolicited project manager
Outdoor curing is sensitive. Hot sun can dry mortar too fast; cold slows curing; rain can ruin fresh grout.
If weather is unpredictable, people often “tent” the paver with a box or plastic cover held above the surface so air can still circulate.
The cover should never touch the tile or groutno one wants a plastic-wrap texture baked into their masterpiece.
6) Grout haze makes you question your eyesight
Grout haze is the ghost of grout past. It’s common, especially on textured tiles. Gentle, repeated buffing with a microfiber cloth
after the grout firms up helps. The key is timing: wipe too early and you pull grout out of joints; wipe too late and you’re polishing cement.
Patience here pays off more than extra elbow grease.
7) Freeze-thaw is the long game
If you live where temperatures swing wildly, the project’s durability depends on three things:
solid coverage, proper cure time, and water management. Hollow spots let water sit. Poor base prep lets the paver rock.
Rushed curing traps moisture. When people redo a failed stepping stone, it’s usually because one of those three got skipped.
The good news? Fixing the process once usually fixes the project for good.
8) The best mosaics are “imperfect on purpose”
Here’s a secret: the mosaics that get the most compliments aren’t always the most symmetrical. They’re the ones with personality
a fun color story, a little texture mix, a quirky border, or a small surprise detail (like a single metallic tile that catches sunlight).
In practice, people remember vibe more than perfection.
Bottom line: if you prep the surface, choose exterior-friendly mortar and grout, and give everything time to cure,
your mosaic paver has a very good chance of becoming one of those yard pieces people point at and say,
“Wait… you made that?”


