Table of Contents >> Show >> Hide
- What Is Candle Tunneling?
- Why Candles Tunnel in the First Place
- The Simple Trick: Use an Aluminum Foil Hat
- Other Ways to Fix a Tunneled Candle
- How to Prevent Candle Tunneling Next Time
- Common Candle Tunneling Mistakes to Avoid
- When a Candle Is Probably Beyond Saving
- Real-Life Experiences With Candle Tunneling
- Conclusion
Few things are more annoying than lighting a beautiful candle, expecting cozy vibes and main-character energy, only to discover a wax crater forming in the middle like your candle is digging its own tiny basement. That, friends, is candle tunneling. It wastes wax, shortens burn time, and makes even an expensive candle look a little tragic.
The good news? You usually do not need to throw the candle away. In many cases, you can fix candle tunneling with one very simple trick: an aluminum foil “hat”. It helps trap heat, melt the stubborn wax around the edges, and reset the surface so your candle can burn more evenly again.
Below, you’ll learn what candle tunneling is, why it happens, how to fix it safely, and how to prevent it from happening again. We’ll also cover a few backup methods, common mistakes, and real-life candle experiences that prove this is one of those tiny household problems that can become weirdly personal. Because yes, sometimes a candle really does feel like it’s judging you.
What Is Candle Tunneling?
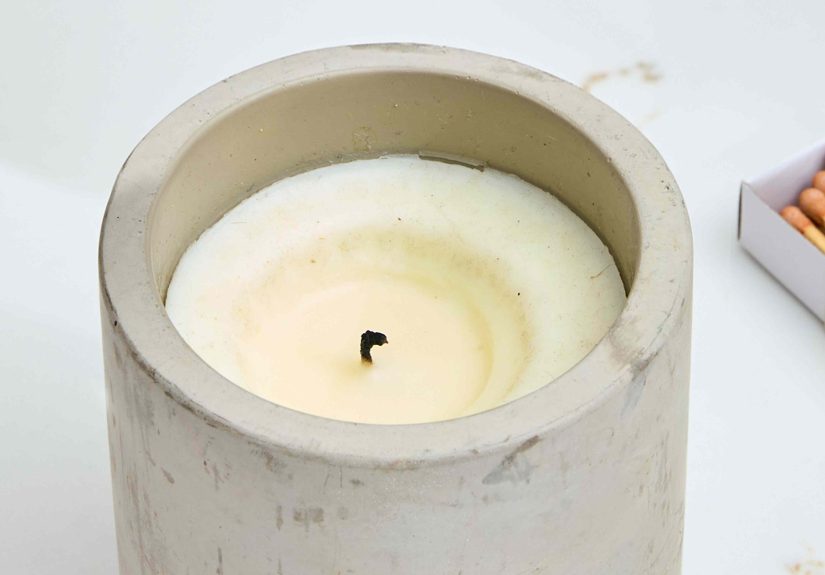
Candle tunneling happens when the wax melts down the center around the wick, while a hard ring of unmelted wax stays stuck around the sides of the jar. Over time, the candle burns deeper instead of wider, creating a tunnel shape. The result is wasted wax, a smaller melt pool, weaker scent throw, and a candle that seems determined to leave half its life behind in the jar.
This issue is especially common with container candles, soy candles, and candles that are extinguished too early during the first burn. It can also happen when the wick is not quite right for the candle size, when the wick is not properly maintained, or when the candle is burning in a drafty area.
Why Candles Tunnel in the First Place
If you want to fix candle tunneling for good, it helps to know why it starts. The biggest reason is surprisingly simple: the first burn matters a lot. Candles develop what many candle makers call a “memory ring.” If you blow out a candle before the wax melts all the way to the edges, the candle tends to keep burning within that same smaller circle every time you relight it.
Other common causes include:
- Burning it for too little time: A short burn often means the melt pool never reaches the sides.
- Not trimming the wick: An overgrown wick can create soot, smoke, and uneven burning.
- Drafts and air movement: Open windows, ceiling fans, or air vents can make the flame flicker and heat the wax unevenly.
- Debris in the wax pool: Wick trimmings, soot, or dust can affect how the candle burns.
- Moving the candle before it cools: Disturbing the wax while it is still soft can lead to an uneven surface and future tunneling.
In other words, candle care is less “light and forget” and more “tiny fire with a routine.”
The Simple Trick: Use an Aluminum Foil Hat
If your candle has already tunneled, the easiest fix is usually the foil trick. It is popular for a reason: it is cheap, fast, and works with many jar candles.
How the foil trick works
Aluminum foil helps reflect heat back toward the top edges of the candle. That extra heat encourages the hard wax around the rim to melt, so the entire top surface can level out. Think of it as giving your candle a tiny sauna session, minus the spa music.
How to fix candle tunneling step by step
- Start with a cool candle. Make sure the wax is fully set before handling it.
- Trim the wick. Cut the wick to about 1/4 inch and remove any mushrooming or loose debris.
- Light the candle. Let the flame stabilize for a minute.
- Wrap the top with foil. Cover the top of the candle loosely with aluminum foil, leaving an opening in the center for the flame and ventilation.
- Let it burn. Allow the candle to burn for about 1 to 2 hours, or until the wax near the edges has melted and the top looks more even.
- Remove the foil carefully. The foil will be hot, so use caution.
- Blow out or snuff the candle and let it cool completely. Once the wax hardens, the top should look much smoother and the candle should burn more evenly next time.
Important safety tips for the foil method
- Do not let the foil touch the flame.
- Do not leave the candle unattended.
- Keep the candle on a heat-safe, stable surface.
- If the glass gets excessively hot, extinguish the candle and let it cool.
- Do not keep burning a candle once about 1/2 inch of wax remains in the bottom, unless the manufacturer says otherwise.
This is the best method when the candle still has a healthy wick and the tunneling is moderate, not catastrophic.
Other Ways to Fix a Tunneled Candle
The foil trick is the star of the show, but it is not the only option. Depending on how badly the candle has tunneled, one of these methods may help.
1. Use a hair dryer
If the wax tunnel is shallow, a hair dryer can help melt the top surface evenly. Use a low setting, keep the dryer at a safe distance, and move slowly so you do not splatter hot wax. The goal is to soften and level the surface, not create a wax hurricane in your living room.
2. Remove a little excess wax
If the wick has become buried or “drowned,” carefully remove a small amount of wax from around the wick once the candle is cool. This can expose more wick so the flame burns stronger and has a better shot at creating a full melt pool. Do this gently and avoid digging aggressively into the candle like you are searching for treasure.
3. Relight and burn longer
Sometimes the candle only needs more time. If the wick is healthy and the tunnel is not too deep, relighting the candle and allowing it to burn until the wax reaches the edges can solve the problem on its own. This works best when the tunneling is still mild.
How to Prevent Candle Tunneling Next Time
Fixing a tunneled candle is nice. Preventing one is even better. Here are the candle care habits that make the biggest difference.
Let the first burn form a full melt pool
This is the golden rule. On the first burn, let the wax melt all the way to the edges of the container. A common rule of thumb is to burn the candle for about one hour for every inch of candle diameter. For many standard jar candles, that means roughly 2 to 4 hours.
Trim the wick to 1/4 inch
A properly trimmed wick helps the candle burn cleaner and more evenly. In most cases, trimming to about 1/4 inch before each burn reduces smoke, soot, and uneven flames. Just remember that some candles, especially certain wood wick candles, may have special label instructions. When in doubt, trust the manufacturer.
Keep candles away from drafts
Drafts can push the flame off-center and cause an uneven melt pool. Keep candles away from open windows, fans, air vents, and busy pathways where the air is constantly moving.
Do not burn for too long
Yes, short burns can cause tunneling, but super long burns can also create problems. Burning a candle for more than about 4 hours at a time can overheat the container and may cause the wick to shift, which leads to uneven burning later.
Keep the wax pool clean
Remove wick trimmings, match bits, dust, and anything else that ends up in the wax. A clean wax pool helps maintain an even flame and keeps the candle looking good.
Let the candle cool before moving it
Moving a candle while the wax is still liquid can create ripples, slants, and uneven hardening. Let it cool completely before relocating it.
Common Candle Tunneling Mistakes to Avoid
If you keep wondering why your candle tunneling problem comes back, one of these habits may be the culprit:
- Lighting a brand-new candle for only 30 minutes “just to enjoy it for a sec”
- Forgetting to trim the wick between burns
- Burning the candle near a vent or fan
- Using the foil trick without leaving ventilation for the flame
- Ignoring a drowning wick until the flame becomes tiny and weak
- Trying to rescue a candle while rushing out the door
In short: candle care rewards patience. Impatience creates wax drama.
When a Candle Is Probably Beyond Saving
Most tunneling candles can be improved, but not all of them are worth the rescue mission. If the wick is badly off-center, the jar is cracked, the candle overheats quickly, or the wick repeatedly drowns even after you remove some wax, it may be safer to retire it. You can sometimes repurpose leftover wax in a wax warmer if the candle itself is no longer a good candidate for burning.
Real-Life Experiences With Candle Tunneling
If you have ever dealt with candle tunneling, you already know it is one of those surprisingly emotional household annoyances. It is not just about wax. It is about expectations. You buy a candle because you want calm, comfort, maybe a little luxury, and then the thing burns like it is actively refusing to cooperate.
A classic experience goes like this: you buy a gorgeous candle, probably in a glass jar heavy enough to feel expensive, and light it during a movie or while cleaning the kitchen. About 45 minutes later, you blow it out because it seems like plenty of time. The next day, you relight it and notice the center drops lower while the edges stay high. By burn number three, your candle looks like a wax bagel. You stare at it, mildly offended, even though you are technically the one who caused the problem.
Another common experience happens with seasonal candles. You pull out a cozy pumpkin, pine, or vanilla candle, burn it for a little while, and pack it away. Months later, you bring it back and realize the first burn was too short. Now the wick is trapped in a tiny crater, and your festive little candle has the energy of a grumpy raccoon. The scent is weaker, the flame is smaller, and suddenly your holiday mood has taken an unnecessary hit.
There is also the luxury candle heartbreak. People are usually much more determined to save a tunneled candle when it costs real money. Nobody wants to watch premium wax cling to the walls of a fancy vessel like a decorative ring of waste. That is why the foil trick has such a loyal following. It feels like a tiny household miracle: one minute your candle is a mess, and the next it is smooth enough to pass for well behaved.
Then there is the “why is my wick so tiny?” phase. Many candle lovers experience this after forgetting to trim properly, burning near a draft, or letting debris fall into the wax pool. The wick starts struggling, the flame gets low, and the candle stops throwing scent like it used to. At that point, people often assume the candle is defective, when really it just needs a little maintenance and a better burn routine.
And finally, there is the redemption arc. Once you learn how to get a full melt pool, trim the wick, and use the foil method when needed, candles suddenly become much less mysterious. You stop making accidental mistakes. Your jars burn flatter, your rooms smell stronger, and your candles last longer. You feel oddly powerful, like someone who has unlocked a secret domestic level. Is it life-changing? Maybe not. Is it deeply satisfying? Absolutely.
That is why learning how to fix candle tunneling with this simple trick is worth it. It saves wax, saves money, and saves you from the petty frustration of being defeated by a decorative flame. And honestly, that is reason enough.
Conclusion
If your candle is tunneling, do not panic and definitely do not toss it just yet. In many cases, the aluminum foil trick can help reset the wax surface and get the candle burning evenly again. Pair that with smart candle care habits like trimming the wick, letting the first burn reach the edges, avoiding drafts, and keeping burn times reasonable, and you can dramatically improve both performance and lifespan.
A good candle should not leave half its wax behind like an abandoned project. Give it a proper melt pool, a tidy wick, and a little patience, and it will usually repay you with a cleaner burn, stronger scent, and a much better attitude.