Table of Contents >> Show >> Hide
- Understanding the Common Problems with Electrical Outlets
- What You'll Need to Fix an Electrical Outlet
- Step-by-Step Guide to Fixing an Electrical Outlet
- Step 1: Turn Off Power to the Outlet
- Step 2: Remove the Outlet Cover Plate
- Step 3: Unscrew the Outlet from the Wall Box
- Step 4: Inspect the Wires and Connections
- Step 5: Tighten Loose Wires or Replace the Outlet
- Step 6: Install the Outlet Back into the Wall Box
- Step 7: Reattach the Cover Plate
- Step 8: Turn the Power Back On
- When to Call a Professional Electrician
- Tips for Preventing Outlet Problems in the Future
- Experiences Related to Fixing Electrical Outlets
- Conclusion
Electrical outlets are essential components in any home, allowing you to plug in devices and power up your space. However, when an outlet malfunctions, it can be frustrating. Whether it’s a loose connection, a tripped circuit, or a damaged outlet, fixing it yourself can save time and money. In this guide, we’ll walk you through the steps to safely and effectively fix an electrical outlet by yourself.
Understanding the Common Problems with Electrical Outlets
Before jumping into the repair process, it’s important to understand the potential issues that might arise with electrical outlets. These include:
- Loose Connections: Over time, screws and wires inside the outlet can loosen, leading to poor contact and sparking.
- Tripped Circuit Breaker: A blown fuse or tripped breaker can cause an outlet to lose power.
- Damaged Outlet: Physical damage, such as cracks or burn marks, can render an outlet unsafe and unusable.
- Grounding Issues: Older outlets may not have grounding, which is crucial for safety when using electrical appliances.
What You’ll Need to Fix an Electrical Outlet
Before you start fixing your outlet, make sure you have the following tools and equipment:
- Flathead screwdriver – To remove screws from the outlet plate and box.
- Phillips screwdriver – For loosening or tightening screws on the outlet itself.
- Voltage tester – To ensure that there’s no electricity running through the outlet before you begin work.
- Replacement outlet – If the outlet is damaged, a new one will be necessary.
- Wire cutters and strippers – These are useful if you need to trim or strip the wires for reattachment.
- Electrical tape – For wrapping exposed wires if necessary.
Step-by-Step Guide to Fixing an Electrical Outlet
Step 1: Turn Off Power to the Outlet
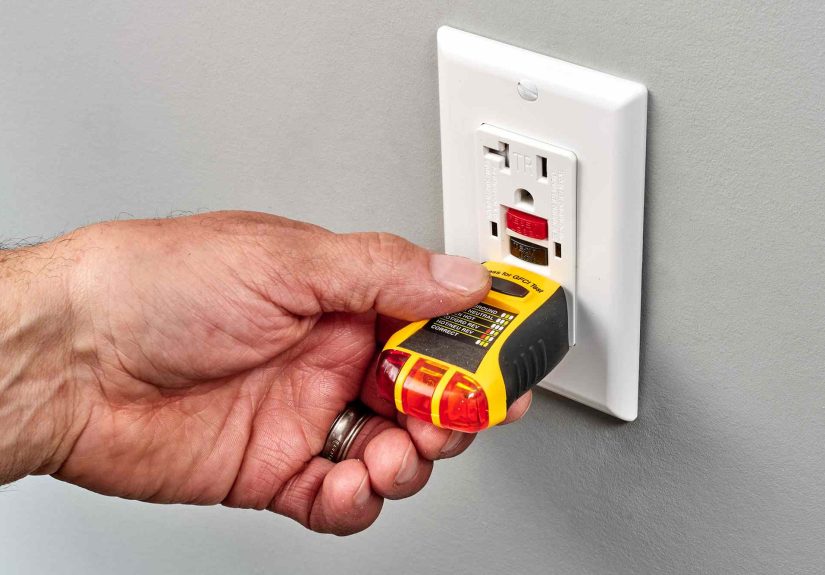
Safety is the number one priority when working with electricity. Before starting any repairs, turn off the power to the outlet at your home’s electrical panel. Use a voltage tester to ensure the outlet is completely dead. Even if the power is turned off at the breaker, it’s essential to confirm that there’s no residual voltage.
Step 2: Remove the Outlet Cover Plate
Use your flathead screwdriver to remove the screws that secure the outlet cover plate. Once the plate is removed, you’ll have access to the outlet itself. If the screws are tight, make sure you’re using the appropriate screwdriver to avoid damaging them.
Step 3: Unscrew the Outlet from the Wall Box
Next, use your Phillips screwdriver to remove the screws that hold the outlet in place. Gently pull the outlet out of the wall box. Be cautious when pulling the outlet outavoid putting too much pressure on the wires to prevent any damage.
Step 4: Inspect the Wires and Connections
Once the outlet is exposed, you can begin inspecting the wiring. Look for any signs of wear or fraying on the wires. If you notice any issues, such as scorch marks or damage to the insulation, the wires will need to be replaced. You can use your wire cutters to remove any damaged sections.
Step 5: Tighten Loose Wires or Replace the Outlet
If the wires are loose, tighten the screws on the outlet to secure them. Ensure that the wire is tightly wrapped around the screws for a firm connection. If the outlet is damaged, replace it with a new one by connecting the wires to the new outlet in the same manner as the previous one.
Step 6: Install the Outlet Back into the Wall Box
Once the wires are secured to the new or repaired outlet, carefully push the outlet back into the wall box. Ensure that the wires are not pinched or overly stressed. Screw the outlet into place using the Phillips screwdriver.
Step 7: Reattach the Cover Plate
Finally, reattach the outlet cover plate and tighten the screws. Make sure the plate is flush against the wall for a clean, neat finish.
Step 8: Turn the Power Back On
Once everything is back in place, turn the power back on at the electrical panel. Test the outlet by plugging in a device to ensure that it’s working properly. If the outlet doesn’t work, double-check your connections and the breaker to see if further troubleshooting is required.
When to Call a Professional Electrician
While DIY electrical repairs can be cost-effective, there are situations where it’s better to call in a professional:
- If the outlet is consistently tripping the circuit breaker, it may indicate a larger issue with the wiring or the breaker itself.
- If you’re unsure about handling the electrical components or if you’re not familiar with electrical safety.
- If you notice persistent sparks, smoke, or burning odors coming from the outlet, which could indicate a serious wiring issue.
Tips for Preventing Outlet Problems in the Future
- Regularly inspect outlets for signs of wear, such as scorch marks or loose connections.
- Don’t overload outlets with too many devices, as this can strain the circuit and lead to damage.
- For older homes, consider upgrading outlets to newer models with grounding to improve safety.
- Use a voltage tester periodically to ensure outlets are functioning properly.
Experiences Related to Fixing Electrical Outlets
Fixing electrical outlets is often seen as a simple task, but many people overlook the importance of safety. One personal experience that highlights the importance of testing an outlet before making repairs involved a homeowner who replaced a damaged outlet but failed to turn off the power. Luckily, they had the right safety tools, so the worst thing that happened was a small shock. But this experience showed how essential it is to take the time to ensure safety first.
Another lesson learned was the importance of checking for wiring damage before assuming an outlet simply needs replacing. One homeowner faced frequent issues with outlets losing power. It turned out the problem was a loose connection inside the wall that was affecting the wiring, not just the outlet itself. This was a good reminder that sometimes the problem isn’t as simple as it seems, and it might be more beneficial to seek professional help for complex issues.
Lastly, one homeowner decided to replace all the outlets in their kitchen after experiencing several issues with their outlets not holding plugs properly. This was especially concerning for appliances that drew high power. The replacement process wasn’t difficult, but it was time-consuming and required careful attention to detail. This experience taught them the importance of having functional outlets in critical areas like the kitchen, where appliance safety is paramount.
Conclusion
Fixing an electrical outlet by yourself can be a rewarding and cost-effective task, but it requires careful attention to safety. By following the right steps, using the proper tools, and understanding the signs of common problems, you can easily fix most outlet issues. However, if you encounter complex problems or feel unsure, it’s always best to consult a professional to avoid potential hazards. Remember, your safety is paramount, and no task is worth the risk of improper handling.
sapo: Discover how to fix an electrical outlet by yourself with this comprehensive guide. Learn the tools you’ll need, the steps to take, and when to call a professional for help. Keep your home safe and powered up!


