Table of Contents >> Show >> Hide
- Know What You’re Patching: Wall Type + Hole Type
- Tools and Materials
- Step-by-Step: How to Fill Small Nail Holes in Drywall
- What If the Hole Is Bigger Than a Nail Hole?
- Plaster Walls: Similar Steps, Slightly Different Vibe
- Wood Trim and Baseboards: Don’t Use Drywall Spackle
- Textured Walls: How to Make the Patch Disappear
- Avoid the Most Common Rookie Mistakes
- When to Call a Pro
- Real-World Experiences: Lessons From Patch-and-Paint Life (Extra )
- Conclusion
- SEO Tags
Nail holes are the wall’s way of saying, “Remember that gallery wall phase?” The good news: filling nail holes is one
of the easiest home repairs you can doif you treat it like a tiny finishing project, not a chaotic finger-painting
session with mystery paste.
This guide covers the right filler for the right wall, the exact steps that make patches disappear, and the small
“pro moves” (like priming properly) that keep your repair from glowing under sunlight like a badge of DIY shame.
Know What You’re Patching: Wall Type + Hole Type
Drywall (most common)
Drywall (gypsum board) is usually the easiest: small nail holes can be filled with spackle, sanded smooth, then
primed and painted. Drywall is also prone to “paper fuzz” if you sand too aggressively or if the hole tears the
facing papertotally fixable, but worth watching for.
Plaster walls (older homes)
Plaster is harder and sometimes slightly textured. Small nail holes still fill easily, but you’ll want a filler
that bonds well and doesn’t shrink too much. Sand lightlyplaster dust is extra fine and gets everywhere, including
into the very soul of your HVAC filter.
Wood trim (baseboards, door casing)
Nail holes in wood should be filled with wood filler or painter’s putty (not drywall spackle). Wood expands and
contracts; the right filler flexes and finishes cleanly.
Nail hole vs. screw/anchor hole
A nail hole (picture-hanging nail, brad, tiny pin) is usually small enough for spackle alone. A screw or anchor hole
is often wider, sometimes torn around the edges, and may need a stronger compound, a patch, or multiple coats.
Translation: if your hole looks like it could whistle, treat it like a “small patch,” not a “tiny hole.”
Tools and Materials
You don’t need a full contractor setup. You need the right basics:
- Spackle (lightweight is great for tiny holes; standard/heavier formulas can be tougher)
- Joint compound (optional, but useful if you’re doing lots of holes or slightly larger repairs)
- Putty knife (2″–4″ for nail holes; wider is easier to feather)
- Fine sandpaper (around 120–150 grit for shaping, then 220 grit for finishing)
- Sanding sponge (handy for controlling edges)
- Utility knife (for trimming loose paper fuzz or raised edges)
- Clean rag or tack cloth (dust is the enemy of invisible repairs)
- Primer (spot primer or wall primer; crucial for an even finish)
- Matching paint + small brush/mini roller
- Optional: drywall texture touch-up (if your wall is orange peel/knockdown), dust mask
Step-by-Step: How to Fill Small Nail Holes in Drywall
This is the classic “nail hole from a picture frame” scenario. If you do these steps, the patch won’t telegraph
through your paint later.
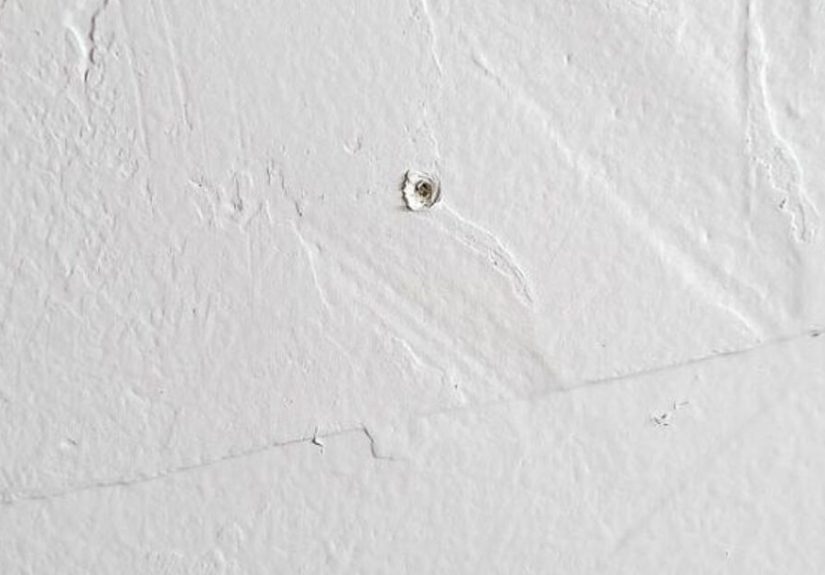
1) Prep the hole (30 seconds that saves 30 minutes)
- Remove the nail and inspect the hole. If there’s any loose crumbly drywall or lifted paper, gently
scrape it away. - Flatten raised edges. Sometimes the nail leaves a tiny “volcano rim.” Use the putty knife to knock
down the ridge, or lightly scrape with a utility knife. You want the surface flat before filling. - Dust off. Wipe the area with a dry rag so the filler bonds to the wall, not to a layer of drywall
dust (aka “DIY Teflon”).
2) Apply spackle the right way (thin coats win)
- Scoop a small amount of spackle with your putty knife. For a tiny nail hole, you need less than you thinkroughly
the size of a pea. - Press firmly into the hole to pack it. The goal is to fill the cavity, not just smear over the top.
- Scrape flush by holding the knife at a slight angle and pulling across the hole. Leave the thinnest
possible layer on the surface while keeping the hole filled. - Feather the edges out 1–2 inches so there’s no hard ridge. Think “soft ramp,” not “speed bump.”
Pro tip: If you overfill, don’t panic and don’t keep piling on. Let it dry and sand it flush. Trying to
perfect wet spackle for too long usually ends with a wider mess than you started with.
3) Let it dry completely (yes, actually)
Dry time depends on product, temperature, humidity, and how thick you applied it. Many lightweight spackles dry fast
for shallow holes, while deeper fills take longer. If it feels cool or squishy, it’s not ready. If you sand early,
it can gum up, tear out, and you’ll do a second repair… on your repair.
4) Sand smooth (with a light touch)
- Start with a sanding sponge or fine sandpaper (around 150 grit) to level the patch.
- Switch to 220 grit to blend the edges. The goal is a seamless transition into the wall, not a shiny polished crater.
- Wipe away dust with a clean, slightly damp rag (then let it dry). Dust left behind can cause paint texture issues.
5) Prime the patch (the “invisible finish” step)
Bare spackle is more porous than painted drywall. If you paint directly over it, you can get dull spots, flashing,
or a patch that shows at certain angles. A quick coat of primer evens out porosity so your topcoat dries uniformly.
If you’re repairing multiple holes, you may get a better blend by priming a slightly wider area.
6) Paint to blend (small roller beats tiny brush)
If you touch up with a brush only, you can leave a different texture (brush strokes) than the surrounding roller
texture. For best results:
- Use a mini roller for wall surfaces so the texture matches.
- Use the same sheen as the wall (flat, matte, eggshell, satin). Sheen mismatch is a patch’s favorite
way to reveal itself. - “Feather” the paint outward, and if the wall is older or sun-faded, consider painting the whole section from corner
to corner for a perfect match.
What If the Hole Is Bigger Than a Nail Hole?
Small screw holes or slightly enlarged nail holes
Use the same process, but expect two thin coats of filler. The first coat can shrink as it dries.
Apply coat one, let it dry, lightly sand, then apply a second skim coat and feather wider.
Anchor holes (the “why is this so wide?” moment)
If a plastic anchor came out and left a rough, wider cavity, you have options:
- For small anchor holes: Pack with a stronger spackle or joint compound in thin layers. Let dry, then
add a second coat if it shrinks. - For medium holes: A self-adhesive mesh patch plus compound can prevent cracking and help bridge the
opening. - For torn drywall paper: Trim fuzz, then seal with primer before your final paint. Otherwise, the
torn paper can swell and show through.
Nail pops (raised circles on the wall)
A “nail pop” is when a drywall fastener pushes out slightly, creating a bump or crack. The repair often involves
securing the drywall properly (sometimes adding a new fastener nearby), then filling and finishing the divot. If you
only cover the bump with spackle without stabilizing it, it may come back like a sequel nobody asked for.
Plaster Walls: Similar Steps, Slightly Different Vibe
For small nail holes in plaster, you can still fill, dry, sand, prime, and paint. The big differences:
- Sand lightly. Plaster can chip if you get aggressive, and the dust is extremely fine.
- Match texture. Many plaster walls have subtle wave or texture; feather wider and use a roller for
paint to blend. - Watch for cracks. If a “nail hole” is actually part of a hairline crack, you may need a flexible
approach (like reinforcing the crack) rather than just filling the dot.
Wood Trim and Baseboards: Don’t Use Drywall Spackle
For painted trim, use wood filler or painter’s putty:
- Clean the hole and remove loose paint chips.
- Press filler into the hole, slightly overfilling.
- Let dry, sand flush, wipe dust.
- Prime if needed, then paint (trim paint is often higher sheen, so prep matters).
If you’re staining wood (not painting), pick a stainable wood filler and test color on an inconspicuous area first.
“Stainable” can still mean “surprise!” depending on wood species and stain tone.
Textured Walls: How to Make the Patch Disappear
Texture is the reason your patch looks perfect… until the sun hits it sideways. Here’s how to keep texture consistent:
Orange peel (light bumpy texture)
- After sanding and priming, apply paint with a roller to recreate the stipple.
- If the wall has heavier orange peel, you may need a texture touch-up product. Practice on cardboard first and blend
lightly beyond the patch.
Knockdown
- You’ll likely need texture touch-up, then “knock down” at the right moment. Timing matterstoo wet and it smears,
too dry and it tears.
Heavily textured or specialty finishes
For dramatic textures, consider doing a slightly larger blended area rather than a tiny spot. Small, isolated repairs
can look like stickers on a textured surface. Blending is the secret.
Avoid the Most Common Rookie Mistakes
- Overfilling and leaving ridges: Your putty knife should leave a thin, feathered patchnot a raised
oval. - Sanding too hard: You can scuff surrounding paint or tear drywall paper. Light pressure, wide blend.
- Skipping primer: This is the fastest way to get a dull spot or visible patch after painting.
- Using the wrong sheen: Even perfect patches show if the finish doesn’t match.
- Touching up only with a brush on rolled walls: Texture mismatch is real. Mini roller = smoother blend.
When to Call a Pro
Filling nail holes is beginner-friendly. But consider professional help if:
- The wall has signs of moisture damage (stains, soft drywall, bubbling paint).
- You’re dealing with large holes, sagging drywall, or recurring cracks.
- You suspect lead paint in an older home and repairs involve sanding.
- You need a flawless finish on a high-gloss wall in strong natural light (those walls are brutally honest).
Real-World Experiences: Lessons From Patch-and-Paint Life (Extra )
If you’ve ever moved out of a rental, you know the special kind of panic that sets in when you finally take everything
off the walls and realize your living room now resembles Swiss cheese. I’ve seen people try to fix 30+ nail holes in
one evening with three tools: toothpaste, optimism, and a paper towel. (Spoiler: toothpaste is not spackle. Also,
peppermint-scented walls are not a known design trend.)
Here are a few “field notes” that come up again and again when real people do real patch jobs:
1) The smallest holes demand the most restraint. The weird truth is that tiny nail holes are easy to
fill but easy to overwork. The moment you start smearing extra spackle “just to be safe,” your repair area grows from
a pinhead to a golf ball. The best-looking patches usually come from one firm press into the hole and one clean scrape
flushdone. Walk away. Let it dry. Don’t keep fiddling like you’re trying to unlock a secret level.
2) Two coats beats one thick coat almost every time. On a wall with lots of little holes, a thin first
pass can shrink slightly. People often notice the tiny dip only after priming (when light hits it differently). A quick
second skim coat fixes that without creating a ridge. This is especially true for holes that were slightly enlarged by
removing a nail at an angle (we’ve all yanked a nail like we’re starting a lawnmower).
3) “It looks fine” is not the same as “it will look fine after paint.” Many patches look perfect while
they’re still raw. Then paint goes on and suddenly the repair shows as a dull spot or a different texture. That’s why
priming mattersand why using a mini roller for touch-ups is a game-changer. The roller recreates that subtle wall
texture you never noticed until it was missing.
4) Lighting is your harshest critic. A patch might disappear at night, then show up at 9:00 a.m. when
sunlight rakes across the wall. One trick that helps: after sanding, shine a flashlight along the wall at a low angle.
If you see a ridge or dip then, you’ll see it later with daylight too. Fix it before primer and paint lock it in.
5) Texture matching is more art than scienceand that’s okay. On lightly textured walls, you can often
get away with good feathering plus roller texture. On heavier orange peel or knockdown, a tiny patch may always look a
little “too smooth.” The best results come from blending a slightly larger area and letting the final roller pass unify
the surface. If you try to keep everything microscopic, the patch can end up looking like a smooth sticker on a bumpy
background.
The most satisfying part is the final moment: you step back, squint dramatically like a home-renovation judge, and
realize you genuinely can’t find the repair anymore. That’s when you get to say the magic words: “No one will ever
know.” (Except you. You will always know. But you will also be okay.)
Conclusion
Filling nail holes is simple, but doing it invisibly takes a few smart habits: prep the edges, use thin coats,
sand lightly, wipe dust, prime to level porosity, then paint in a way that matches your wall’s texture and sheen. Do
that, and your wall goes back to looking like a wallnot a memory board for every frame you’ve ever hung.