Table of Contents >> Show >> Hide
- What Is a Windows XP Repair Install?
- Before You Start: What You Need
- How to Do a Windows XP Repair Install: 13 Steps
- Step 1: Back Up Anything You Cannot Afford to Lose
- Step 2: Confirm You Have the Right Windows XP CD
- Step 3: Check the BIOS Boot Order
- Step 4: Boot From the Windows XP CD
- Step 5: Press F6 Only If You Need Special Storage Drivers
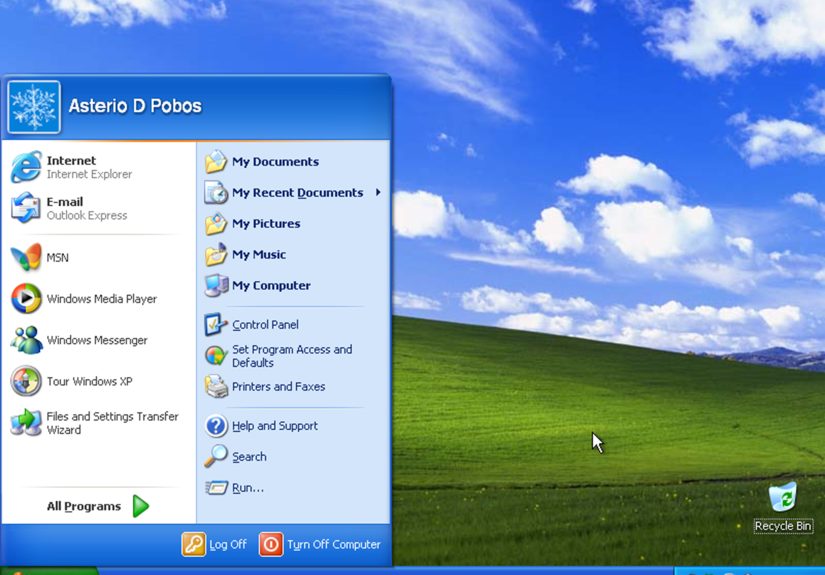
- Step 6: At the First Setup Screen, Press Enter Not R
- Step 7: Accept the License Agreement
- Step 8: Select the Existing Windows XP Installation
- Step 9: Press R to Start the Repair Install
- Step 10: Let Setup Copy Files and Restart the Computer
- Step 11: Complete the On-Screen Setup Prompts
- Step 12: Log In and Reinstall Updates, Service Packs, and Drivers
- Step 13: Test the System and Fix Leftover Problems
- Common Problems During a Windows XP Repair Install
- Is a Repair Install Better Than a Clean Install?
- Important Security Note About Windows XP
- Final Thoughts
- Real-World Experience With a Windows XP Repair Install
There are few sounds in retro computing more dramatic than an old Windows XP machine coughing, sputtering, and then refusing to load properly. One minute it is opening spreadsheets like it is 2004. The next minute it is throwing file errors, rebooting in circles, or acting like the Start menu has entered witness protection. That is where a Windows XP repair install can save the day.
A repair install is basically Windows XP saying, “Let me put myself back together without throwing away your personal files and installed programs.” It is not a miracle cure for every broken PC, and it is definitely not the same thing as a clean install. But when system files are damaged, startup is flaky, or Windows has become unstable after driver trouble or a messy shutdown, this old-school fix can still be useful on legacy machines.
In this guide, you will learn exactly how to do a Windows XP repair install in 13 steps, what to do before you start, what can go wrong, and what to check when the repair is finished. If you are working on a vintage desktop, an industrial machine, or that one office computer nobody has had the courage to replace, this walkthrough is for you.
What Is a Windows XP Repair Install?
A Windows XP repair install is an in-place reinstallation of the operating system. It replaces core Windows files while trying to keep your documents, installed software, and basic settings intact. Think of it as replacing the frame of the house while leaving most of the furniture where it is.
This process can help if:
- Windows XP will not boot correctly
- Important system files are missing or corrupted
- Startup errors appeared after a crash or forced shutdown
- Drivers or updates damaged the operating system
- The system is unstable but you want to avoid a full reinstall
It may not be the right solution if the hard drive is failing, the system is badly infected with malware, or the XP installation media does not match the edition or service pack level already installed. In those situations, a clean install or drive replacement may be the more realistic path.
Before You Start: What You Need
Before jumping into Setup like it is a hero scene from a 2000s tech movie, gather the basics:
- A bootable Windows XP installation CD
- The correct edition of XP, such as Home or Professional
- Ideally the same or newer service pack level as the installed copy
- Your Windows XP product key, just in case Setup asks for it
- Backups of important files if the system is still accessible
- Any special storage drivers if the PC uses older RAID or SATA hardware
Also, note one very important gotcha: if the system had a later version of Internet Explorer installed over the original XP version, a repair install can break Internet Explorer unless that newer version is handled first. On a true legacy machine, that detail matters more than you might expect. Yes, even old software can be dramatic.
How to Do a Windows XP Repair Install: 13 Steps
Step 1: Back Up Anything You Cannot Afford to Lose
A repair install is designed to preserve data, but “designed to” and “guaranteed to” are not the same sentence. If the machine still boots in Safe Mode or lets you browse files, copy documents, photos, spreadsheets, and anything else important to an external drive, network share, or another computer.
Step 2: Confirm You Have the Right Windows XP CD
Your installation disc needs to match the existing Windows XP edition. If the computer runs XP Professional, use XP Professional media. If it runs XP Home, use XP Home media. Service pack level matters too. For example, if the installed system is on Service Pack 3 and your CD is older, the repair option may fail or create problems later.
Step 3: Check the BIOS Boot Order
Restart the computer and enter BIOS or the boot menu. Make sure the CD or DVD drive is set before the hard drive in the boot order. Otherwise the PC will ignore the disc and continue booting into the same broken installation, which is not helpful unless your goal is emotional repetition.
Step 4: Boot From the Windows XP CD
Insert the Windows XP CD and restart. When you see the prompt to Press any key to boot from CD, do it quickly. If you miss it, restart and try again. Windows Setup will load files and drivers, and this may take a few minutes.
Step 5: Press F6 Only If You Need Special Storage Drivers
Early in Setup, you may see a prompt telling you to press F6 to install a third-party SCSI or RAID driver. Most standard systems can ignore this. But if the machine uses a special storage controller and XP does not recognize the hard drive, you may need to supply the driver. This is especially common on older SATA or RAID setups.
Step 6: At the First Setup Screen, Press Enter Not R
This is the part that trips people up. The first screen gives you an option to press R for the Recovery Console. That is not the repair install you want. Instead, press Enter to start Windows XP Setup. The actual repair install option appears later.
Step 7: Accept the License Agreement
Read the Windows XP license screen if you are feeling nostalgic, then press F8 to accept it. Setup will continue scanning the hard drive for existing Windows installations.
Step 8: Select the Existing Windows XP Installation
Once Setup detects your installed copy of Windows XP, highlight it. On most home PCs, there will only be one option listed. If the drive contains multiple Windows installations, choose carefully. Repairing the wrong one is a fast route to confusion.
Step 9: Press R to Start the Repair Install
Now you finally press R. Setup will begin replacing Windows system files while keeping your programs and personal data in place. If you do not see a repair option here, that usually means one of three things: the CD does not match the installed copy, the installation is too damaged for Setup to recognize, or the disc is really a factory restore disc rather than a full XP setup disc.
Step 10: Let Setup Copy Files and Restart the Computer
Windows XP Setup will delete and replace necessary system files, copy installation files to the hard drive, and then reboot automatically. When the computer restarts, do not press a key if you see the boot-from-CD prompt again. Let the system continue from the hard drive so the repair process can move into the graphical installation phase.
Step 11: Complete the On-Screen Setup Prompts
During the next phase, Setup may ask for regional settings, language options, date and time, network choices, computer name, and sometimes the product key. Enter the requested information and keep moving. In many cases, this stage looks a lot like a normal XP installation, but under the hood it is repairing the existing system rather than wiping it.
Step 12: Log In and Reinstall Updates, Service Packs, and Drivers
Once Windows XP loads again, you are not done yet. A repair install usually rolls back many operating system updates and service pack files. That means you may need to reinstall Service Pack 3, run Windows Update if the machine is allowed online, and reinstall device drivers for video, audio, networking, or printers. If Internet Explorer behaves strangely after the repair, check whether the system had a later IE version installed before the process started.
Step 13: Test the System and Fix Leftover Problems
Open your regular programs. Check Device Manager for missing drivers. Make sure the network works. Test audio, printing, and attached peripherals. If Windows XP still refuses to behave, the problem may be deeper than damaged system files. At that point, you may be dealing with failing hardware, file system corruption, or an installation so broken that a clean install is the better answer.
Common Problems During a Windows XP Repair Install
Even when you do everything right, old systems like to improvise. Here are a few common problems:
- No repair option appears: The CD may not match the installed edition or service pack, or the system may be too damaged to detect properly.
- Hard drive not detected: The machine may need a third-party controller driver loaded with F6.
- Repair install loops or fails: The disc may be scratched, the drive may be bad, or the hard drive may have deeper errors.
- Internet Explorer stops working: This can happen when a later IE version was installed before the repair.
- System comes back but is missing updates: This is normal. XP often reverts to older system files after the repair process.
Is a Repair Install Better Than a Clean Install?
Sometimes yes, sometimes absolutely not. A repair install is better when you want to keep applications, user accounts, and local files in place while restoring system stability. It is especially useful on legacy business systems where reinstalling old software would be a headache the size of Nebraska.
A clean install is better when the system is infected, heavily corrupted, or packed with years of software clutter. It is also the better option when the hard drive has been replaced or the XP installation is beyond recognition.
Important Security Note About Windows XP
Windows XP is long out of support. That means even a perfectly repaired XP system is still not secure by modern standards. If this machine must remain in service, it is smartest to use it offline or on a restricted network whenever possible. A repair install can restore functionality, but it does not turn XP into a modern, safe operating system. Sadly, no wizard setting exists for that.
Final Thoughts
A Windows XP repair install is one of those classic troubleshooting moves that feels part surgery, part archaeology. Done correctly, it can revive a broken installation without forcing you to erase everything and start over. The key is using the right CD, selecting the right repair option at the right moment, and being prepared for post-repair cleanup like service packs, drivers, and updates.
If you are maintaining older hardware, industrial systems, or a sentimental PC from another era, knowing how to perform a Windows XP repair install is still a valuable skill. It is not glamorous, but neither is explaining to someone that their “totally fine yesterday” computer is now a decorative beige box.
Real-World Experience With a Windows XP Repair Install
If you have ever worked on an old Windows XP machine, you already know that no two repair jobs feel exactly the same. On paper, the process is straightforward: boot from the disc, choose Setup, select the existing installation, and repair it. In real life, there is usually at least one surprise waiting behind the next reboot.
One common experience is that the repair install works beautifully right up until the machine loads into Windows again and half the drivers seem to have taken a coffee break. The display may come back in a chunky low resolution, the network card may vanish, and the sound may disappear like it owes somebody money. That does not always mean the repair failed. It often just means XP restored older core files and now needs drivers or updates reinstalled to get back to normal.
Another familiar scenario happens on systems that were upgraded over time. Maybe the computer started with XP Service Pack 1, later moved to SP2, and finally landed on SP3. Then someone tries a repair install with an older disc they found in a drawer labeled “important computer stuff.” The result can be confusion, missing repair options, or a repaired system that rolls back farther than expected. This is why matching the service pack level matters so much. Old Windows media is picky in the same way an old printer is picky: for reasons that feel personal.
There is also the emotional side of working on legacy computers. People often attempt a repair install because the machine runs a single old program that nobody wants to replace, or because it stores years of files in folders with names like “Do Not Delete Final Final.” In those moments, a repair install can feel less like a technical task and more like a rescue mission. When it works, it is incredibly satisfying. The system boots, the desktop appears, and suddenly that old XP wallpaper feels like a trophy.
At the same time, experience teaches caution. If a hard drive is clicking, if Setup throws repeated file copy errors, or if the machine keeps crashing even after the repair, it is usually a sign that the operating system is not the only problem. Hardware faults, failing RAM, or a dying drive can make a repair install look ineffective when the real issue lives deeper down. In those cases, the smartest technicians back up the data first, test the hardware, and avoid trusting a temporary recovery as a permanent fix.
The biggest lesson from real-world XP repair work is simple: be patient, be methodical, and do not mistake “booted once” for “fully repaired.” A successful repair install is really the start of a cleanup phase. You still need to test devices, reinstall updates, confirm applications open correctly, and make sure the system is stable enough for whatever job it still has to do. Windows XP may be old, but it still demands respect. And occasionally, snacks.