Table of Contents >> Show >> Hide
- Why Water Changes Matter (It’s Not Just “Dirty Water”)
- How Often Should You Do a Water Changeand How Much?
- What You Need (A Quick Checklist That Prevents Chaos)
- Step-by-Step: A Safe Freshwater Aquarium Water Change
- Step 1: Wash your hands (and skip lotions)
- Step 2: Turn off/unplug equipment that can run dry
- Step 3: Do a quick visual check
- Step 4: Optionalscrape algae first
- Step 5: Start the siphon and vacuum the substrate (gently)
- Step 6: Remove the right amount of water
- Step 7: Use the removed tank water for filter rinsing (if needed)
- Step 8: Prepare replacement water (temperature + conditioner)
- Step 9: Refill the tank slowly (avoid sandstorms and fish panic)
- Step 10: Restart equipment (heater last)
- Step 11: Final check (fish behavior + leaks + temperature)
- Special Situations: When “Normal Advice” Needs Tweaking
- Common Mistakes (That Make Fish Side-Eye You)
- Pro Tips to Make Water Changes Easier (So You Actually Do Them)
- Conclusion: Safe Water Changes Are Boringand That’s the Goal
- Real-World Water Change Experiences & Lessons (500+ Words)
Water changes are the unglamorous chore that quietly keeps your aquarium from turning into a tiny, glass-walled
crime scene. They’re also one of the few aquarium tasks where you can do everything “basically right” and still
stress your fish if you rush, skip dechlorinator, or forget your heater is still plugged in (ask your future
self how that went).
This guide walks you through a safe freshwater aquarium water change step-by-stepwhat to do,
what not to do, how much water to replace, and how to keep fish stress low. You’ll also get specific
examples, troubleshooting, and real-world lessons at the endbecause nothing teaches faster than “Oops.”
Why Water Changes Matter (It’s Not Just “Dirty Water”)
In a freshwater tank, waste doesn’t disappearit transforms. Fish poop, uneaten food, and decaying plant bits
break down into ammonia, then nitrite, then nitrate as your beneficial bacteria do their job (the nitrogen cycle).
In an established aquarium, ammonia and nitrite should be kept at zero, but nitrate keeps accumulating.
A water change is the simplest, most reliable way to:
- Dilute nitrate and other dissolved pollutants that filters don’t fully remove.
- Remove fine debris trapped in the substrate (where it loves to rot in peace).
- Replenish minerals and stabilize water chemistry over time.
- Reduce yellowing water, odors, and that “my tank looks tired” vibe.
Think of it like airing out a room. Your filter is the HVAC system; your water change is opening the windows.
Both helptogether they’re magic.
How Often Should You Do a Water Changeand How Much?
There isn’t one perfect schedule because tanks aren’t identical. Your ideal routine depends on stocking level,
feeding, plants, filtration, and tank size (small tanks swing faster). Still, most healthy freshwater community
tanks do well with regular partial water changesnot full drain-and-refill events.
A practical baseline (then adjust)
- Lightly stocked tanks: 10–20% weekly, or 20–30% every 2 weeks.
- Heavily stocked tanks: 20–30% weekly (sometimes more if nitrates climb).
- New tanks or messy eaters: smaller changes more often beats huge, occasional changes.
Use nitrate as your “thermostat”
If you want a smarter plan than “every Sunday because vibes,” use a test kit. Track nitrate before your water
change for a few weeks. If nitrate is creeping up, increase either frequency or
percentage. Your goal is stability: fish prefer consistent, boring water over dramatic “spa day”
chemistry swings.
Example schedules (realistic and safe)
Example 1: 20-gallon community tank (tetras, corys, live plants, moderate feeding)
- Weekly: 20% water change + light gravel vacuum (rotate sections)
- Monthly: rinse filter sponge in removed tank water
Example 2: 5-gallon betta tank (heater + filter, light plants)
- Weekly: 30–40% water change (small tanks foul faster)
- Spot-clean: remove uneaten food daily if needed
What You Need (A Quick Checklist That Prevents Chaos)
Before you start, gather your gear. This is the aquarium version of “mise en place”except instead of onions,
you’re juggling hoses, buckets, and your dignity.
Must-haves
- Gravel vacuum / siphon: removes water while lifting debris from substrate.
- Dedicated bucket: aquarium-only. Never used for cleaners, soap, or mop water.
- Water conditioner (dechlorinator): neutralizes chlorine/chloramine and helps protect fish.
- Thermometer: to match replacement water temperature.
- Algae scraper or clean sponge: optional, but handy before the change.
- Towel(s): because water always finds the floor.
Nice-to-haves
- Hose attachment / water change system: life-changing for larger tanks.
- Water test kit: helps you adjust your schedule logically.
- Clip or siphon holder: keeps the hose from escaping the bucket like a startled snake.
Step-by-Step: A Safe Freshwater Aquarium Water Change
The safest water change is calm, measured, and predictable. The goal is to remove old water and waste while
keeping temperature and chemistry swings small.
Step 1: Wash your hands (and skip lotions)
Rinse hands and forearms with plain waterno soap residue, no sanitizer, no scented lotion. Aquariums are
sensitive systems, and fish are basically living pH strips with opinions.
Step 2: Turn off/unplug equipment that can run dry
Unplug the heater and anything that might run without water (some filters can be left running,
but many hobbyists unplug to be safe). A heater exposed to air can crack or overheat fast. Also: electricity and
splashing are not a cute combo.
Step 3: Do a quick visual check
Look for fish acting weird (gasping, clamped fins), equipment issues (filter flow slowed), or obvious debris
traps. This helps you decide if you need a gentle vacuum or a more thorough one.
Step 4: Optionalscrape algae first
If you scrape algae now, the water change will remove some of the floating bits. Don’t go on a rage-cleaning
spree; just tidy the front glass so you can see your fish judging you.
Step 5: Start the siphon and vacuum the substrate (gently)
Place the gravel vacuum in the tank and the hose end in your bucket (or to a drain). Start the siphon according
to your siphon type. Once flowing, push the vacuum into the gravel and lift slightly so debris rises and gets
carried out while gravel falls back down.
- Gravel tanks: vacuum in sections; you don’t need to deep-clean every inch every time.
- Sand tanks: hover slightly above the surface to lift waste without sucking sand.
- Planted tanks: avoid yanking near roots; lightly skim open areas.
Step 6: Remove the right amount of water
Aim for your planned percentage (e.g., 20–30%). If you don’t know your percentages, a simple trick is to mark
the outside of the tank with removable tape at “full” and your target “stop” line.
Step 7: Use the removed tank water for filter rinsing (if needed)
If your filter sponge/pad is clogged and flow is reduced, rinse it in the bucket of old tank water (not under
hot tap water). You’re removing gunk while being kind to the beneficial bacteria living on the media.
Don’t replace all filter media at once unless it’s literally disintegrating. Many filter “cartridges” are sold as
monthly replacements, but replacing everything at the same time can reduce biological filtration and destabilize
the tank.
Step 8: Prepare replacement water (temperature + conditioner)
This is where safety lives. Your replacement water should be:
- Dechlorinated (chlorine/chloramine can harm fish and beneficial bacteria).
- Temperature-matched as closely as possible (sudden swings stress fish).
- Similar in chemistry (avoid wild pH/hardness jumps when possible).
If you’re using a bucket: fill it with tap water, match temperature using a thermometer, then add water
conditioner based on the amount of new water you’re adding (follow your product’s label).
If you’re filling directly from the tap with a hose system: add conditioner in a way that ensures the water is
treated as it enters the tank (many aquarists dose the tank volume or dose to cover incoming waterfollow your
conditioner’s directions and use common sense).
Step 9: Refill the tank slowly (avoid sandstorms and fish panic)
Pour the new water in gently. A simple trick: pour onto a clean plate, bowl, or your hand to diffuse the flow.
This prevents blasting substrate everywhere and turning your tank into a snow globe of regret.
Step 10: Restart equipment (heater last)
Once the tank is refilled to normal level:
- Restart the filter and confirm normal flow.
- Wait a few minutes to ensure the heater is fully submerged and water is circulating.
- Plug the heater back in.
Step 11: Final check (fish behavior + leaks + temperature)
Watch your fish for a minute. Normal: curious, active, maybe a little “what are you doing?” darting. Not normal:
gasping at the surface, extreme hiding, or frantic flashing. Check temperature and make sure there are no drips
from hoses, filters, or enthusiastic splashing.
Special Situations: When “Normal Advice” Needs Tweaking
1) New tanks (cycling)
In early weeks, your beneficial bacteria colony is still building. Avoid over-cleaning: don’t vacuum the entire
substrate deeply every time and don’t replace filter media aggressively. If ammonia or nitrite appears,
water changes are still your emergency brakejust keep changes moderate and consistent while you
address the root cause (overfeeding, overstocking, immature biofilter).
2) Shrimp tanks and sensitive species
Shrimp and some delicate fish can react strongly to parameter swings. The safest approach is
smaller, more frequent water changes with careful temperature matching. If your tap water varies
seasonally, consider pre-conditioning water in a container (and, if needed, using remineralized RO/DI water based
on your livestock’s needs).
3) Planted aquariums
Plants help consume nitrate, but they don’t automatically make water changes optional. Water changes still remove
dissolved organics and help keep the tank stable. Many planted tank keepers stick with regular partial changes and
adjust based on plant mass, feeding, and algae behavior.
4) Big tanks (55 gallons and up)
Big tanks are usually more stableuntil the water change becomes a full-body workout. Consider a hose-based water
changer or a pump system. The easier the routine is, the more consistently you’ll do itand consistency is what
your fish want most.
5) Well water, softeners, and “mystery tap water”
If you’re on well water or use a water softener, your water chemistry may be unusual. Test your tap water
occasionally (pH, hardness, nitrate). If your source water already has nitrate, you may need larger or more
frequent changes, live plants, or an alternative water source.
Common Mistakes (That Make Fish Side-Eye You)
Mistake 1: Doing a full drain-and-refill “cleaning”
Full water changes can destabilize a tank by causing big swings in temperature and chemistry, and by disrupting
beneficial bacteria habitats. Most routine maintenance should be partial changes.
Mistake 2: Forgetting dechlorinator
Chlorine and chloramine are added to municipal water to disinfect it. Great for humans, terrible for fish gills and
the bacteria your tank depends on. Conditioner is non-negotiable if your water contains disinfectants.
Mistake 3: Temperature mismatch
Fish can handle a tiny drift; they don’t love a surprise cold plunge. Always temperature-match replacement water as
closely as possibleespecially for tropical species.
Mistake 4: Cleaning everything at once
Scrubbing decor, deep-vacuuming all gravel, replacing filter media, and doing a huge water change in one session is
the aquarium version of renovating your kitchen during Thanksgiving dinner. Spread big tasks out.
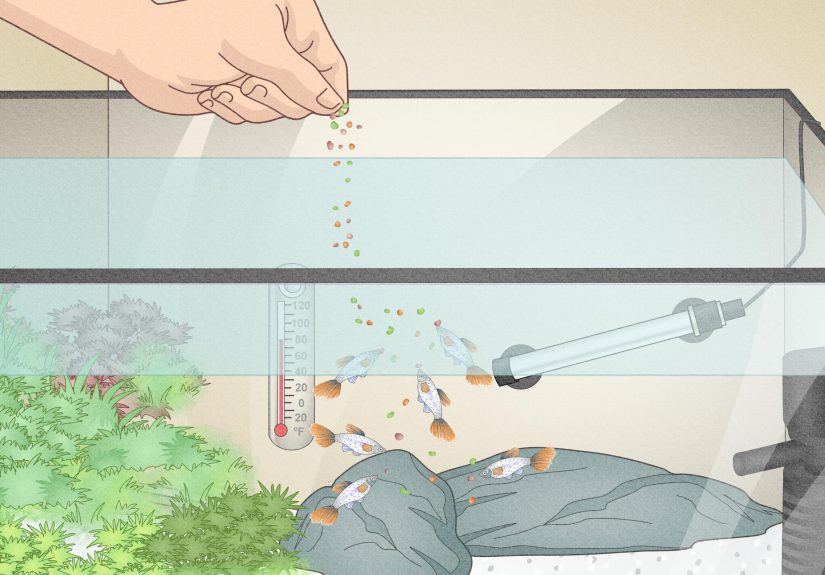
Mistake 5: Overfeeding right before (or after) a water change
Heavy feeding increases waste load. If you want an easy win, feed lightly the day of a water change. Your fish will
survive. They will also act like they won’t. Ignore the performance.
Pro Tips to Make Water Changes Easier (So You Actually Do Them)
- Make it a ritual: same day, same time, same checklist. Less thinking = fewer mistakes.
- Label your bucket: “AQUARIUM ONLY.” Dramatic? Yes. Effective? Also yes.
- Vacuum in zones: front-left this week, back-right next week. Cleaner substrate, less disruption.
- Keep conditioner with your tools: if it’s next to the siphon, you’re less likely to forget it.
- Track nitrates monthly: adjust schedule based on data, not guilt.
Conclusion: Safe Water Changes Are Boringand That’s the Goal
A safe freshwater aquarium water change is all about consistency: partial changes, treated water,
stable temperature, gentle substrate cleaning, and not nuking your filter media. When done right, your fish barely
noticeand your tank quietly thrives.
If you remember only three things, make them these: dechlorinate, match temperature,
and stick to partial changes. Everything else is just optimization (and fewer wet socks).
Real-World Water Change Experiences & Lessons (500+ Words)
The first time I did a “confident” water change, I learned a timeless truth: confidence is not a substitute for
gravity. I had the siphon flowing beautifullylike a professional aquarist in an inspirational montageuntil the
bucket filled up faster than my brain could process. I looked away for two seconds (two!) and suddenly my floor
had its own freshwater aquarium. The fish were fine. The carpet developed opinions.
Lesson #1: Never leave a running siphon unattended. Not to answer a text. Not to “just grab a towel.”
Not even to stare at your fish and whisper, “Don’t worry, this is for your own good.” If you need to step away,
pinch the hose, lift the siphon, or stop the flow.
Another time, I thought I was being extra responsible by deep-cleaning everything in one go: big water change,
vigorous gravel vacuum, scrubbed decor, andbecause I was on a rollreplaced the filter cartridge with a crisp new
one. The tank looked sparkling. For about twelve minutes. Then the water turned cloudy and the fish acted like
they’d just watched a plot twist they didn’t consent to. The problem wasn’t “dirty water.” It was that I removed
too much of the established biological balance at once.
Lesson #2: Don’t do “all the cleaning” on the same day. Spread tasks out. If you vacuum the gravel
thoroughly this week, just do a gentle filter rinse next week. If you must replace part of your filter media, do it
in stageskeeping established media in place so the bacteria population doesn’t crash.
Then there’s the classic: forgetting to unplug the heater. I once lowered the water level below the heater line
and kept siphoning because I was “almost done.” The heater made a tiny ticking sound, like it was politely asking
for help. I unplugged it immediately, waited, and replaced it laterbecause heaters that run dry can fail in
exciting, wallet-damaging ways.
Lesson #3: Unplug heaters before draining, and plug them back in only after they’re fully submerged
and the tank is refilled. It’s a two-second habit that can save you equipment and fish.
My favorite water-change upgrade wasn’t fancy chemicals or a high-tech gadgetit was simply learning to match
temperature with a thermometer instead of guessing by hand. “Feels about right” is what people say right before a
fish decides to sulk behind a plant for the next hour. Once I started matching within a couple degrees, fish stress
dropped noticeably. Feeding response stayed normal. No dramatic hiding. No frantic darting. Just calm, healthy
behavior.
Lesson #4: Consistency beats intensity. A 20% change every week with stable temperature and treated
water is safer than a sporadic 60% change fueled by guilt and panic.
And finally, the most quietly satisfying experience: using old tank water to rinse filter sponges. The first time I
did it, I was horrified by the color of the rinse waterlike someone brewed espresso with pond sediment. But the
filter flow improved, the tank stayed stable, and I didn’t feel like I’d “reset” the aquarium’s biology. It also
removed the temptation to over-clean. Your filter media doesn’t need to look brand new; it needs to work.
Lesson #5: Clean enough to restore flow, not enough to sterilize. Aquariums are living systems.
Your goal is a healthy ecosystem, not a laboratory beaker.
If you’re new to the hobby, water changes can feel like a big deal. After a few weeks, they become routinealmost
relaxing. Put on music, follow the same steps, and enjoy the weirdly satisfying moment when your tank looks clearer
and your fish go back to their normal lives: eating, exploring, and pretending you don’t exist unless food is
involved.