Table of Contents >> Show >> Hide
- Why Cleaning Kitchen Cabinets Matters
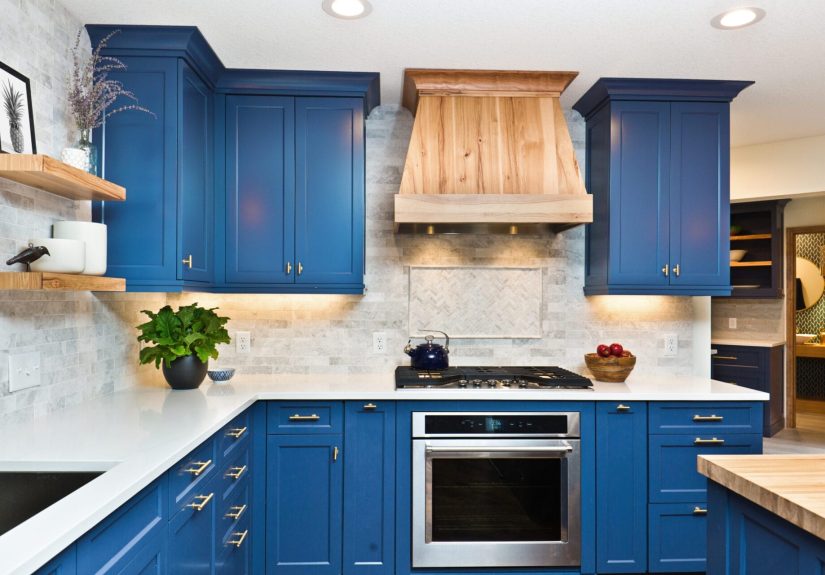
- Step One: Know Your Cabinet Finish
- What You’ll Need to Clean Kitchen Cabinets
- Everyday & Weekly Cleaning: The Simple Routine
- How to Deep Clean Kitchen Cabinets
- The Best Ways to Remove Grease from Kitchen Cabinets
- Cleaning Different Types of Kitchen Cabinets
- What Not to Use on Kitchen Cabinets
- How Often Should You Clean Kitchen Cabinets?
- Pro Tips to Keep Cabinets Cleaner Longer
- Real-Life Lessons from Cleaning Lots of Kitchen Cabinets
- Conclusion
Open your kitchen cabinets on any random Tuesday and you’ll probably find three things:
a half-empty box of pasta, a jar you forgot existed, and doors that feel just a tiny bit
sticky. Grease, dust, sauce splatters, and mystery fingerprints all team up to turn your
cabinets from “showroom fresh” to “please don’t look too closely.” The good news? With a
few simple tools and the right techniques, you can clean kitchen cabinets safely without
ruining the finish or spending your entire weekend scrubbing.
In this comprehensive guide inspired by the practical, no-nonsense approach of
This Old House, we’ll walk through everyday cleaning, deep-clean
routines, and targeted strategies for removing grease buildup from wood, painted, and
laminate cabinets. You’ll also learn what not to use (put down that steel wool!) and how
to keep your cabinets looking good for years to come.
Why Cleaning Kitchen Cabinets Matters
Cabinets are the unsung heroes of the kitchen. They’re constantly exposed to heat, steam,
cooking oils, food splatter, and fingerprints. Over time, airborne grease mixes with dust
and settles on cabinet surfaces, especially the doors, handles, and the tops of upper
cabinets. That sticky layer isn’t just unattractive; it can:
- Dull the finish or paint on your kitchen cabinets.
- Trap odors from cooking and food spills.
- Make future cleaning much harder as grease hardens over time.
- Attract more dust and grime, turning a light film into a stubborn mess.
Regularly cleaning kitchen cabinets keeps your kitchen looking polished, protects your
investment in cabinetry, and makes any future remodel much easier since you’re not
dealing with years of built-up gunk.
Step One: Know Your Cabinet Finish
Before you grab a cleaning product, take a moment to figure out what you’re actually
cleaning. Different finishes tolerate different cleaners:
-
Solid wood or wood veneer cabinets: Usually have a clear protective
topcoat (varnish, lacquer, or polyurethane). These prefer gentle cleaners and minimal
water. -
Painted cabinets: Typically factory-finished or professionally sprayed
with durable paint. They can handle mild soap and water but may show dull spots if you
scrub too aggressively. -
Laminate or thermofoil cabinets: More forgiving and moisture-resistant
but can peel if edges are soaked or exposed to strong chemicals. -
High-gloss or acrylic fronts: Show every streak and fingerprint; they
require soft cloths and non-abrasive cleaners. -
Glass-front cabinets: Need a combo of cabinet-safe cleaner for frames
and glass cleaner (or vinegar solution) for the panels.
When in doubt, test any cleaner on a hidden area inside a door or on the underside of a
cabinet before attacking the entire kitchen.
What You’ll Need to Clean Kitchen Cabinets
For most cabinet cleaning jobs, you can stick to a simple kit:
- Soft microfiber cloths (at least 3–4 per session).
- A small bowl or bucket of warm water.
- Mild dish soap (a grease-cutting formula is ideal).
- Soft sponge or non-abrasive scrub pad.
- Soft-bristled toothbrush or cleaning brush for crevices.
- Baking soda for stubborn spots.
- White vinegar for light degreasing (if safe for your finish).
- Optional: a cabinet-safe commercial degreaser, used according to label directions.
If you’re working with strong cleaners (like ammonia-based products or heavy-duty
degreasers), you’ll also want gloves and good ventilation. And no matter what you use,
never mix vinegar or ammonia with bleach.
Everyday & Weekly Cleaning: The Simple Routine
You don’t need to deep clean kitchen cabinets every week, but a quick wipe-down keeps
grease from building up. Think of this as brushing your cabinets’ teeth.
Quick Weekly Wipe-Down (5–10 Minutes)
-
Mix a mild solution. Combine warm water with a few drops of mild dish
soap in a bowl or bucket. -
Dip and wring. Dip a microfiber cloth into the soapy water, then wring
it out thoroughly. The cloth should be damp, not dripping. -
Wipe high-touch areas. Focus on cabinet doors, especially around
handles, pulls, and edges where your hands naturally land. -
Rinse and dry. Wipe again with a clean, damp cloth to remove soap
residue, then immediately dry with a soft towel to prevent water spots or swelling,
especially on wood cabinets.
Do this quick routine once a week (or at least every couple of weeks) and you’ll avoid
the dreaded “sticky film” that requires elbow grease and several podcasts’ worth of
scrubbing.
How to Deep Clean Kitchen Cabinets
Twice a yearor more often if you cook frequently or love fryingplan a deeper clean for
your kitchen cabinets. This targets the inside shelves, cabinet tops, and hinges where
dust and grease quietly collect.
Step-by-Step Deep Clean
-
Empty the cabinets. Remove dishes, food, and small appliances. This is
a great time to toss expired snacks and mystery jars from 2017. -
Vacuum or dust. Use a brush attachment to remove crumbs and loose
debris from shelves and corners. -
Clean interior surfaces. Wipe shelves and cabinet walls with your mild
dish soap solution, using a damp (not soaked) cloth. Rinse and dry thoroughly. -
Scrub crevices. Use a soft toothbrush dipped in the cleaning solution
to clean around hinges, hardware bases, and decorative trims. -
Clean cabinet tops. If the tops of your upper cabinets are exposed,
you’ll often find a sticky mix of grease and dust. Dish soap and warm water or a
vinegar-and-water solution (if your finish allows) works well. For heavy buildup, a
baking soda paste can help. -
Dry completely. Use a dry microfiber cloth to remove any remaining
moisture before putting items back.
After this deep clean, consider lining shelves with wipeable liners to make future
cleanups faster and less painful.
The Best Ways to Remove Grease from Kitchen Cabinets
Grease is the number one villain when it comes to kitchen cabinet cleaning. Fortunately,
you can tackle grease safely with a few proven methods that won’t destroy your finish.
Method 1: Warm Water and Dish Soap (First Line of Defense)
It’s boring, but it works. A solution of warm water and a few drops of grease-cutting
dish soap is safe for most finished wood, painted, and laminate cabinets.
- Mix warm (not scalding) water with 3–4 drops of dish soap in a bowl.
- Dip a soft cloth or sponge into the solution and wring it out well.
- Wipe the greasy areas in small circles, applying light pressure.
- Rinse with a clean, damp cloth to remove soap residue.
- Immediately dry the area with a microfiber cloth.
Most light-to-moderate grease will lift with this simple method. If you’re dealing with
long-neglected cabinets (hello, above the range), move on to a stronger option.
Method 2: Vinegar and Water (For Many Finished Surfaces)
A 50/50 mix of white vinegar and warm water is a classic degreaser that works on many
wood and laminate finishes. However, if your cabinets are unfinished wood, specialty
oiled wood, or very old, test in a hidden spot first. Vinegar’s acidity cuts through
grease without being as harsh as some commercial products.
- Mix equal parts white vinegar and warm water in a spray bottle.
- Lightly mist the cabinet surface or spray onto a cloth.
- Wipe in the direction of the wood grain if applicable.
- Follow with a damp cloth and then a dry cloth.
Method 3: Baking Soda Paste (For Stubborn Spots)
When grease has turned into a sticky, shiny patch that laughs at soap and water, baking
soda brings gentle abrasion to the party.
- Mix baking soda with a small amount of water to form a thick paste.
- Apply the paste to the greasy spot using your fingers or a soft cloth.
- Let it sit for a few minutes to loosen the grime.
- Gently rub with a soft cloth or spongeno heavy scrubbing.
- Wipe clean with a damp cloth and then dry thoroughly.
Use this method sparingly on delicate or high-gloss finishes, and always test first in an
inconspicuous area.
Method 4: Cabinet-Safe Commercial Degreasers
If DIY cleaners aren’t cutting it, you can use a commercial degreaser labeled as safe for
cabinets or finished wood. Always:
- Read and follow the label instructions carefully.
- Test on a hidden spot first.
- Use gloves and ventilate the kitchen.
- Rinse if the product requires it, and dry thoroughly.
Cleaning Different Types of Kitchen Cabinets
Wood Cabinets
For wood kitchen cabinets with a clear finish, the safest approach is warm water, mild
dish soap, and soft cloths. Avoid soaking the wood or letting water sit in seams or
panel grooves. Clean, rinse, and dry in small sections. If the finish looks dull after
cleaning, you can occasionally use a wood-specific cleaner or conditioner, but skip the
heavy wax buildup that can actually attract dust.
Painted Cabinets
Painted cabinets are fairly forgiving but can show shiny or dull patches if you scrub too
hard. Use the same mild soap-and-water routine and very soft cloths. For stains that
don’t respond to cleaning, sometimes a light touch-up with matching paint is better than
aggressive scrubbing that damages the finish.
Laminate or Thermofoil Cabinets
These surfaces are tough but don’t like extreme heat or harsh chemicals. Warm water and
dish soap, vinegar solutions, and gentle wiping are usually enough. Avoid picking at
peeling edges; cleaning won’t fix delamination, and you may need a repair or replacement
for badly damaged doors.
High-Gloss and Acrylic Fronts
High-gloss cabinets show streaks easily, so use very soft microfiber cloths and avoid
powders, pastes, or rough scrubbers. Work in small sections, and dry as you go to prevent
streaking.
Glass-Front Cabinets
Clean the frames with your standard cabinet cleaner, then treat the glass panels with a
vinegar-and-water mix or a glass cleaner applied to a cloth (not sprayed directly if
there are wood frames). Don’t forget to clean the inside of the glass where dust often
clings.
What Not to Use on Kitchen Cabinets
A lot of cabinet damage comes from using the wrong tools and products, not from dirt
itself. To protect your cabinets:
-
Avoid abrasive pads or steel wool. These can scratch finishes and
paint, leaving dull patches and permanent damage. -
Skip harsh scouring powders. They may clean fast but are too rough
for most cabinet surfaces. -
Be cautious with “magic” eraser sponges. These are micro-abrasive and
can remove sheen or even paint if used aggressively. -
Don’t soak your cabinets. Excess water can cause swelling, warping,
or peeling over time. -
Never mix ammonia or vinegar with bleach. This creates dangerous
fumesabsolutely off-limits.
How Often Should You Clean Kitchen Cabinets?
How often you clean depends on how you cook, but as a general guideline:
- Weekly: Quick wipe-down of doors, handles, and high-splash areas.
-
Every 1–3 months: More detailed degreasing near the range and hood,
plus a wipe of cabinet sides and undersides. -
Twice a year: Full deep clean, including emptying cabinets, cleaning
shelves, and wiping cabinet tops.
If you cook a lot of fried or oily foods, you might bump those timeframes up. Your nose
and your fingers (if everything feels sticky) are pretty good indicators that it’s time.
Pro Tips to Keep Cabinets Cleaner Longer
-
Use the range hood fan. Turn it on every time you cook to pull grease
and steam away from cabinet surfaces. -
Wipe spills immediately. Tomato sauce is easier to clean today than
next week. -
Keep hands clean. Washing your hands after handling oil or raw meat
reduces greasy fingerprints on handles. -
Line shelves and drawers. Shelf liners catch crumbs and spills and are
much easier to replace than cabinet interiors. -
Pay attention to cabinet tops. If your cabinets don’t go to the
ceiling, place washable trays or parchment up top so you can remove and clean instead
of scrubbing sticky dust annually.
Real-Life Lessons from Cleaning Lots of Kitchen Cabinets
Cleaning kitchen cabinets might sound straightforward, but anyone who has tackled a
seriously greasy kitchen knows there’s an art (and a bit of strategy) involved. Over
time, a few patterns and “aha” moments pop up that can save you a lot of frustration.
First, you quickly learn that hotter water and patience beat brute force
almost every time. When you’re staring at a shiny orange ring of old grease above the
stove, it’s tempting to reach for the harshest cleaner you own and scrub like you’re
training for a cleaning Olympics. In reality, letting a warm, soapy cloth sit against the
spot for a minute or two so the grease softens usually works betterand doesn’t risk
stripping the finish.
Second, it becomes obvious that handles and edges are the dirtiest places
in the entire kitchen. People often focus on the large, flat surfaces of cabinet doors,
but the real grime party happens right where fingers land. On some older wood cabinets,
you can almost “see” the history of late-night snack runs in the darker patches around
knobs. Spending an extra minute or two with a toothbrush around these areas makes the
whole kitchen look sharper, even if you didn’t scrub every square inch.
Third, there’s the emotional journey of cleaning cabinet tops. If your cabinets stop
short of the ceiling, the top surface is usually a mystery zone. The first time you climb
up there with a flashlight, you may discover what can only be described as fossilized
grease dust. Don’t panic. A gentle degreaser, plenty of paper towels or old rags, and a
little humor go a long way. Once it’s clean, laying down removable liners or parchment
means the next deep clean is as easy as pulling up the liner instead of chiseling away at
goo.
Another big lesson is that not all “miracle” cleaning hacks are cabinet-friendly.
Online, you’ll see people swear by everything from oven cleaner to undiluted ammonia on
cabinets. While those products have their place, they can be overkill for wood or painted
finishes. Many homeowners discover the hard way that overly aggressive products leave
dull patches, cloudy spots, or peeling edges. Sticking with the boring basicsmild dish
soap, water, diluted vinegar, and gentle pressureusually gives you 95% of the results
with none of the regret.
It’s also surprisingly motivating to tackle cabinets in small, manageable zones
instead of trying to deep clean the whole kitchen in one day. Choose one section, like
the cabinets around the stove, and get those looking great. The visual payoff encourages
you to move on to the next section. When you break it up over a few days, it feels less
like punishment and more like a series of quick wins.
Finally, the biggest long-term takeaway from repeated cabinet cleaning sessions is that
maintenance is everything. The kitchens that stay looking good aren’t
the ones that get a marathon cleaning once every few yearsthey’re the ones where
someone wipes cabinet doors weekly, turns on the vent fan while cooking, and cleans up
splatters when they happen. Five minutes here and there will save you hours later and
help your cabinets look closer to “just installed” than “just survived a decade of
spaghetti night.”
When you bring all of these experiences togetherthe gentle products, smart routines, and
a realistic scheduleyou get exactly what a This Old House–style approach is all about:
practical, repeatable habits that keep your kitchen functional, comfortable, and
genuinely pleasant to cook in. Your future self, and your cabinets, will definitely
thank you.
Conclusion
Cleaning kitchen cabinets doesn’t require fancy tools or harsh chemicalsjust a basic
understanding of your cabinet finish, a dependable routine with mild cleaners, and a few
smart strategies for handling grease. Whether you’re doing a quick weekly wipe-down or a
full deep clean, gentle methods protect the finish, extend the life of your cabinets, and
keep your kitchen looking bright and inviting. Start small, be consistent, and soon
“sticky cabinet doors” will be one kitchen problem you can officially cross off the list.