Table of Contents >> Show >> Hide
- What Is a Fence Post Plant Hanger (and Why Build One)?
- Pick Your Style: Three Fence Post Plant Hanger Designs
- Materials and Tools
- Plan the Size (So It Doesn’t Lean Like It’s Tired)
- Step-by-Step: How to Build a Fence Post Plant Hanger
- Step 1: Choose the location (and think like a plant)
- Step 2: Select the right wood (ground-contact matters)
- Step 3: Cut the post to height
- Step 4: Cut the hanger arm and brace
- Step 5: Pre-drill and dry-fit the top assembly
- Step 6: Attach the arm and brace securely
- Step 7: Add the hook (and aim for balance)
- Step 8: Dig the hole
- Step 9: Set the post (concrete or compacted gravel)
- Step 10: Finish and protect the wood
- Optional Upgrades That Make It Look “Store-Bought”
- Hanging Basket Success: Keep Your Plants Alive and Showing Off
- Troubleshooting: Fix the Common Problems
- Cost, Time, and Difficulty
- Wrap-Up: A Small Build With Big Curb Appeal
- Field Notes: Real-World “Experience” Tips DIYers Learn Fast (Extra)
If your porch or patio feels like it’s missing something, it’s probably this: a thriving hanging basket gently swaying in the breeze, making your place look like you definitely have your life together.
A fence post plant hanger is one of those deceptively simple DIY projects that delivers big “wow” for not much moneyplus it gives your plants a dedicated stage so they stop auditioning for “Leaning Tower of Petunia.”
This guide walks you through a sturdy, classic build using a ground-set 4×4 post and a strong hanger arm. You’ll also get design options, hardware tips for outdoor durability, and plant-care advice so your baskets look great long after the sawdust settles.
What Is a Fence Post Plant Hanger (and Why Build One)?
A fence post plant hanger is a vertical postoften a 4x4installed in the ground (or mounted to an existing fence post) with an arm and hook that holds one or more hanging baskets. It’s basically a mini “plant signpost” that can:
- Add height and visual interest to flat spaces (like fences and walkways).
- Keep baskets off railings (and away from curious pets, kids, or rogue soccer balls).
- Create flexible seasonal decor (flowers in spring, ferns in summer, mums in fall).
- Boost curb appeal near a mailbox, gate, patio corner, or garden bed.
Pick Your Style: Three Fence Post Plant Hanger Designs
1) The Classic “L-Arm” Hanger (recommended)
One post, one horizontal arm, one diagonal brace. This is the sweet spot of strong, simple, and easy to build with basic tools.
2) The “T-Top” Double Hanger
Add a crosspiece at the top to hang two baskets (one on each side). Great for symmetryjust remember you’re doubling the wind load too.
3) The Fence-Mounted Bracket Version
If you already have a sturdy fence post, you can attach a bracket or a short arm directly to it. This avoids digging, but your fence post must be solid and not wobbly.
Materials and Tools
Materials (typical single-hanger build)
- One 4×4 pressure-treated post rated for ground contact (often sold as an 8-foot or 10-foot post).
- One 2×4 (or 2×6 if you want a beefier arm) for the hanger arm and brace.
- Exterior-rated fasteners: hot-dipped galvanized or stainless screws/bolts suitable for treated lumber.
- One heavy-duty hook (screw-in hook) or eye bolt with washers and nut.
- Gravel for drainage at the bottom of the hole.
- Concrete mix (optional but recommended for a long-lasting, rigid post).
- Optional: decorative post cap, exterior wood stain/sealant, S-hook/chain, rubber bumpers to reduce basket sway.
Tools
- Measuring tape, pencil, speed square
- Level (2-foot level is great; a small torpedo level also helps)
- Post hole digger and/or shovel (an auger makes life easier)
- Drill/driver + drill bits (including a bit sized for pre-drilling)
- Saw (circular saw or miter saw)
- Clamps (nice to have)
- Safety gear: eye protection, gloves, hearing protection
Safety note: Cutting and drilling are normal DIY tasks, but they can bite. Wear eye protection, keep fingers away from blades, and if you’re a teen DIYer, build with a responsible adult nearbyespecially for digging and power tools.
Plan the Size (So It Doesn’t Lean Like It’s Tired)
Before you cut anything, decide your height and reach. A practical target is:
- Above-ground height: about 5 to 6 feet (enough clearance to walk under the basket).
- Arm length: 18 to 24 inches for a standard 10–14 inch basket.
- Post length: usually 8 feet total for most yards, or 10 feet if you want extra height or need deeper burial.
Remember: a hanging basket is heavier than it looksespecially after watering. Add wind, and your hanger becomes a tiny sailboat mast. Strong joints and a stable post are the whole game.
Step-by-Step: How to Build a Fence Post Plant Hanger
Step 1: Choose the location (and think like a plant)
Pick a spot that gets the light your basket plants need. Most flowering baskets want bright light (often 6+ hours of sun), while ferns prefer shade. Also check:
- Walking paths (don’t hang a basket where people will headbutt it).
- Sprinklers/hoses (easy watering is a gift from Past You).
- Underground utilities (call your local utility-locating service before digging).
- Wind exposure (corners and open yards can be rough on baskets).
Step 2: Select the right wood (ground-contact matters)
If your post will be buried, it should be pressure-treated lumber rated for ground contact (often associated with a “UC4A” use category). This is the right kind of treatment level for posts that live in soil and moisture. Choosing the proper rating helps the post last much longer outdoors.
Step 3: Cut the post to height
A common layout for an 8-foot post:
- 24 to 30 inches below grade (more if your frost line is deep)
- 60 to 66 inches above grade
Cut the post square. If you’re adding a decorative cap, you can keep the top clean and flat for an easy fit.
Step 4: Cut the hanger arm and brace
For a straightforward, strong build:
- Arm: 2×4, about 20–24 inches long.
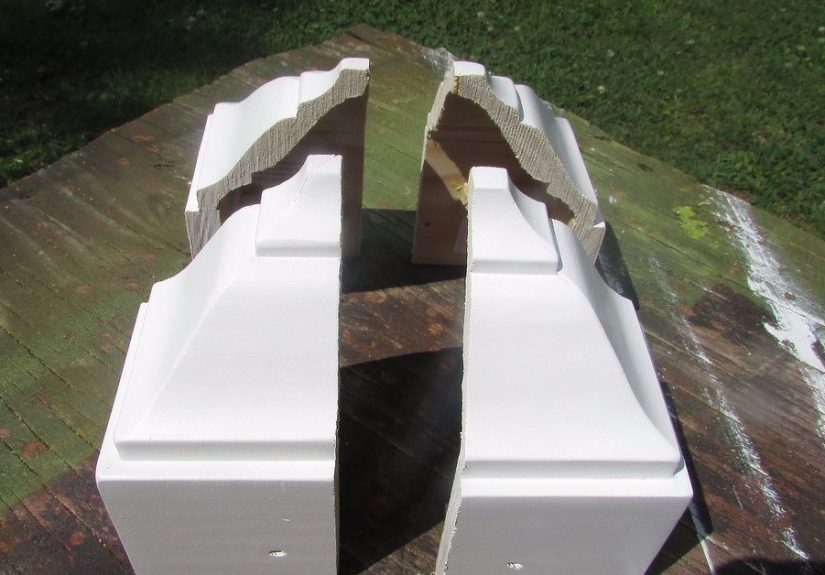
- Brace: 2×4, about 16–20 inches long with 45° cuts on both ends (so it forms a neat diagonal support).
The brace is the unsung hero. Without it, your arm will slowly sag over timelike a shelf that’s been holding encyclopedias since 1997.
Step 5: Pre-drill and dry-fit the top assembly
Outdoor wood splits most often near ends and edges, so pre-drilling is worth the extra minute. Dry-fit the pieces like this:
- Arm sits near the top of the 4×4, projecting outward.
- Brace runs from the underside of the arm down to the post, making a rigid triangle.
Fastener tip: When working with pressure-treated lumber, use hardware designed for exterior treated woodcommonly stainless steel or hot-dipped galvanized fasteners. Avoid cheap indoor screws unless you enjoy surprise rust stains as a decorating style.
Step 6: Attach the arm and brace securely
A reliable approach is:
- Fasten the arm to the post with two to three exterior structural screws (or lag bolts with washers).
- Fasten the brace with two screws into the arm and two into the post.
Keep everything square and level while you fasten. If the arm tilts up or down, your basket will advertise it every time you walk past.
Step 7: Add the hook (and aim for balance)
You have two common options:
- Heavy-duty screw hook: Easy and fast. Pre-drill a pilot hole and screw it in at the end of the arm.
- Eye bolt: A little more “hardware store serious,” and very strong. Drill through the arm, add washers, and tighten the nut.
Position the hook near the end of the arm, but leave at least 1–2 inches of wood beyond the hole so you don’t weaken the tip.
Step 8: Dig the hole
A common rule for post depth is about one-third of the post length underground, plus extra room for a gravel base. Many DIY instructions also note that conditions like wind, soil type, and freeze-thaw cycles may require deeper holes.
Dig the hole wide enough to work around the postoften 10–12 inches across for a 4×4 is comfortable. Then add 3–4 inches of gravel in the bottom for drainage and tamp it down.
Step 9: Set the post (concrete or compacted gravel)
Place the post on the gravel, then:
- Use a level on two sides to get it plumb.
- Brace it temporarily with scrap wood so it doesn’t move.
- Pour concrete around the post (if using), stopping a few inches below grade.
- Slope the top of the concrete away from the post to shed water instead of letting it pool at the wood.
- Once cured, backfill the last few inches with soil.
If you prefer a no-concrete method, you can backfill with gravel and compact in layers. Concrete is typically the more rigid, “set it and forget it” option for a plant hanger that will see wind and watering weight.
Step 10: Finish and protect the wood
Pressure-treated wood is built for the outdoors, but it still benefits from thoughtful finishing:
- Sand sharp edges so they don’t splinter.
- Consider sealing end grain (especially any cut ends).
- Stain or paint once the wood is dry enough to accept finish (treated lumber can be damp when purchased).
Optional Upgrades That Make It Look “Store-Bought”
Add a post cap
A simple cap makes the hanger look finished and can reduce water sitting on the top end grain. Decorative caps range from basic to fancychoose your vibe.
Add a second hook
If your post is tall and sturdy, add a second arm lower down for a layered look (think “plant chandelier,” but outdoors and less dramatic).
Include a base planter
Some DIYers build a small planter box around the post base or set the post in a large planter-style container (great for patios where digging is not an option).
Hanging Basket Success: Keep Your Plants Alive and Showing Off
The hanger is only half the victory. The other half is not letting your basket dry out the moment you blink.
Water deeply (and consistently)
Hanging baskets dry out faster than pots on the ground because air moves around them on all sides. When you water, soak the basket until water drips out of the bottom. Aim for evenly moist soilfrequent severe wilting can reduce quality and flowering.
Fertilize on a schedule
Because baskets get watered often, nutrients wash out faster. Many extension resources suggest using a water-soluble fertilizer regularly through the growing season (commonly every 1–3 weeks, depending on product and conditions). Follow the label so you don’t overdo it.
Deadhead and groom
Removing spent blooms encourages many flowering plants to keep producing. It also keeps baskets looking full instead of “tired brunch bouquet.”
Wind management
If your yard gets gusty, choose heavier baskets, shorten the chain/hang height, and consider placing the hanger where a fence or shrub line breaks the wind.
Troubleshooting: Fix the Common Problems
The post wobbles
- Hole may be too shallow or too wide without enough support.
- Concrete may not have cured fully.
- Soil may be loosecompact backfill in layers if not using concrete.
The arm sags
- Add or enlarge the diagonal brace.
- Switch to stronger structural screws or lag bolts with washers.
- Shorten the arm slightly to reduce leverage.
Hardware rusts or stains the wood
- Use fasteners rated for pressure-treated lumber (hot-dipped galvanized or stainless).
- In harsh environments (like coastal air), consider stainless hardware for longer life.
The basket dries out too fast
- Move to partial shade during peak heat.
- Water in the morning and check again later on very hot days.
- Choose a quality potting mix designed for containers, and consider a moisture-retaining approach (without making it soggy).
Cost, Time, and Difficulty
- Time: About 2–4 hours (longer if you’re mixing concrete and waiting on cure time).
- Cost: Often modestmostly a post, a couple boards, fasteners, and a hook (plus concrete if you use it).
- Difficulty: Beginner-friendly with basic tools and careful measuring.
Wrap-Up: A Small Build With Big Curb Appeal
A DIY fence post plant hanger is one of those projects that’s practical, decorative, and oddly satisfying. You’re building a tiny piece of “garden architecture” that makes flowers look intentional instead of randomly placed wherever the last free hook happened to be.
Build it solid (good post depth, good brace, good hardware), then keep the basket thriving with steady watering and a simple feeding routine. Your future self will thank youright after they stop admiring it from the driveway like it’s a new car.
Field Notes: Real-World “Experience” Tips DIYers Learn Fast (Extra)
Even when you follow a solid plan, building a fence post plant hanger has a funny way of teaching you a few lessons you didn’t know you signed up for. Here are the most common “experience-based” discoveries DIYers run intoshared in the spirit of saving you time, frustration, and at least one unnecessary second trip to the hardware store.
First: digging is always the wildcard. In your head, you’re picturing clean soil that politely steps aside for your post hole digger. In reality, you may meet a rock the size of a microwave, a root system that apparently belongs to an ancient forest, or soil that crumbles like dry cake. If your hole walls keep collapsing, widen the hole slightly and work slower. If you hit a rock you can’t move, shifting the hanger location by even a foot can be the difference between “quick DIY” and “archaeological excavation.”
Second: getting the post perfectly plumb feels easy until gravity gets involved. Posts love to lean at the exact moment you reach for the concrete bag. The “pro move” is bracing the post in two directions before you start filling. Think of it like a photo shoot: the post needs a couple of supportive friends to keep it standing straight while you do all the work. And check the level repeatedlybecause the post will absolutely drift when you’re not looking.
Third: the diagonal brace is not optional flair. A fence post plant hanger looks simpleuntil you hang a fully watered basket and the arm develops a slow-motion droop. A brace creates a triangle, and triangles are basically nature’s way of saying, “This won’t wobble.” DIYers who skip the brace often end up adding one later, which is like assembling furniture twice just to prove you’re independent.
Fourth: hardware choice shows up months later. The hanger may look perfect on day one, but outdoor moisture has a long memory. If you used indoor screws, you’ll learn what “rust bloom” looks likeusually right above a bright white petunia that did nothing to deserve the stain. Using exterior-rated, treated-lumber-friendly fasteners can feel boring at checkout, but it’s the difference between “this is cute” and “why does my hanger look like it survived a shipwreck?”
Fifth: hanging baskets are dramatic. They’re gorgeous, but they’re also the plant equivalent of a high-maintenance friend who needs water, snacks, and reassurance. Most people are surprised by how quickly baskets dry outespecially when the weather is hot or windy. The easiest habit is a quick daily check: touch the soil surface and lift the basket slightly to feel whether it’s light. Water deeply until it drains, then keep an eye on it during heat waves. Fertilizing lightly on a regular schedule helps too, because frequent watering washes nutrients away.
Finally: placement matters more than you think. DIYers often install the hanger where it looks best from the street… and then realize it’s a pain to water, bumps into a walkway, or gets blasted by afternoon sun and wind. The best compromise is “visible but livable”: close enough to a hose or watering can route, far enough from foot traffic, and positioned where your plants can actually thrive. If you nail that balance, your fence post plant hanger won’t just be a weekend projectit’ll become a reliable little centerpiece that makes your outdoor space feel finished.