Table of Contents >> Show >> Hide
- What a VTuber Actually Is (And What You’re Really Selling)
- Step 1: Pick Your VTuber Format (PNG, 2D Live2D, or 3D)
- Step 2: The Core VTuber Pipeline (Simple, Repeatable, Not Scary)
- Equipment You Need to Start VTubing (Budget to “I Have a Spreadsheet”)
- Software Stack: What to Install (And What to Ignore Until Later)
- Cost: How Much Does It Cost to Become a VTuber?
- What “Hololive-Level” VTubing Means (And What You Can Learn From It)
- Streaming Settings That Prevent “Scuffed” Tech Disasters
- Common VTuber Mistakes (So You Can Skip Them)
- Experience Notes From New VTubers (The “Real Life” Part)
- Conclusion: Your Best VTuber Setup Is the One You’ll Actually Use
So you want to become a VTuber. Excellent choice. It’s like streaming, but with the added benefit of showing up in pajama pants
while looking like an anime hero (or a sentient loaf of bread with feelings). VTubing is part performance, part tech setup, part
creative branding, and part “why is my mouth tracking upside down right now?”
This guide walks you through the full path: choosing your VTuber style, picking equipment that fits your budget, estimating realistic
costs, and understanding what “Hololive-level” VTubing actually involves (including what agencies tend to look for). No fluff, no
keyword soup, and no pretending you need a $10,000 mocap suit to say “hi chat.”
What a VTuber Actually Is (And What You’re Really Selling)
A VTuber (virtual YouTuber/streamer) uses a digital avatar that moves with them in real time. That avatar might be a simple image that
bobs when you talk, a 2D character that blinks and emotes, or a 3D model that can dance, gesture, and occasionally clip through the floor
like a friendly ghost.
The “secret sauce” isn’t the avatar. It’s the experience: a recognizable character, a consistent vibe, and content people
want to come back to. Think of the avatar as your on-screen mascot and brand identity rolled into one. The content is still king; your
model is the crown.
Step 1: Pick Your VTuber Format (PNG, 2D Live2D, or 3D)
Option A: PNGTuber (Best for Starting Fast)
A PNGTuber uses a static image (or a couple images) that swap or bounce based on your voice. It’s cheap, fast, and a fantastic training
ground for streaming skills: talking, pacing, chat interaction, and basic scene setup.
- Pros: Lowest cost, easiest setup, lightweight on your computer.
- Cons: Less expressive; relies more on your voice, editing, and overlays.
Option B: 2D VTuber (Live2D + Face Tracking)
This is the “classic modern VTuber” look: a 2D character rigged to move with your face. Tools like VTube Studio make it possible to drive
a Live2D model with a webcam or iPhone face tracking, including blinks, smiles, and (with practice) dramatic anime squints.
- Pros: Expressive, popular style, great for branding and variety content.
- Cons: Custom models can get expensive; setup has more moving parts (sometimes literally).
Option C: 3D VTuber (VRoid/3D Model + Tracking)
3D avatars range from simple VRoid-style models to full production characters. You can start with basic webcam tracking, then upgrade to
better tracking later (hands, body, etc.). 3D can be great for dance, VR content, or creators who want a more “full-body” performance feel.
- Pros: Full-body potential, flexible camera angles, strong for performance content.
- Cons: Can be heavier on PC resources; high-end tracking can become a rabbit hole with a credit card.
Step 2: The Core VTuber Pipeline (Simple, Repeatable, Not Scary)
No matter your style, most VTubers follow the same pipeline:
- Create (or commission) your avatar: PNG art, 2D Live2D model, or 3D model.
- Track your face/body: Webcam, iPhone face tracking, or specialized sensors.
- Composite your scene: Use streaming software to combine gameplay, alerts, chat, and your avatar.
- Sound good: Audio quality is the “silent dealbreaker” for new channels.
- Test, refine, go live: Your first stream is a prototype. Treat it like one.
Equipment You Need to Start VTubing (Budget to “I Have a Spreadsheet”)
1) A Computer That Can Handle Your Real Life (and Your Digital One)
VTubing can be surprisingly demanding because you’re often running three things at once: a game, avatar tracking software, and streaming
software. If you’re doing “Just Chatting” with a simple model, you can get by with less. If you’re streaming modern games, you’ll want a
stronger CPU/GPU and enough RAM to avoid stutters that make your avatar look like it’s buffering emotionally.
- Minimum vibe: Comfortable for basic streaming + tracking (especially if you’re not gaming heavily).
- Better vibe: A modern CPU, 16GB RAM, and a solid GPU so encoding is smooth.
- Pro vibe: Extra headroom for higher resolutions, more effects, and heavier games.
2) Tracking: Webcam vs. iPhone Face Tracking
For 2D VTubing, you typically track your face. A webcam works, but iPhone face tracking (on compatible models) is known for being smoother,
especially for subtle expressions. VTube Studio supports both webcam and iPhone face tracking, and also supports hand tracking features for
extra expression and fun bits.
- Webcam tracking: Cheapest and simplest. Great starter choice.
- iPhone face tracking: Often smoother expression capture; great upgrade if you already own one.
- Hand tracking: Nice-to-have for gestures, not required on day one.
3) Microphone: The Upgrade That Grows Channels
If you can only improve one thing, improve audio. Viewers will forgive a “scuffed” model. They won’t stick around for crunchy, distant,
underwater-sounding audio that makes you seem like you’re streaming from inside a cereal box.
Many creators start with a USB mic because it’s plug-and-play. XLR setups require an audio interface, but they scale better if you want to
upgrade microphones later or add multiple audio sources. Neither is “automatically better.” The best mic is the one you can set up correctly
and use consistently.
4) Lighting: The Sneaky Tracking Booster
Better lighting doesn’t just make you look good; it helps your camera track your face more reliably. Even a basic ring light or soft light
can reduce jitter and weird shadow issues. Your model’s eyes will thank you.
5) Headphones (Optional, but Sanity-Preserving)
Headphones help prevent echo and let you monitor your audio. If you want your stream to sound clean, hearing what your mic is picking up is
a big advantage.
Software Stack: What to Install (And What to Ignore Until Later)
Streaming Software
Most VTubers use OBS Studio or Streamlabs Desktop to build scenes, add sources, and go live. OBS is flexible and widely used; Streamlabs
Desktop is popular for beginners because it bundles features and setup help. OBS includes tools like an Auto Configuration Wizard to help
match settings to your hardware.
VTuber / Avatar Software
For 2D VTubing, Live2D is a major toolset for creating and editing models, and it offers both free and paid options (including a trial).
To actually run and animate a Live2D model on stream, creators commonly use an app like VTube Studio, which is designed to bring Live2D
models to life with face tracking and scene controls.
Audio Cleanup (Nice-to-Have)
You can improve your audio with software filters, noise suppression, and simple tweaks. AI tools like NVIDIA Broadcast can remove noise and
echo, while platforms like Discord include built-in noise suppression options (useful for collabs and calls). Treat noise reduction like hot
sauce: a little is delicious, too much ruins the meal.
Cost: How Much Does It Cost to Become a VTuber?
VTubing can be nearly free to start or wildly expensive if you commission a custom model, upgrade your PC, buy a new mic, and then decide you
also need a dedicated “stream room” (which is a slippery slope that ends with acoustic foam and questionable financial decisions).
Budget Tier 1: “I Just Want to Start” ($0–$300-ish)
- PNGTuber art (DIY or inexpensive commission)
- Free streaming software
- Existing laptop/PC
- Basic headset mic or entry USB mic
- Basic lighting (or a well-placed lamp you pretend is “studio lighting”)
This tier is perfect for building streaming habits: schedule, talking on mic, community interaction, and learning how scenes work.
Budget Tier 2: “Serious Starter VTuber” ($300–$1,500-ish)
- 2D model (premade or modest custom) or a clean 3D model
- Better mic and accessories (boom arm, pop filter)
- Webcam upgrade and/or improved lighting
- PC upgrades if needed (especially RAM and GPU headroom)
This tier is where you can look and sound “legit” without going full production studio. Many creators settle here for a long time while
they grow.
Budget Tier 3: “High Production” ($1,500–$6,000+)
- Custom Live2D model + professional rigging
- iPhone face tracking setup (if not already owned)
- Strong streaming PC and upgraded capture/encoding options
- Higher-end mic or full XLR chain (interface, cabling, treatment)
- Optional: advanced overlays, custom scenes, original music assets
For a real-world example of model costs, a Polygon budget-streaming guide includes an anecdote from a creator who spent roughly $1,500 on a
Live2D model. That number can go lower or much higher depending on complexity, artist demand, rig quality, and revision rounds.
What “Hololive-Level” VTubing Means (And What You Can Learn From It)
Hololive (and Holostars) are part of a large agency ecosystem. Even if you never audition, it’s useful to understand why these groups are so
influential: they combine character branding, consistent content output, performance skills, and strong production support.
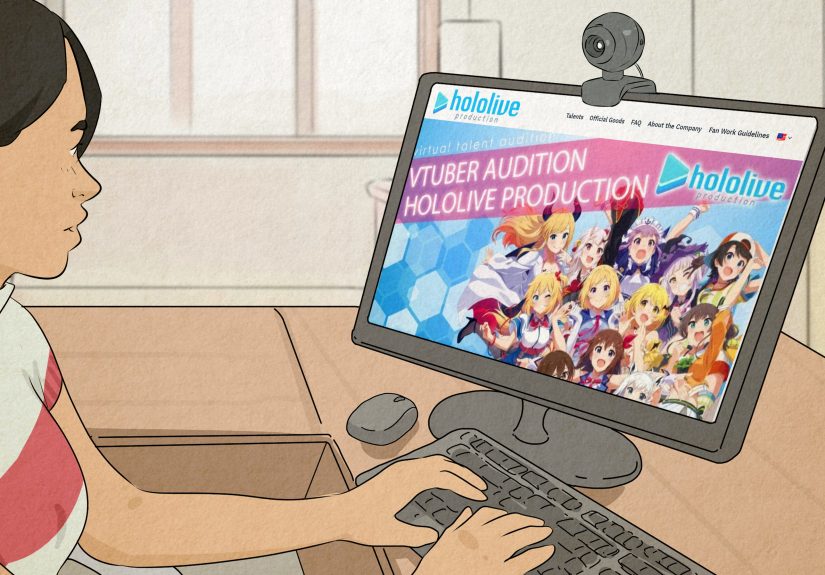
Hololive Auditions: The Reality Check
Official Hololive audition info emphasizes fundamentals that sound simple but are brutally real in practice: being 18+, having clear goals,
being able to continue activities on an ongoing basis, and being able to follow the company’s rules during the audition process. Hololive’s
EN audition announcements also highlight expectations like committing to content creation and streaming/submitting content multiple times per
week over an extended period.
What Agencies Tend to Look For (Even Beyond Hololive)
- Consistency: Can you reliably create content for a year or more?
- Performance: Voice, improv, storytelling, or a strong on-camera presence (even as a character).
- Versatility: Gaming, music, art, comedy, collabs, or community-building.
- Professionalism: Can you meet deadlines, handle feedback, and keep private things private?
- Clear “why”: Not “I want to be famous,” but “I want to make X kind of content for Y audience.”
How the Audition Process Is Often Structured
While details vary by branch and timing, official materials describe a process that usually starts with application screening, then moves
into multiple interviews/tests, then final results. Official audition pages also note an important truth: passing the audition process does
not necessarily guarantee debut.
If You’re Not Auditioning: Use Hololive as a Study Guide
You can learn a lot by analyzing what top VTubers do well:
- Strong “first 30 seconds” energy: Hook, greeting, and immediate viewer clarity (what’s happening today?).
- Repeatable segments: Karaoke nights, weekly challenges, themed streams, recurring bits.
- Collab-friendly etiquette: Clear audio routing, respectful pacing, good “yes-and” improvisation.
- Community rituals: Catchphrases, channel jokes, consistent visual branding.
Streaming Settings That Prevent “Scuffed” Tech Disasters
Bandwidth and Bitrate: Don’t Max Out Your Upload
A common beginner mistake is pushing bitrate too high for your actual upload speed. YouTube’s streaming guidance recommends leaving headroom
(around 20%) so your connection can handle fluctuations. If your stream looks great for five minutes and then melts into pixels, your
internet may be staging a quiet protest.
Keyframe Interval: The Boring Setting That Matters
Encoder recommendations commonly suggest a keyframe interval of around 2 seconds for stable livestreaming. It’s not glamorous, but it keeps
platforms happier and your stream healthier.
Test Like a Professional (Even If You’re New)
Before your first “real” stream, do at least one unlisted/private test with movement, talking, and whatever you’ll be doing live. Make sure
your model stays synced, your mic isn’t clipping, and your scenes don’t accidentally reveal your desktop named “taxes_FINAL_final2_reallyfinal.”
Common VTuber Mistakes (So You Can Skip Them)
- Overbuilding before going live: Launch with a “minimum viable VTuber,” then upgrade based on what your content needs.
- Ignoring audio: Viewers tolerate simple visuals; they don’t tolerate painful sound.
- Buying gear to solve confidence: Gear can’t replace practice. It can only amplify what’s already there.
- Choosing a model that’s hard to perform: If the voice and personality don’t match the design, viewers feel it.
- No content plan: Even a loose plan beats “uhh… what should we do today?” every stream.
Experience Notes From New VTubers (The “Real Life” Part)
Since VTubing is a mix of performance and tech, most beginners describe the first few weeks as a funny kind of chaos: you’re learning to
entertain while also troubleshooting a mini production studio you built out of hope, hotkeys, and a suspiciously wobbly mic arm.
One of the most common experiences is realizing that streaming is a stamina sport. Talking continuously is harder than it
looks, especially when you’re also reading chat, managing your game, and remembering which scene button turns off the “BRB” screen you
accidentally activated. New VTubers often say their best improvement didn’t come from a new overlay; it came from practicing narration:
describing what you’re doing, reacting out loud, and asking chat questions that invite responses.
Another shared experience: the first time your tracking glitches mid-sentence, you will learn humility. Maybe your mouth starts flapping like
a wind-up toy. Maybe your eyes drift into a thousand-yard stare. Maybe your model freezes with the exact expression of someone who just
remembered an embarrassing middle-school moment. Most VTubers eventually treat these “scuffed” moments as content. If you can laugh and keep
going, your audience usually laughs with you (and honestly, it makes you feel more human).
Many beginners also underestimate how much lighting and camera angle affect tracking confidence. When your lighting is
uneven, your model can look jittery or “tired,” even if you’re wide awake. A simple habit that experienced VTubers recommend is building a
two-minute pre-stream checklist: light on, camera clean, mic level checked, tracking centered, scenes tested. It’s boring, but it saves you
from going live and spending the first 20 minutes fixing something while chat watches you silently wrestle with settings menus.
On the creative side, new VTubers often report that the avatar gives them a strange kind of freedom: it can feel easier to be expressive
through a character than “as yourself.” That doesn’t mean you should invent a personality that exhausts you. The creators who seem happiest
tend to choose a character that’s an amplified version of something real: your humor, your interests, your vibeturned up a
notch. It’s easier to maintain over months and years.
Finally, the most consistent “wish I knew this earlier” experience is about growth: your first audience might be tiny, and that’s normal.
VTubing rewards consistency, clarity, and community-building over time. A lot of creators find their footing when they stop measuring success
by raw viewer count and start measuring it by repeat viewers and engagement: who comes back, who chats, who clips moments,
and who seems genuinely invested. In other words, focus less on being discovered by the algorithm and more on being memorable to the people
who already found you.
Conclusion: Your Best VTuber Setup Is the One You’ll Actually Use
Becoming a VTuber isn’t about having the fanciest gear or the most expensive model. It’s about building a setup you can run reliably, a
character you can perform comfortably, and content you can deliver consistently. Start with what you have, upgrade the pieces that remove
friction (usually audio and lighting), and treat your early streams as experiments.
If you’re inspired by Hololive, take the right lesson from it: the magic isn’t just production value. It’s commitment, creativity,
professionalism, and a clear understanding of what your audience is there for. Build that foundation, and the tech becomes an amplifiernot
a crutch.