Table of Contents >> Show >> Hide
- Why Pom Pom Paper Mache Letters Are a Total Win
- Supplies You’ll Need
- Step 1: Choose Your Letter Base
- Step 2: Make a Kid-Friendly Paper Mache Paste
- Step 3: Paper Mache the Letter (Without Losing Your Mind)
- Step 4: Paint and Prep the Surface
- Step 5: Pom Pom Plan: Buy or DIY
- Step 6: Glue Pom Poms Onto the Letter
- Creative Variations (So You Can Make More Than One Without Getting Bored)
- Turn It Into a Learning Activity (Without Saying the Word “Learning”)
- Troubleshooting: Common Problems and Easy Fixes
- Display Ideas That Actually Look Cute
- Wrap-Up: Big Craft Energy, Little-Kid Friendly
- Extra: of Real-World “We Actually Did This” Wisdom
If your house has ever looked like a glitter tornado hit a glue factory, congratulationsyou already have the vibe for this project.
Pom pom paper mache letters are the sweet spot between “I want something cute for the wall” and “I need an activity that keeps kids busy long enough to drink my coffee while it’s still hot.”
The result is a puffy, colorful letter kids feel proud of, and you get custom décor that doesn’t scream “I bought this at 11:58 p.m. while panic-scrolling.”
In this guide, you’ll learn how to make pom pom paper mache letters with kid-friendly steps, smart drying tricks, and a few sanity-saving tips
for keeping the mess contained (mostly). Whether you’re crafting a nursery initial, a classroom name display, or a party sign, this is a fun kids craft
that doubles as sneaky learning time.
Why Pom Pom Paper Mache Letters Are a Total Win
At first glance, this looks like a cute DIY letter decor project. Under the hood, it’s basically a stealthy skill-builder:
kids practice planning (color choices!), patience (drying time!), and fine motor control (picking up and placing tiny fluff balls with purpose).
Also, pom poms are oddly satisfyinglike bubble wrap, but socially acceptable for a living room.
It’s craft + learning without feeling like homework
- Letter recognition: kids bond with “their” initial or name.
- Fine motor skills: pinching, sorting, and placing pom poms improves control.
- Creativity and confidence: they make real design decisions (and defend them passionately).
- Room-ready results: finished letters look great on shelves, doors, and walls.
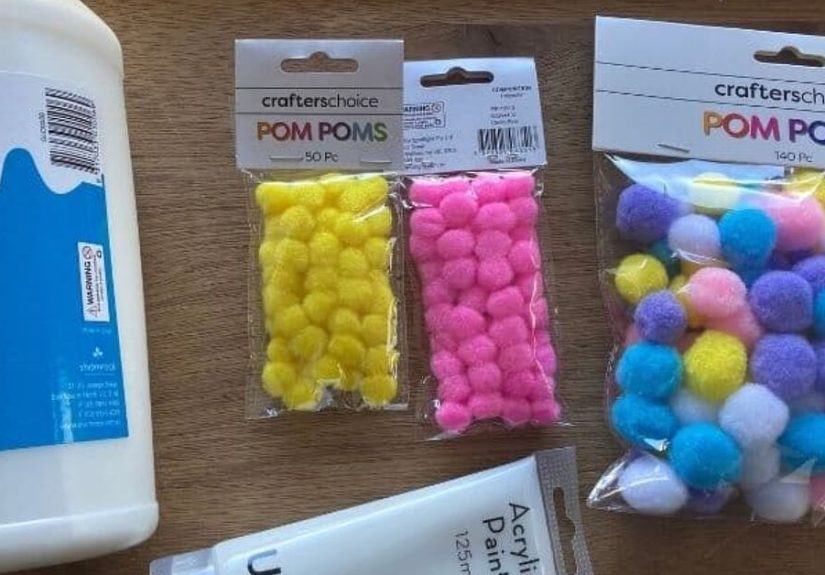
Supplies You’ll Need
This project is flexible. You can go “simple and sweet” or “we are basically a craft studio now.” Here’s the practical list.
Core materials
- Letter base: store-bought paper mache letter, cardboard letter, or a DIY cut-out letter
- Paper mache paper: newspaper, brown kraft paper, or recycled paper strips
- Paste: flour-and-water paste OR white school glue thinned with water
- Pom poms: assorted sizes (store-bought) or yarn for DIY pom poms
- Paint (optional but recommended): acrylic or washable kids paint for the base coat
Helpful tools
- Mixing bowl and spoon/whisk
- Foam brush or paintbrush
- Scissors
- Tray or baking sheet (for organizing pom poms)
- Wax paper or a plastic tablecloth (your table deserves a fighting chance)
- School glue or tacky glue (and adult-only hot glue if you choose that route)
- Tongs/tweezers (optional, but great for a fine-motor “challenge mode”)
Safety note: Pom poms can be a choking hazard for toddlers. For younger kids, use jumbo pom poms, close supervision, and skip anything small.
If your child is in the “everything goes in my mouth” stage, keep this as a mostly-adult-led project.
Step 1: Choose Your Letter Base
Your base determines how much time you’ll spend on structure versus decoration. Both options workpick what fits your schedule and your patience level.
Option A: Store-bought paper mache letters
Craft stores often sell lightweight paper mache letters that are ready to paint and decorate. They’re sturdy enough for pom poms,
and they save a lot of prep time. If your goal is “maximum fun, minimum engineering,” this is your best friend.
Option B: DIY cardboard letters (budget-friendly and surprisingly sturdy)
If you want bigger letters (or you’ve got a stack of shipping boxes that’s starting to look like modern art), make your own:
draw a large letter on cardboard, cut out two copies, then add a strip of cardboard around the edge to create a 3D “block letter.”
Paper mache over it to smooth everything out and strengthen it.
Step 2: Make a Kid-Friendly Paper Mache Paste
Paper mache doesn’t have to be complicated. Most families use either a simple flour paste or a glue-and-water mixture.
Both work well for papier mache letters; the choice depends on your preferences and what you have on hand.
Paste option 1: Flour-and-water paste (classic and pantry-friendly)
- Mix flour and water until it’s thin like pancake batter.
- If you’re working in a humid space or storing projects overnight, adding a bit of salt can help reduce the chance of funk.
Flour paste is inexpensive and kid-safe, but it can smell a little “bready” while drying. (Your kitchen will briefly feel like a very confused bakery.)
Paste option 2: White school glue + water (smooth, strong, and less “doughy”)
- Mix white school glue with water until it’s runny and easy to brush on.
- If it feels too thick, add a little more water.
Glue paste dries strong and tends to feel less lumpy, which is nice if you want a smoother finish for painting.
Step 3: Paper Mache the Letter (Without Losing Your Mind)
This is the part where kids get delightfully sticky and adults suddenly develop a deep respect for paper towels.
Keep the vibe light: paper mache is forgiving, and a few bumps won’t matter once the pom poms go on.
- Prep your space: cover the table, put hair up, and remove anything you love.
- Tear paper strips: tearing (not cutting) helps strips blend and lay flatter.
- Dip and swipe: dip a strip in paste, then run it between two fingers to remove excess.
- Layer it up: lay strips across the letter, smoothing as you go. Overlap like shingles on a roof.
- Do 2–3 layers: enough to strengthen and smooth, not so much that it takes three business days to dry.
- Dry completely: set it somewhere warm and airy. Rotate it halfway through drying if possible.
Drying tips that actually help
- Choose thin layers over one thick, soggy layer.
- Dry on a rack or prop the letter so air can circulate around it.
- Let it dry overnight before painting or gluing pom poms.
Step 4: Paint and Prep the Surface
You can glue pom poms straight onto the dried paper mache letter, but a quick base coat of paint gives you a nicer finish if any gaps show.
It also makes the project feel “finished,” even before the fluff begins.
Easy paint strategy
- Paint the front and sides in a color that matches your pom pom palette (or a neutral like white).
- Let it dry fully before adding glue and pom poms.
- If the surface feels rough, a light sanding (adult job) can smooth it out.
Step 5: Pom Pom Plan: Buy or DIY
The pom poms are the headline act. You can buy a bag of craft pom poms and be done, or make your own from yarn for a fluffier, custom look.
Both options work great for kids crafting.
Store-bought pom poms (fastest path to joy)
Mixed-size bags are ideal because tiny pom poms fill gaps and larger ones cover space quickly. More sizes = fewer awkward holes.
DIY yarn pom poms (extra cozy, extra proud)
Older kids can make simple pom poms using a pom pom maker, cardboard rings, or even a fork. Yes, a fork.
It’s the rare kitchen utensil that encourages creativity instead of negotiating over vegetables.
Color ideas that look “designed,” not “random snack mix”
- Ombre: dark to light in the same color family
- Rainbow: classic, cheerful, and impossible to mess up
- Two-tone: school colors, team colors, or room décor colors
- Neutrals: cream, tan, and soft gray for calmer spaces
Step 6: Glue Pom Poms Onto the Letter
Here’s where it becomes the glorious fluffy masterpiece you imagined. The key is working in small sections and starting with the outline.
Kid-friendly glue choices
- School glue or tacky glue: safest for kids, slower drying (which can be a bonus for repositioning).
- Low-temp hot glue (adult use only): fastest hold, best for wall-hanging durability.
A simple method that looks polished
- Outline first: glue pom poms around the outer edge of the letter to define the shape.
- Fill the center: work inward, mixing sizes so gaps disappear.
- Press gently: hold each pom pom for a second so it grabs.
- Check for bald spots: add tiny pom poms where the base peeks through.
- Dry time: let it sit flat until fully set (ideally a few hours).
Pro tip: If kids love squeezing glue bottles like they’re training for the Olympics, pour glue into a small dish and use a cotton swab or brush to apply it.
Same results, fewer glue lakes.
Creative Variations (So You Can Make More Than One Without Getting Bored)
1) Name letters for bedrooms and playrooms
Spell a short name (like “MIA” or “NOAH”) and hang the letters above a shelf. For longer names, do just the first initial and a smaller sign for the rest.
2) Party décor that doesn’t look disposable
Make initials for a birthday backdrop or baby shower table. Choose two or three matching colors, and suddenly you’re the person who “has an eye for design.”
3) Seasonal letters
- Fall: rust, mustard, cream, and brown pom poms
- Winter: white + silver + icy blue
- Spring: pastels and flower-shaped felt accents
- Summer: bright rainbow with extra-large pom poms
4) Texture mash-up (for older kids)
Mix pom poms with felt balls, buttons (for older kids only), ribbon borders, or small fabric flowers.
The trick is limiting the palette so it looks intentional instead of “everything we found in the craft drawer.”
Turn It Into a Learning Activity (Without Saying the Word “Learning”)
Want to make this an educational craft without killing the fun? Try one of these low-key add-ons:
- Pattern play: alternate colors (ABAB) or make stripes.
- Counting: estimate and then count how many pom poms the letter used.
- Sorting: group pom poms by color or size before gluing.
- Spelling: make the first letter of each family member’s name and line them up.
- Story prompt: “If this letter was a character, what would it be like?” (Yes, kids will answer. In detail.)
Troubleshooting: Common Problems and Easy Fixes
My letter warped while drying
Too much moisture on one side can cause bending. Next time, use thinner layers and flip the letter during drying.
If it’s already warped, place it under a light weight (with wax paper protection) once it’s nearly dry.
The paper mache feels bumpy
Totally normal. Smooth strips as you apply them, and consider one extra thin layer. After drying, a light sanding (adult job) helps.
Also: pom poms hide a multitude of sins. Fluff is forgiving.
Pom poms keep falling off
That usually means too little glue, glue that hasn’t cured yet, or a dusty/paint-chalky surface. Use tacky glue for better grip,
and let the base paint dry completely. For display pieces that will be handled a lot, adult-applied low-temp hot glue is sturdier.
It smells weird the next day
Flour paste can smell as it dries, especially in humid spaces. Make sure the letter dries fully in good airflow.
If you’re in a very humid environment, consider glue paste instead, and don’t store damp projects in closed containers.
Display Ideas That Actually Look Cute
- Bookshelf pop: stand the letter next to a few favorite picture books.
- Door décor: hang a single initial with removable hooks.
- Gallery wall: mix a fluffy letter with framed kids’ art for a playful look.
- Classroom word: spell “READ” or “ART” in bright pom poms for an inviting corner.
- Party centerpiece: set initials on the dessert table for instant theme polish.
Wrap-Up: Big Craft Energy, Little-Kid Friendly
Pom pom paper mache letters are one of those rare crafts that checks all the boxes: hands-on, customizable, forgiving, and genuinely adorable when finished.
You get a keepsake-worthy piece of DIY home decor, kids get a sensory-rich project, and everyone gets a story about the time a pom pom mysteriously
showed up in someone’s sock drawer three days later.
Extra: of Real-World “We Actually Did This” Wisdom
If you’re making these with kids, the biggest secret isn’t the paste recipeit’s pacing. The fastest way to turn a fun craft into a meltdown is trying to do
everything in one sitting. Paper mache loves a two-day schedule: Day 1 is “make it sticky and heroic,” and Day 2 is “decorate it like a tiny interior designer.”
When you split it up, kids stay interested, and you avoid the tragic moment where someone tries to glue pom poms onto a letter that’s still damp and quietly falling apart.
Another real-life win: set up a “pom pom bar.” Pour colors into a muffin tin or small cups, and suddenly kids are making deliberate choices instead of scooping
everything into one chaotic pile. If you want the finished letter to look more polished, choose a simple rule like “two colors only” or “light-to-dark gradient.”
Kids can absolutely handle design constraintsespecially if you present it as a fun challenge. (“Can you make it look like a sunset?” works better than “Please stop using every color at once.”)
Glue management matters more than you’d think. Many kids treat glue bottles like ketchup: they believe more is always better, and the only acceptable amount is
“until it floods.” A small dish of glue plus a cotton swab or paintbrush gives them control and keeps the pom poms from swimming. If you’re crafting with a group,
consider assigning stations: one table for gluing, one for drying, and one for “design planning” (which is a fancy way of saying kids arrange pom poms on the letter before committing).
That planning step cuts down on regrets and helps kids learn that creativity sometimes involves trying options first.
For younger kids, bigger pom poms are your best friend. They cover space quickly, are easier to grab, and reduce frustration. For older kids, mixing sizes becomes
a satisfying puzzle: big pom poms create the structure, small ones fill the awkward gaps, and suddenly the letter looks professionally “full.”
Want to sneak in extra skill-building? Offer tongs or tweezers as an optional tool for placing pom poms. Some kids will love the challenge, others will ditch it immediately.
Both responses are valid, and nobody is grading this.
Finally, embrace the inevitable fluff fallout. Pom poms roll. They hide under chairs. They show up where they do not belong. Keep a small bowl for “runaway pom poms”
and turn cleanup into a mini game: “Find five pom poms and you win the right to choose the next color.” You’ll end up with a finished letter, a happy kid,
and a home thatwhile not spotlessfeels full of creative energy. And honestly, that’s the whole point.


