Table of Contents >> Show >> Hide
- What Finish Carpentry Actually Includes
- Finish Carpentry Tips Every DIYer Should Know
- 1) Mark in place whenever possible (don’t over-trust the tape measure)
- 2) Learn “reveals” and use them on purpose
- 3) Cope inside corners; miter outside corners
- 4) Back-bevel your cope and tune the fit instead of forcing it
- 5) Cut slightly long and sneak up on the fit
- 6) Scribe instead of caulking giant gaps
- 7) Use a consistent reference line when floors are out of level
- 8) Use the right nailer and nail size for the job
- 9) Fasten trim to something solid (studs matter)
- 10) Place scarf joints thoughtfully (and make them disappear)
- 11) Hide end grain with returns whenever possible
- 12) Build in test cuts and scrap practice as part of the job
- 13) Prep and finish like a painter who respects your trim
- 14) Caulk is for finishing, not for covering every mistake
- 15) Protect your lungs, eyes, and future self
- 16) Think like a finisher: sequence matters as much as skill
- Common DIY Finish Carpentry Mistakes (and the Fast Fix)
- Final Thoughts
- Extra 500-Word Experience Section: Real-World DIY Lessons from Finish Carpentry Projects
Finish carpentry is where a room stops looking like “construction” and starts looking like “someone who knows what they’re doing lives here.” It’s the phase of trim, casing, baseboards, crown molding, panels, and detail work that people actually noticeespecially when it goes wrong. (Nothing humbles a confident DIYer faster than a baseboard corner that looks like it lost a fight with a miter saw.)
The good news: you do not need to be a master carpenter to get professional-looking results. You do need a few smart habits, a better sequence, and a willingness to sneak up on a cut instead of trying to be a hero on the first pass. This guide covers the finish carpentry tips that make the biggest difference for DIYers: tighter joints, cleaner lines, fewer gaps, better fastening, smoother paint prep, and less “I’ll fix it with caulk” energy.
What Finish Carpentry Actually Includes
Finish carpentry covers the visible woodwork and trim details in a room: baseboards, shoe molding, window and door casing, crown molding, chair rail, panel trim, built-ins, and decorative moldings. Unlike framing, where speed and structural layout dominate, finish work is about accuracy, proportion, appearance, and consistency. The eye is ruthless. A 1/16-inch error that disappears in framing can shout at you from across the room in trim work.
Finish Carpentry Tips Every DIYer Should Know
1) Mark in place whenever possible (don’t over-trust the tape measure)
One of the best finish carpentry habits is to mark the material in place instead of measuring, walking to the saw, and transferring numbers. Measuring is necessary sometimes, but trim work gets more accurate when you reduce opportunities for tiny mistakes. Tape hooks bend. Numbers get misread. Pencil marks get interpreted creatively. Marking in place cuts down on all of that.
Example: hold casing or baseboard exactly where it will sit, strike the length directly, then cut. If you must measure, label your cut orientation (inside corner, outside corner, butt end) right on the back of the trim. Future-you at the saw station will thank present-you.
2) Learn “reveals” and use them on purpose
A reveal is the intentional setback between trim and the edge of a jamb or another surface. This tiny detail creates a shadow line and makes the installation look cleaner and more professional. More importantly, reveals help hide minor inconsistencies caused by wood movement, wall variation, and human imperfection (yes, including yours and mine).
Instead of trying to make everything perfectly flush (which often won’t stay flush), keep reveals consistent. Consistency reads as craftsmanship. Random flushness reads as “close enough.”
3) Cope inside corners; miter outside corners
This is one of the biggest upgrades a DIYer can make. Inside corners are rarely a perfect 90°, and wood moves with seasonal humidity. That means inside miters often open up over timeeven if they looked great at install.
A coped joint solves this by cutting the profile of one piece so it fits over the face of the adjoining piece. It’s more forgiving, often faster once you learn it, and usually stays tighter-looking longer. Outside corners, on the other hand, are typically mitered (and often glued) for a clean corner seam.
Pro-DIYer move: practice coping on scrap before touching your actual trim. Your first cope will look like abstract art. Your third will look shockingly good.
4) Back-bevel your cope and tune the fit instead of forcing it
When coping trim, don’t cut straight down like you’re slicing a sandwich. Use a slight back bevel so the face edge contacts first and the material behind it doesn’t prevent the joint from closing. That’s how you get a clean, tight seam where it matters: the visible edge.
Also, don’t try to make the perfect cope entirely with one tool. A coping saw (or jigsaw setup, if you know what you’re doing) gets you close. Small files and sandpaper help you fine-tune the profile. Trim carpentry is often less “one perfect cut” and more “smart cut plus gentle tuning.”
5) Cut slightly long and sneak up on the fit
In finish carpentry, you can always remove more material; adding it back is a different project entirely. For many trim piecesespecially miters it’s better to cut a hair long, dry-fit, and trim to final length than to nail up a piece that’s 1/16 inch short and then stare at that gap forever.
A practical workflow:
- Make the first cut.
- Test fit.
- Shave a little (not a lot).
- Test again.
- Only then commit to fastening.
6) Scribe instead of caulking giant gaps
Walls and floors are not as straight as they look. Finish carpentry gets dramatically better when you learn to scribe trim to fit uneven surfaces. Scribing means transferring the contour of a wall or floor to your trim and trimming the edge to match.
Why this matters: a thin caulk line can make trim look polished. A thick caulk line looks like a confession. If the floor dips or the wall bows, scribing the bottom edge of baseboard (or using shoe molding strategically) often produces a much cleaner result than trying to fill everything after the fact.
7) Use a consistent reference line when floors are out of level
Floors are often out of levelespecially in older homes. If you install baseboard by simply following the floor, the top edge can visibly wave around the room. The fix is to establish a reference line (often from the highest floor point) and install to that line so the top stays visually consistent.
This is one of those finish-carpentry truths that feels backwards at first: the eye usually notices wandering lines more than it notices something being slightly out of level. Parallel and consistent often look better than mathematically “perfect” in a crooked room.
8) Use the right nailer and nail size for the job
Not all trim should be fastened the same way. A common DIY mistake is using one nailer for everything because it’s the one already in the garage.
- Brad nailer (18-gauge): great for smaller trim, delicate moldings, and situations where you want smaller holes and less risk of splitting.
- Finish nailer (15- or 16-gauge): better for larger casing, baseboards, crown, and heavier trim that needs stronger holding power.
- Pin nailer (23-gauge): useful for tacking tiny pieces or holding joints while glue sets (not a substitute for structural holding in trim runs).
A good rule of thumb: choose nail length so it penetrates adequately into framing or the substrate without blowing out the material. For many trim installs, a finish nailer is the workhorse, while brads or pins can help with detail pieces and corner assembly.
9) Fasten trim to something solid (studs matter)
Beautiful joints won’t stay beautiful if the trim is floating. Mark studs before installation and fasten baseboard/casing where possible into framing. This improves long-term stability and reduces joints opening later. On long runs, fastening patterns also matter: distribute nails consistently and avoid placing them where filler and paint work become a headache.
For outside corners and scarf joints, many pros also use wood glue to help keep alignment tight while fasteners hold everything in place. Glue is not cheating. Glue is adulting.
10) Place scarf joints thoughtfully (and make them disappear)
When one wall is longer than your trim stock, you’ll need to join pieces with a scarf joint instead of a butt joint. A scarf joint spreads the seam across angled cuts, making it less visible and generally stronger-looking.
Best practices for DIYers:
- Place scarf joints where they can be nailed securely (ideally near framing).
- Dry-fit before glue.
- Keep the profiles flush at the face.
- Plan seam locations in less noticeable sightlines when possible.
11) Hide end grain with returns whenever possible
End grain absorbs paint and stain differently, which makes exposed trim ends stand out. If a trim run terminates in the open (for example, at the side of a cased opening or where molding stops), consider a mitered return to hide the end grain.
This is a small detail that makes a big visual difference. It’s one of those “people can’t explain why it looks better, but they know it does” moves.
12) Build in test cuts and scrap practice as part of the job
DIYers often think test cuts are wasted time. They’re not. They’re insurance. Keep a short offcut of each trim profile and use it to:
- Verify miter saw settings
- Practice coping cuts
- Check corner angles
- Test filler/caulk/paint compatibility
- Dial in nailer depth
One five-minute test can save an eight-foot mistake.
13) Prep and finish like a painter who respects your trim
Finish carpentry isn’t done when the last nail goes in. The final quality often comes from the prep:
- Clean the trim surface before painting.
- Fill nail holes with the correct filler or spackle for the application.
- Sand repairs smooth (don’t leave little filler volcanoes).
- Remove dust before priming/painting.
- Use a thin, controlled bead of caulk on paint-grade trim where needed.
For paint-grade interior trim, paintable acrylic/latex painter’s caulk is commonly the better choice. Save non-paintable silicone products for wet areas or use cases where water resistance matters more than paint adhesion. And yes, tiny beads look better than giant ones.
14) Caulk is for finishing, not for covering every mistake
Caulk can make trim look seamless. It can also make trim look like it was installed in a hurry. Use it to close fine paint-grade gaps and refine the visual linenot to hide major fitting errors. Tape can help produce cleaner beads, and smoothing the caulk before it skins over makes a huge difference in final appearance.
If you’re looking at a gap and wondering, “Caulk or re-cut?” use this rule: if the gap changes the profile, angle, or shadow line noticeably, re-cut. If it’s a hairline seam on paint-grade trim, caulk is probably appropriate.
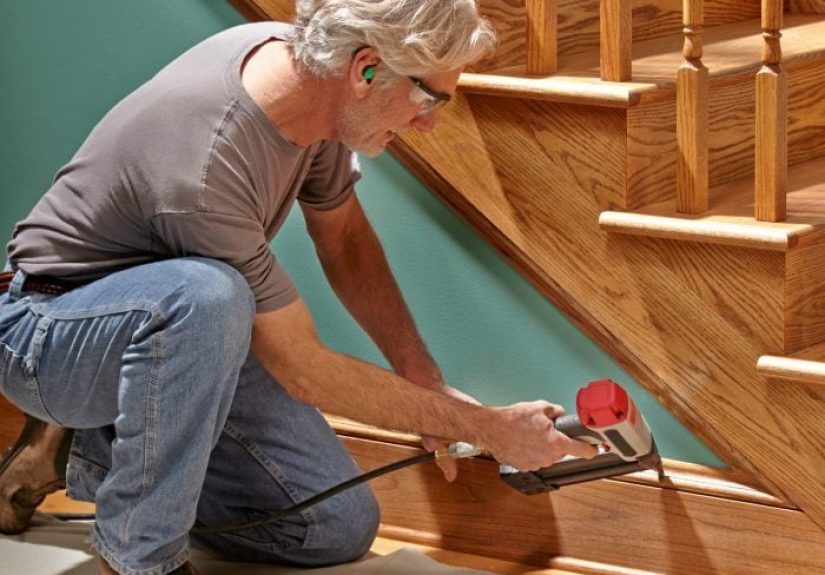
15) Protect your lungs, eyes, and future self
Finish carpentry feels “cleaner” than demolition, but it still produces sawdust, sanding dust, flying chips, and noise. Wear eye and hearing protection when cutting. Control dust at the source when possible, and clean up sanding dust before finishing.
Extra-important note: if you’re working on an older home (especially pre-1978 paint), treat paint dust seriously and follow lead-safe renovation practices. Trim removal, sanding, scraping, and cutting can create hazardous dust. Set up containment, minimize dust, and use appropriate protective equipment.
16) Think like a finisher: sequence matters as much as skill
A lot of DIY frustration comes from doing steps in the wrong order. Here’s a simple sequence that usually works well:
- Plan the room and trim layout (including joints and seam locations).
- Check walls/floors/corners for problem areas.
- Mark studs and reference lines.
- Cut and dry-fit key pieces first (especially corners).
- Assemble/fasten in a logical order.
- Fill, sand, caulk, and clean.
- Prime/paint/touch up.
- Do a punch-list walkaround in daylight.
That last step matters. Finish carpentry is detail work, and details are easiest to miss when you’re already mentally onto your next project.
Common DIY Finish Carpentry Mistakes (and the Fast Fix)
- Problem: Inside corners open up. Fix: Use coped joints and back-bevel.
- Problem: Top of baseboard looks wavy. Fix: Set a reference line from the high spot of the floor.
- Problem: Trim splits near ends. Fix: Use smaller fasteners, pre-drill where needed, and avoid overdriving.
- Problem: Big visible seams on long walls. Fix: Use scarf joints and place them strategically.
- Problem: Paint looks rough. Fix: Sand/fill properly, remove dust, and keep caulk beads small and neat.
- Problem: “It looked good yesterday, not today.” Fix: Improve fastening into studs, glue corners where appropriate, and let materials acclimate before installation.
Final Thoughts
Finish carpentry rewards patience more than bravado. The best-looking trim jobs usually come from a handful of repeatable habits: accurate marking, smart joint choices, careful fitting, clean fastening, and disciplined finishing. You don’t need to work like a production trim crew. You just need a system.
Start with one room. Practice coping on scrap. Accept that your first corner might be “learning-shaped.” Then keep going. Once you begin seeing tight joints and crisp lines come together, finish carpentry stops feeling intimidating and starts feeling addictivein the best possible sawdust-covered way.
Extra 500-Word Experience Section: Real-World DIY Lessons from Finish Carpentry Projects
One of the most common experiences DIYers have with finish carpentry is the “confidence spike” followed by the “corner reality check.” The project starts great: the trim looks beautiful at the store, the saw is set up, and the first straight cut feels clean and precise. Then the first inside corner goes together and suddenly there’s a gap big enough to store your frustration in. This is usually the moment people realize finish carpentry is less about cutting exactly 45 degrees every time and more about reading the roomliterally. Walls lean, corners drift, drywall mud builds up, and floors rise and fall. DIYers who succeed long-term are the ones who stop fighting that reality and start working with it.
Another common experience is discovering that installation speed and installation quality are not the same thing. Many beginners rush to nail everything as soon as a piece “mostly fits,” because holding trim in place feels like progress. Later, when they step back, they notice a small twist at the outside corner, a hairline gap near the casing, or a top edge that wanders. Experienced DIYers often describe a turning point when they start dry-fitting more, fastening less aggressively at first, and making small adjustments before committing. That shift alone can dramatically improve results without buying a single new tool.
There’s also the finishing lesson almost everyone learns the hard way: trim doesn’t look finished just because it’s installed. Nail holes, sanding scratches, dust, and thick caulk beads can make good carpentry look sloppy. DIYers who take time for filler, sanding, dust removal, and clean caulk lines often say this is the step that makes guests assume the work was done by a pro. In other words, the “boring” part is often the part people compliment.
Many DIYers also report that their best finish carpentry improvements came from simple process changes: labeling pieces clearly, keeping scraps for test cuts, checking miter saw settings more often, and creating a cut list before touching the material. These habits reduce mental load, especially in rooms with lots of windows, doors, and transitions. Instead of improvising every cut, they build a repeatable workflow. That means fewer mistakes, less wasted trim, and a much calmer weekend project.
Finally, there’s the emotional side of finish carpentry that people don’t talk about enough: it teaches patience in a very practical way. You can’t bully a coped joint into looking clean. You can’t argue a wavy floor into being level. You can, however, adjust, refine, and improve. That’s why so many DIYers end up loving finish work after initially dreading it. It gives immediate feedback, visible progress, and a satisfying before-and-after transformation. A room with thoughtful trim work feels more complete, more intentional, and more expensiveeven when the budget was modest. And for a DIYer, that’s a pretty great payoff for a few extra test cuts and a little humility.


