Table of Contents >> Show >> Hide
- Quick Safety Note (Not a BuzzkillA Lifesaver)
- Electric Water Heater Basics (So the Rest Makes Sense)
- Before You Install: Picking the Right Heater (and Avoiding Regret)
- What a Professional Installation Looks Like (The Real-World Walkthrough)
- Step 1: Shut down utilities and verify conditions
- Step 2: Drain and remove the old tank
- Step 3: Prep the site (the quality part most people skip)
- Step 4: Set the new water heater in place
- Step 5: Connect the plumbing (cold in, hot out, no surprises)
- Step 6: Install the T&P relief valve and discharge piping correctly
- Step 7: Fill the tank fully (before any power is applied)
- Step 8: Electrical connection and start-up (done by a qualified electrician)
- Step 9: Test for leaks, confirm operation, and set a safe temperature
- Installation Checklist: What Homeowners Should Inspect (No Tools Required)
- Common Mistakes That Cause the Most Headaches (and Service Calls)
- Maintenance Tips That Keep Your Water Heater Happy (and Quiet)
- When to Replace vs. Repair
- Real-World Installation Stories and Lessons (Experience Section)
- 1) The “It fit on paper” closet problem
- 2) The “Why is the relief valve dripping?” mystery
- 3) The “New heater, old shutoff valve” regret
- 4) The “We set it to max so we never run out” strategy (and the scald scare)
- 5) The “It’s brand new and it’s noisy” first-week panic
- 6) The “Permit and inspection saved me” moment
- Conclusion
- SEO Tags
If your shower has started practicing “surprise cold plunge therapy,” your water heater may be waving a tiny white flag.
The good news: electric hot water heaters are common, reliable, and (when installed correctly) wonderfully boring.
The important news: installation involves high-voltage electricity, pressurized plumbing, and scalding-hot waterso for most homes,
this is a licensed-pro job.
This guide explains how electric water heater installation workswhat a professional typically does, what you can check or prepare as a homeowner,
what code-related items matter, and how to avoid the classic mistakes that lead to leaks, breaker trips, or “why is the water brown?” moments.
Think of it as the “director’s cut” of an install: the process, the why, and the quality checkswithout risky step-by-step wiring instructions.
Quick Safety Note (Not a BuzzkillA Lifesaver)
Installing or replacing an electric water heater usually means working with a 240-volt circuit, which can seriously injure or kill if handled improperly.
Many areas also require permits and inspections. If you’re not a trained, licensed professional, use this article to
understand the job, hire confidently, and inspect the finished work.
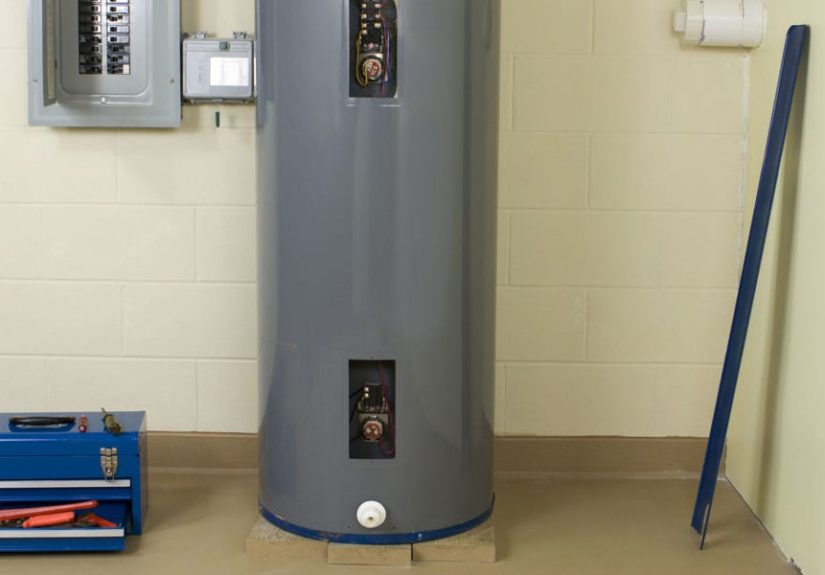
Electric Water Heater Basics (So the Rest Makes Sense)
What “electric hot water heater” typically means
Most homes with electric hot water use a tank-style electric storage water heater (commonly 30–80 gallons).
Inside the tank are one or two heating elements controlled by thermostats. Cold water enters the tank, hot water leaves from the top,
and the tank stays ready so you don’t have to negotiate with your schedule every time you want a shower.
Key terms you’ll hear during installation
- Capacity (gallons): How much hot water the tank stores.
- First-hour rating: How much hot water it can deliver in the first hour (storage + recovery).
- Recovery rate: How quickly it can reheat water after you use it.
- T&P relief valve: A safety valve that releases pressure/temperature if the tank overheats or over-pressurizes.
- Discharge pipe: Pipe attached to the T&P valve that safely routes released water to a visible, safe termination point.
- Thermal expansion tank: Often required in “closed” plumbing systems to prevent pressure spikes.
Before You Install: Picking the Right Heater (and Avoiding Regret)
1) Size it for your household, not your optimism
A water heater that’s too small creates daily “who used all the hot water?” drama. Too large wastes money and energy.
Pros typically size by household count, usage patterns (multiple showers at once), and the heater’s first-hour rating.
If your current tank is close but not perfect, this is the moment to adjust.
2) Consider efficiency upgrades (especially heat pump water heaters)
Standard electric tank heaters are straightforward, but a heat pump water heater can dramatically reduce electricity use by moving heat
rather than generating it directly. They do need adequate space, airflow, and a suitable location (often a garage or basement),
and they make some noisemore “dishwasher hum” than “jet engine,” but still noticeable in a quiet laundry room.
3) Confirm electrical and space requirements
Electric water heaters usually need a dedicated electrical circuit and correct disconnecting means, grounding, and overcurrent protection per local code.
Translation: an electrician may need to verify your panel capacity and existing wiring. This is especially important if you’re upgrading size,
switching to a heat pump model, or moving the heater to a new location.
4) Know the permit reality in your area
Permit requirements vary widely. Some cities require permits for replacement in the same location; others still strongly recommend it
because inspections catch unsafe installs (and can protect resale value and insurance claims).
A reputable installer will usually handle permits or tell you exactly what’s required.
What a Professional Installation Looks Like (The Real-World Walkthrough)
Here’s the typical flow for replacing a tank-style electric water heater. The exact order can vary depending on local code,
your plumbing material, and whether you’re upgrading components like shutoff valves or adding an expansion tank.
Step 1: Shut down utilities and verify conditions
- Power off at the electrical panel and verified de-energized by a qualified person.
- Cold water supply shut off to the heater.
- Work area safety checked: drainage, clearances, and safe access.
This is the part that looks “easy” and then becomes dangerous when someone assumes the correct breaker was turned off.
Pros verify. Always.
Step 2: Drain and remove the old tank
Tanks are heavy. Like “awkward refrigerator full of water” heavy. Installers drain the tank through the drain valve,
relieve pressure safely, and disconnect plumbing connections. If the old tank is corroded or valves are seized,
removal can shift from “replacement” to “mini-demolition,” especially in tight closets.
Step 3: Prep the site (the quality part most people skip)
A good installation isn’t just swapping a cylinder and calling it a day. The site should be prepared to reduce risk and improve longevity:
- Drain pan installed where required, piped to an approved drain path if applicable.
- Shutoff valve evaluated (replace if old, stiff, or leaking).
- Seismic strapping added where required (common in earthquake-prone regions).
- Clearances confirmed for service access, especially for heat pump models.
Step 4: Set the new water heater in place
The tank is positioned level on a stable surface. In garages, local rules may address elevation or protection in certain situations.
The installer ensures the unit is accessible for future maintenancebecause someone will eventually need to test the relief valve,
flush sediment, or replace an anode rod.
Step 5: Connect the plumbing (cold in, hot out, no surprises)
The installer connects cold-water supply and hot-water outlet using approved materials and fittings. Many pros install
flex connectors for easier future servicing, and they may add (or replace) a dielectric fitting where appropriate to reduce galvanic corrosion.
If your home has a pressure-reducing valve, backflow preventer, or check valve, you may have a “closed system.”
In that case, a thermal expansion tank is often used to prevent pressure spikes when water heats and expands.
Step 6: Install the T&P relief valve and discharge piping correctly
The temperature-and-pressure (T&P) relief valve is not optional, not decorative, and not something you “cap because it drips.”
It’s a critical safety device.
Discharge piping rules vary by jurisdiction, but the intent is consistent: if the valve opens, hot water must discharge safely,
visibly, and without endangering people or damaging the building. Your installer should follow current adopted code and manufacturer requirements.
Step 7: Fill the tank fully (before any power is applied)
This is a big one. Heating elements can burn out if powered before the tank is full of water.
Pros open the cold-water supply, then open one or more hot faucets to purge air until water flows steadily.
Only after the tank is confirmed full and leaks are checked does the electrical side proceed.
Step 8: Electrical connection and start-up (done by a qualified electrician)
The final electrical connection must match the water heater’s nameplate rating and local electrical code requirements.
This is where “I watched a video once” can turn into “why does my breaker smell like regret?”so it’s commonly handled by a licensed electrician
or a plumber qualified for the electrical portion under local rules.
Step 9: Test for leaks, confirm operation, and set a safe temperature
The installer checks all connections for leaks, confirms proper heating, and sets the thermostat to an appropriate temperature.
A common target for many homes is 120°Fa balance of comfort, energy savings, and lower scald risk.
Some households need different settings depending on dishwasher needs, medical considerations, or local guidance, but 120°F is a widely used baseline.
Installation Checklist: What Homeowners Should Inspect (No Tools Required)
You don’t need to touch wiring or open panels to do a smart post-install check. Walk through this list after the installer finishes:
Plumbing & leak check
- No dripping at the hot/cold connections, valves, or unions.
- Drain pan is present where appropriate and not crushed or tilted.
- Water lines are supported neatly (not pulling sideways on fittings).
Safety components
- T&P relief valve is installed and has a discharge pipe routed properly.
- Discharge termination is visible and directed to a safe location.
- Expansion tank is present if your system is closed and local rules require it.
Performance
- Hot water reaches fixtures in a normal amount of time.
- No banging, popping, or constant hissing (some initial noise can be normal, persistent noise is not).
- Thermostat is set to a reasonable temperature (often ~120°F).
Common Mistakes That Cause the Most Headaches (and Service Calls)
Powering the heater before it’s full
This can damage heating elements quickly. If your new heater “worked for a day” and then stopped, this is one possible culprit.
Ignoring thermal expansion
Closed systems can create pressure spikes when water heats. Without proper control, you may see relief valve discharge,
dripping at fittings, or premature wear on plumbing components.
Bad T&P discharge routing
If the relief valve opens, the discharge must be safe and visible. Improper routing can be dangerous and can fail inspection.
Setting temperature too high
Higher settings increase scald risk and can raise energy use. If you need hotter water for certain appliances,
consider a mixing/tempering strategy at fixtures rather than cranking the whole tank to “lava.”
Maintenance Tips That Keep Your Water Heater Happy (and Quiet)
A little maintenance goes a long wayespecially in areas with hard water. These habits can reduce sediment buildup,
improve efficiency, and extend the life of the tank.
Every few months: quick visual inspection
- Look for moisture at fittings, around the base, and in the drain pan.
- Check for corrosion streaks or mineral deposits.
- Listen for new noises during heating cycles.
Periodically: manage sediment
Sediment can collect at the bottom of the tank, causing popping or rumbling and reducing efficiency.
Many homeowners schedule a professional flush based on water quality and manufacturer guidance.
Annually-ish: test the T&P valve (or have it tested)
The relief valve is a safety device. If you’re not comfortable testing it, ask your service tech to include it in routine maintenance.
Every few years: inspect the anode rod
The anode rod sacrifices itself to protect the tank from corrosion. Replacing it on time can meaningfully extend tank life,
especially with hard or aggressive water.
When to Replace vs. Repair
- Repair-friendly: a failed heating element, thermostat, or minor valve issue (when the tank itself is sound).
- Replace-now: leaking tank body, heavy corrosion at the base, repeated repairs, or significant rust-colored water tied to tank failure.
If you’re on the fence, ask a pro for a quick assessment and the age of the unit (often found on the rating plate).
Water heaters don’t live forevereventually they retire, whether you agree or not.
Real-World Installation Stories and Lessons (Experience Section)
Here are common “experience-based” lessons homeowners and technicians share after real installsbecause the best advice usually starts with,
“So here’s what went wrong…”
1) The “It fit on paper” closet problem
A homeowner upgrades from a 40-gallon to a 50-gallon tank for better first-hour performance. Great planuntil the new tank arrives and the closet door
won’t close because the plumbing connections sit higher and push the piping forward. The lesson: measure the whole space, not just the footprint.
Height, side clearance, and where the pipes land matter. Many pros like flexible connectors for exactly this reason: they can accommodate slight differences
without stressing fittings.
2) The “Why is the relief valve dripping?” mystery
Another common story: everything works, but the T&P discharge pipe drips occasionally. People assume the new heater is defective.
Often, the real cause is thermal expansion in a closed plumbing system. When heated water expands, pressure rises, and the relief valve may open slightly.
Adding a properly sized expansion tank (when appropriate) can solve the issue and protect the plumbing system. The lesson: a dripping relief valve is a
symptomdon’t “solve” it by capping the pipe or plugging the valve. That turns a warning sign into a hazard.
3) The “New heater, old shutoff valve” regret
Homeowners sometimes keep the old shutoff valve because “it still turns.” Then, months later, it starts weeping or won’t fully close,
turning a simple future repair into a bigger job. Pros often recommend replacing worn valves during installation because the system is already drained
and accessible. The lesson: spending a little on the right small parts during install can prevent big inconvenience laterespecially if the heater is
tucked into a tight corner or attic access is limited.
4) The “We set it to max so we never run out” strategy (and the scald scare)
Some households crank the thermostat up to avoid running out of hot water, then discover the hard way that scalding happens fast.
A common compromise is setting the heater around 120°F and improving hot water availability in other ways:
insulating accessible hot water pipes, installing efficient showerheads, spacing out high-demand uses, or choosing a heater with better recovery/first-hour rating.
The lesson: comfort and safety can coexistbut the “max heat” approach creates risks, especially for kids, older adults, and anyone with sensitive skin.
5) The “It’s brand new and it’s noisy” first-week panic
New installs can sometimes sound odd at firstair purging, slight expansion noises, or the tank settling. But loud popping or rumbling that continues
can suggest sediment issues (common in areas with hard water) or a need to check installation details. Homeowners who schedule routine maintenance
(even just an annual check) often report fewer surprises and longer equipment life. The lesson: pay attention to new sounds, but don’t assume every noise is a disaster.
Consistent, loud, or worsening noises are worth a professional look.
6) The “Permit and inspection saved me” moment
Some homeowners see permits as paperwork for the sake of paperworkuntil an inspector catches an unsafe discharge pipe termination,
missing seismic straps in a required area, or a setup that would have failed during a pressure event. Even when a permit isn’t strictly required,
many people feel better knowing the installation was reviewed. The lesson: a permit is often less about bureaucracy and more about
a second set of eyes on safety-critical details.
Bottom line: most “bad water heater experiences” aren’t caused by the tank itself. They’re caused by rushed installs, skipped safety parts,
or small details ignored in the name of speed. A careful installation plus a simple maintenance routine is the difference between
“reliable hot showers for years” and “my water heater is trending on the family group chat.”
Conclusion
Installing an electric hot water heater is a classic home upgrade that feels simpleuntil you remember it mixes electricity, water pressure, and heat.
The smartest approach for most households is to hire a qualified installer, understand what “good work” looks like, and confirm the safety components
(T&P valve discharge, expansion control where needed, and a safe temperature setting). Do that, and your water heater will quietly do its job
which is exactly what you want from a large, hot, pressurized appliance living inside your house.