Table of Contents >> Show >> Hide
- Why Dollar Tree Is a Halloween Wreath Goldmine
- Pick Your Wreath Base Like a Pro
- What You’ll Need (Budget-Friendly Supplies + Tools)
- Step-by-Step: The Classic Dollar Tree “Spider Pop” Deco Mesh Wreath
- Three Easy Variations Using Dollar Tree-Style Supplies
- How to Make a Cheap Wreath Look “High-End”
- Hanging, Weatherproofing, and Storage
- Troubleshooting (Because Wreaths Love Drama)
- Final Thoughts: Cheap Can Still Look Amazing
- Experience Notes: What DIYers Learn After Making a Dollar Tree Halloween Wreath
Halloween decorating has a special talent: it can go from “cute and festive” to “why is my porch a haunted museum?” in about three shopping bags.
If you’re aiming for the first option (with a tiny hint of the second), a DIY Dollar Tree Halloween wreath is the move.
It’s affordable, beginner-friendly, and it gives your front door the exact vibe you wantspooky, silly, classy, or “my house is the one with the good candy.”
This tutorial walks you through a polished wreath that looks far more expensive than it is, plus several easy variations using the same basic technique.
You’ll get design tips that make a budget wreath look “boutique,” practical advice for hanging it outside, and a real-world troubleshooting section
(because deco mesh has opinions).
Why Dollar Tree Is a Halloween Wreath Goldmine
Dollar Tree is basically a seasonal craft buffet. When Halloween hits, you’ll usually find the kinds of supplies that make wreath-making ridiculously doable:
wire wreath forms, wreath ties (often called chenille stems or tinsel stems), deco mesh, ribbons, floral picks, spooky embellishments (spiders, skulls, bats),
and lightweight signs. The best part is that these pieces are meant to be mixed-and-matched, so you can build a custom look without needing a craft store
loyalty card and a second job.
One smart strategy: choose a simple base (wire form or grapevine), then spend most of your “design energy” on a focal point and a consistent color palette.
That’s how you get the “I bought this at a cute home boutique” effect while your receipt quietly whispers, “It was like twelve bucks.”
Pick Your Wreath Base Like a Pro
Before you grab the first circular thing you see, here’s a quick cheat sheet. The base determines how you attach everything and how the wreath will behave
outdoors.
Wire Wreath Form (Best for Deco Mesh + Ribbon Tails)
- Why it works: Easy to tie mesh and ribbon onto the frame with chenille stemsno fancy skills required.
- Look: Full, fluffy, boldclassic “front door statement.”
- Great for: Orange/black/purple mesh, layered ribbons, big bows, and chunky embellishments.
Grapevine Wreath (Best for Rustic + “High-End” Texture)
- Why it works: You can tuck picks into the vines, and the texture instantly looks elevated.
- Look: Rustic, organic, slightly spooky-in-a-Pottery-Barn-way.
- Great for: Mini pumpkins, faux florals, creepy cloth, cobwebbing, and moody neutrals.
Foam Wreath Form (Best for Pinning + Glue-Heavy Designs)
- Why it works: You can pin, glue, or wrap fabric around it quickly.
- Look: Smooth and controlledgreat for themed wreaths (ghosts, eyeballs, spiders).
- Great for: Wrap-and-glue projects where you want everything placed “just so.”
For this main tutorial, we’ll use a wire wreath form because it’s the easiest path to a full, dramatic wreath with Dollar Tree supplies.
Then we’ll cover grapevine-style variations afterward.
What You’ll Need (Budget-Friendly Supplies + Tools)
This list is designed so you can build a wreath that looks full and finished without buying a mountain of extras. If your Dollar Tree has slightly different
colors or patterns, no problemstick to a tight palette and you’ll still win.
Dollar Tree Supplies (Core List)
- 1 wire wreath form (typically 12–14 inches)
- 2–4 rolls of deco mesh (Halloween colors like black/orange/purple work great)
- 1–3 wired ribbon spools (mix one bold pattern + one solid + one accent)
- 1 pack of chenille stems/tinsel stems (or multiple packs if you want extras)
- 1–3 Halloween picks or stems (pumpkins, bats, skulls, spooky florals)
- 1 lightweight Halloween sign or centerpiece (optional but very effective)
- Optional accents: plastic spiders, mini skulls, cobweb stretch, glittery bats, tiny ornaments
Tools (Use What You Have)
- Scissors (or wire cutters if you have them)
- Hot glue gun + glue sticks (optional but helpful)
- Zip ties (optional, for extra security outdoors)
- Measuring tape (optionalyour eyes are allowed to guess)
Budget tip: If you’re trying to keep this truly cheap, prioritize: (1) a solid base, (2) mesh volume, and (3) one strong focal point.
Ribbon is the “lipstick” of wreathsit makes everything look more put togetherbut you don’t need ten kinds.
Step-by-Step: The Classic Dollar Tree “Spider Pop” Deco Mesh Wreath
This design is bold, classic, and reads “Halloween” instantly from the sidewalk. Think: fluffy mesh base, layered ribbon tails, and a spider centerpiece
that says, “I’m festive… but I’m watching you.”
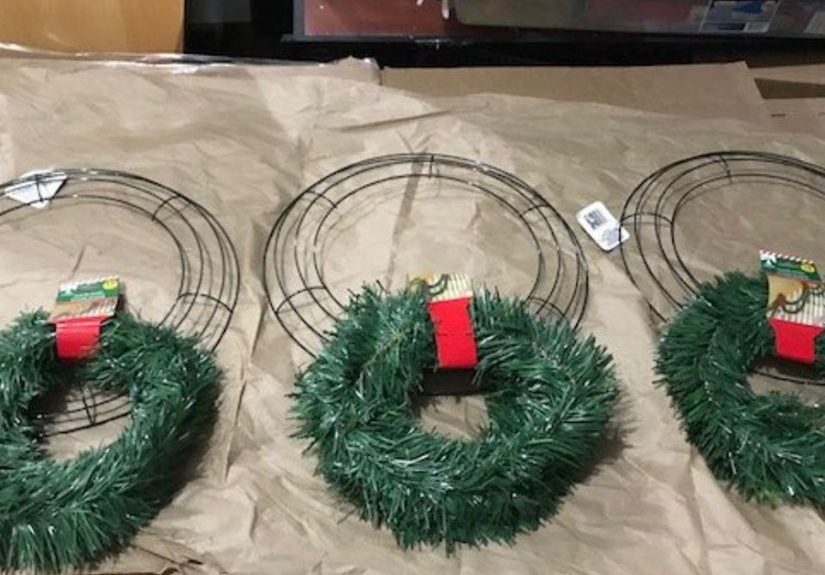
Step 1: Prep the Frame and Add Ties
- Lay your wire wreath form flat on a table.
- Cut chenille stems in half (you’ll get more ties and less bulk).
- Attach ties evenly around the frame by twisting them onto the metal rings.
You want enough ties so the wreath looks full. If you’re not sure, add “a few more” because wreath-making follows one universal truth:
the door will always show the gaps you didn’t see on the table.
Step 2: Add Deco Mesh for Fullness
Choose one main mesh color (like black) and one accent (orange or purple). You can use a simple “ruffle” method that’s beginner-friendly and forgiving.
- Cut mesh into strips (roughly 8–12 inches each) or ruffle it continuouslyeither way works.
- Pinch the mesh in the center to form a bow-tie/ruffle shape.
- Place the pinched center into a tie and twist to secure.
- Repeat around the wreath, alternating colors for a balanced look.
Design note: If your mesh looks too “striped,” blend ituse more of the main color and sprinkle the accent color throughout.
It looks more intentional and less like Halloween traffic cones.
Step 3: Add Ribbon Tails for a Boutique Look
Ribbon tails are the quickest way to make a Dollar Tree wreath look expensive. Wired ribbon is your best friend herebecause it holds shape instead of
flopping like a sad noodle.
- Cut ribbon into 6–10 inch tails (mix patterns and solids).
- Fold each tail in half like a little loop or awareness ribbon shape.
- Slip 1–2 ribbon tails into each tie (over the mesh) and twist to secure.
Keep it cohesive by repeating the same ribbon set around the wreath. Consistency reads as “designer,” even when your designer is… you, in sweatpants,
holding hot glue.
Step 4: Create a Strong Centerpiece (Spider or Sign)
Your focal piece is what makes the wreath feel like a “finished product” instead of “craft supplies that formed a circle.”
A big spider, a “Boo!” sign, or a pumpkin plaque works beautifully.
- Decide where you want the focal point (center, lower center, or slightly off to the side).
- If it’s a sign, attach chenille stems to the back (or use zip ties through holes/loops if available).
- Secure it tightly to the wire frame so it won’t wobble when the door opens.
Outdoor tip: If your door gets a lot of wind or slams shut easily, reinforce the centerpiece with a zip tie or two.
Hot glue is greatuntil the weather decides it’s not.
Step 5: Add Picks and Accents (The “Wow” Layer)
Now you’re building depth. Picks and accents should frame the focal point and guide the eye, like little stagehands for your spider.
- Trim long stems on picks so they’re easier to tuck into the wreath.
- Tuck picks into the wire frame or mesh bundles near the focal point.
- Secure with ties or a dab of hot glue where needed.
- Add small accents (bats, mini skulls, tiny pumpkins) in clusters of 3–5.
Easy design rule: Place your biggest elements first, then fill around them with medium pieces, and finish with small accents.
If you do it backwards, you’ll keep moving things and quietly negotiating with your wreath like it’s a stubborn roommate.
Step 6: Finish With a Big Bow (Optional, But Highly Recommended)
A bow instantly looks “front-door ready.” If you don’t want to build a giant bow, you can do a simplified one with two loops per side.
- Make a bow with wired ribbon (or layer two ribbons for contrast).
- Attach the bow with chenille stems twisted tightly to the wire frame.
- Fluff the loops and angle the tails so they point slightly downward.
Three Easy Variations Using Dollar Tree-Style Supplies
Once you understand the “base + focal point + filler” formula, you can remix your wreath into different styles without starting from scratch.
Here are three crowd-pleasers.
1) Pumpkin Patch Grapevine Wreath (Rustic + Spooky-Cute)
Use a grapevine wreath base if you want that textured, “expensive-looking” foundation. Stretch cobweb material lightly across part of the wreath,
then layer mini pumpkins and florals in one corner (top-left or bottom-right).
- Palette: orange + black + a touch of cream
- Focal idea: pumpkin cluster + black bow
- Pro move: keep some grapevine visible so it looks intentional, not overcrowded
2) Goth Garden Wreath (Black Florals + Mini Skulls)
This look is moody and stylish, not cartoonish. Start with a dark base (grapevine or painted foam) and add black florals, deep purple accents,
and a few mini skulls tucked in like they “naturally grew there” (nature is healing).
- Palette: black + deep purple + muted green
- Focal idea: floral cluster with skull accents
- Pro move: use odd-number groupings for accents (3 skulls looks better than 2)
3) Friendly Ghost Wreath (Whimsical + Great for Kids)
For a softer Halloween vibe, wrap strips of gauzy fabric or “creepy cloth” around a foam wreath form. Add a few simple ghost shapes (felt, lightweight
plastic, or fabric bundles) and finish with a classic “Boo!” sign. This style photographs well and feels more playful than scary.
- Palette: white + black + a small orange pop
- Focal idea: “Boo!” sign with one or two ghost accents
- Pro move: add a small string of battery fairy lights if you want an evening glow
How to Make a Cheap Wreath Look “High-End”
You don’t need luxury suppliesyou need intentional choices. Here’s what actually changes the final look.
Stick to One Main Color Story
Pick two main colors and one accent. Examples:
orange + black + gold, or black + purple + green, or neutral + black + copper.
If you use every Halloween color at once, your wreath can start to look like it escaped from a party store aisle.
Choose One “Hero” Item
A hero item is your big focal piece: a spider, a sign, a pumpkin cluster, or a dramatic bow. Everything else supports it.
This prevents the “I glued everything I owned onto a circle” effect.
Layer Texture, Not Just Stuff
Mesh gives volume, ribbon gives structure, and picks give dimension. If you feel like your wreath is flat, add texture layersdon’t just add more items.
A couple of well-placed picks can do more than fifteen tiny doodads.
Hanging, Weatherproofing, and Storage
Hanging Options
- Over-the-door wreath hanger: easiest and most secure for most doors
- Ribbon hanger: loop a sturdy ribbon through the frame and hang it on a hook
- Outdoor adhesive hooks: helpful on smooth surfaces (follow package directions and keep weight realistic)
Quick Weatherproofing Tips
- Reinforce heavy items with zip ties, not just hot glue.
- Keep paper signs sheltered, or seal them with clear protective spray if you have it.
- If your porch gets direct rain, choose plastic and wire-based accents over paper and fabric-heavy designs.
Storage That Prevents “Next Year’s Sad Wreath”
- Store in a large plastic bin or wreath storage bag.
- Keep it dry and out of direct sun to prevent fading.
- Fluff mesh and bows before storing so you don’t crush the shape.
Troubleshooting (Because Wreaths Love Drama)
My wreath looks patchy.
Add more mesh in the thin spots, then cover transitions with ribbon tails. Ribbon is basically the concealer of crafting.
My bow is drooping.
Use wired ribbon, tighten the center tie, and fluff the loops. If it still droops, anchor the bow to the frame with an extra tie point.
Stuff falls off when the door closes.
Reinforce heavier accents with zip ties or wire. Hot glue alone can fail with temperature changes and repeated motion.
It looks “busy,” not “designed.”
Remove two or three small items and give the focal point breathing room. Negative space is not your enemyit’s your wreath’s personal assistant.
Final Thoughts: Cheap Can Still Look Amazing
A Dollar Tree Halloween wreath works because it’s built on simple principles: pick a base that matches your style, commit to a palette,
create a focal point, and layer with purpose. The result is festive, durable, and genuinely cutewithout the kind of price tag that makes you
question your life choices in the checkout line.
And if your first attempt isn’t perfect? Congratulations: you’re officially a wreath maker now. Fluff it, tweak it, and remember
trick-or-treaters are not grading your ribbon tails. They’re grading your candy.
Experience Notes: What DIYers Learn After Making a Dollar Tree Halloween Wreath
Here’s the funny thing about a cheap Halloween wreath: the supplies are simple, but the experience feels oddly cinematic.
There’s a momentusually halfway throughwhen the wreath looks like a chaotic pile of mesh and you think,
“I have made a terrible mistake.” Then you add ribbon, a focal piece, and suddenly it transforms into something that looks
planned on purpose. That “before and after” glow-up is a big reason people keep making wreaths year after year.
DIYers also learn quickly that the store trip is part scavenger hunt, part comedy. You walk in for “a wreath form and maybe a spider,”
and you walk out holding a glitter bat, a pumpkin pick, three ribbons you didn’t know you needed, and a sign that says “Witch Please.”
(Dollar Tree has a way of making everyone believe they’re one accessory away from winning Halloween.)
Another common experience: realizing that extras save your sanity. Extra chenille stems. Extra glue sticks.
One more roll of mesh than you think you need. Not because you’re wastefulbecause wreaths have a magical ability to use up supplies
right when the project is almost done. Many crafters learn to buy “one backup” so they don’t have to pause mid-fluff and drive back out
with a bow half-attached like a tiny craft emergency.
People also discover the “door test” is real. A wreath can look perfect on the table and then misbehave the second it hits the front door.
Doors open, doors close, wind happens, and suddenly your spider centerpiece is leaning like it’s exhausted from haunting.
That’s why experienced DIYers do a quick durability check: hang it, open the door a few times, and make sure nothing swings wildly or shifts.
If something moves, it gets reinforcedusually with a zip tie or an extra tie pointbecause outdoor decor lives a tougher life than indoor decor.
There’s also the “photo moment” experience. A lot of DIYers don’t realize how different wreaths look in real lighting until they take a picture.
Bright orange mesh can pop beautifully in daylight, while black mesh and dark florals can look extra rich at dusk.
If you add fairy lights, the wreath can become a whole evening vibeespecially if your porch light is warm-toned.
Many people end up tweaking placement after a quick photo because the camera reveals what your eyes missed: a gap, a crooked sign,
or ribbon tails that are being dramatic.
Finally, DIYers learn that wreath-making is secretly about confidence. The first one takes the longest because you’re deciding everything in real time.
The second one is faster because you trust the process. And by the third, you’re casually saying things like,
“I’m going to anchor the focal point off-center for visual movement,” as if you didn’t start this journey by googling
“how do I attach a spider to a wreath without crying.” That’s the real win: a front door that looks festive, plus the satisfying feeling
that you made it yourselfcheap, cheerful, and totally Halloween-ready.