Table of Contents >> Show >> Hide
- Why a Terra Cotta Pot Tower Is So Popular
- What You’ll Need for a DIY Terra Cotta Pot Tower
- Step-by-Step: How to Build a Terra Cotta Pot Tower
- Choosing the Right Plants for Your Terra Cotta Tower
- Keeping Your Pot Tower Healthy and Standing Tall
- Creative Ways to Customize Your Hometalk-Style Pot Tower
- Common Mistakes (and How to Avoid Them)
- Real-Life Experience: Living With a DIY Terra Cotta Pot Tower
- Final Thoughts
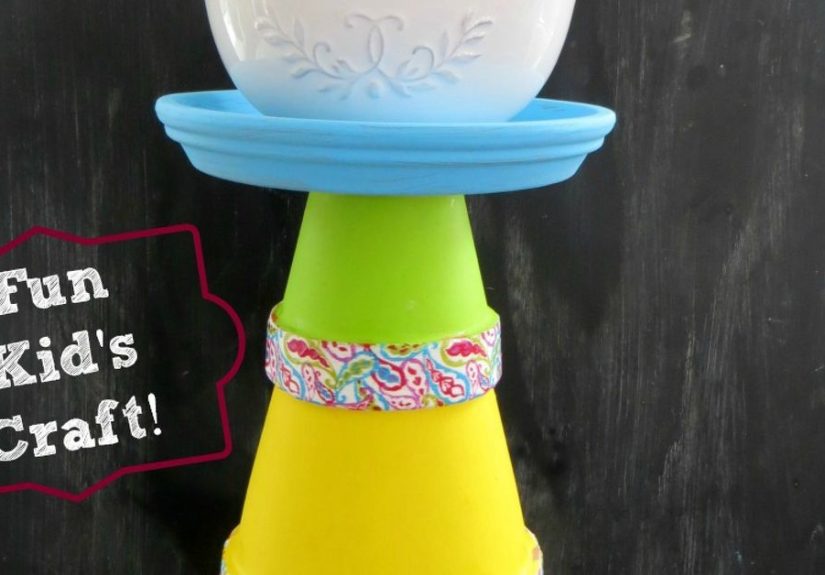
If your porch or patio is looking a little “meh,” a DIY terra cotta pot tower is the garden glow-up it’s been waiting for.
This stacked planter project takes classic clay pots, turns them into a vertical garden, and gives you a showy column of flowers or herbs that looks custom-madewithout the custom price tag. Inspired by popular Hometalk-style projects, this is the kind of weekend DIY that makes neighbors slow down and stare (in a good way).
In this guide, you’ll learn exactly how to build your own terra cotta pot tower, what to plant, how to keep it from toppling over in the first good breeze, and how to protect those pots from cracking in winter. We’ll also wrap up with some real-life “experience” tipsthe little tricks you only learn after living with a pot tower through sun, storms, and the occasional soccer ball.
Why a Terra Cotta Pot Tower Is So Popular
Vertical gardening without power tools
A terra cotta pot tower is basically vertical gardening for people who hate complicated builds. You stack clay pots on a central support or nest them inside one another, creating several layers of planting space in the footprint of a single container. That makes it a smart solution for small patios, balconies, and narrow entryways.
Many DIYers use a metal rod or rebar driven through the drainage holes of each pot. The pots tilt in different directions as they’re threaded onto the rod, giving that fun “tipsy” or “topsy-turvy” look while still being surprisingly stable when built correctly.
The perks of terra cotta
Terra cotta (unglazed clay) isn’t just pretty and rustic; it’s also practical. The clay is porous, which allows air and moisture to move through the pot walls. That improves soil aeration and drainage, making terra cotta especially good for plants that don’t like “wet feet” such as herbs, succulents, and many annuals.
The trade-off? Terra cotta dries out faster than plastic or glazed containers, so your tower will need regular watering in hot weather. Think of it as the gym membership your watering can always wanted.
What You’ll Need for a DIY Terra Cotta Pot Tower
Exact supplies vary by design, but here’s a solid starting list:
- 1 large terra cotta pot (12–14 inches) for the base
- 4–6 smaller pots (6–10 inches), all with drainage holes
- 1 sturdy metal rod, pipe, or rebar (4–6 feet, depending on tower height)
- High-quality potting mix formulated for containers
- Optional: pea gravel or perlite to improve drainage in the soil mix
- Annual flowers, herbs, or trailing plants
- Heavy saucer or paver to sit under the bottom pot
- Gloves, small trowel, and a level (if you want to be extra precise)
Some crafters also use strong exterior-grade adhesive between pot tiers instead of a central rod. This approach works well for straight, tiered “wedding cake” towers and can be useful when you’re placing the tower in a windy area and want extra stability.
Step-by-Step: How to Build a Terra Cotta Pot Tower
1. Choose the perfect spot
Place your tower where your chosen plants will be happiest. Flowering annuals like petunias and calibrachoas usually want full sun (6+ hours per day), while many herbs do well in full sun to part shade. Close to a water source is idealnothing kills pot-tower enthusiasm faster than dragging a hose across the entire yard every evening.
2. Prepare the base
Set your saucer, paver, or stepping stone where you want the tower to live. This helps distribute weight and keep the bottom from sinking into soil over time.
Place the largest pot on the saucer. If your winters are cold, elevating containers on pot feet, bricks, or blocks helps drainage and reduces freeze damage to clay.
3. Install the central support
For the classic “tipsy” look, slide the metal rod or rebar through the drainage hole of the largest pot so it sits in the center. Push the rod down into the ground several inches (or more, if your soil is soft) until it feels solid. Many tutorials recommend leaving at least a foot of rod above the final pot so the tower remains stable.
If your pot will sit on hardscape (like a porch), you can anchor the rod in a separate heavy container filled with concrete, or bolt it to the surface if you’re comfortable with that type of hardware.
4. Add soil and stack the pots
Fill the base pot with potting mix until the soil level sits just below the drainage hole of the next-sized pot. Don’t put a big layer of rocks at the bottom of the pot; research shows this actually makes drainage worse by creating a perched water table where roots can rot. Instead, rely on good-quality, well-draining container soil and adequate drainage holes.
Thread the second pot onto the rod and gently tilt it so it rests at an angle on the soil. Add potting mix, again stopping just short of the next drainage hole. Repeat with each additional pot, alternating the direction of the tilt so plants will cascade in different directions. This is what gives the tower its playful, Hometalk-ready personality.
5. Plant your flowers or herbs
Now for the fun part. In each pot, tuck in your plants, leaving a bit of space at the top so water doesn’t immediately overflow. Many gardeners use a mix of:
- “Thrillers” – upright plants like geraniums or upright herbs in the top pot
- “Fillers” – mounding flowers like impatiens or marigolds in the middle tiers
- “Spillers” – trailing plants like sweet potato vine, lobelia, or creeping thyme that spill over the edges
Herb towers are also popularthink basil, thyme, parsley, oregano, and chives layered down the tower so you can snip your way to dinner.
6. Water and settle the soil
Water the tower from the top, letting moisture filter down through the pots. Many vertical planter designs rely on this “trickle-down watering” effect: as the top pot drains, it helps hydrate the pots below, reducing wasted water.
After the first watering, you may need to top up the soil a bit where it has settled around roots. Just don’t bury stems or crowns too deeply.
Choosing the Right Plants for Your Terra Cotta Tower
Sun-loving flower combos
For a full-sun location, consider combinations like:
- Petunias + calibrachoa + sweet potato vine
- Geraniums + bacopa + lobelia
- Portulaca (moss rose) for a drought-tolerant, low-maintenance mix
These annuals tolerate the faster drying of terra cotta and reward you with a wall of color all summer.
Herb tower ideas
If you’re more “kitchen witch” than “flower farmer,” turn your tower into a vertical herb garden. Mix:
- Basil in the top pot (it loves warm, sunny spots)
- Thyme and oregano in the middle tiers
- Trailing rosemary or creeping thyme near the bottom where they can spill over
Just group herbs with similar light and water needs so nobody ends up grumpy and wilted halfway through July.
Shade-friendly options
For part shade, impatiens, begonias, coleus, and ferns can all play nicely in a tower. Use lighter-colored flowers to brighten a shady corner and pair them with variegated foliage for extra interest.
Keeping Your Pot Tower Healthy and Standing Tall
Watering and feeding
Because terra cotta is porous, your tower may need daily watering in hot, dry weathersometimes even twice a day in extreme heat. Stick a finger into the soil about an inch down; if it feels dry, it’s time to water again.
Use a balanced, water-soluble fertilizer every few weeks or a slow-release granular fertilizer mixed into the potting soil at planting time. Container-grown plants depend entirely on you for nutrients; there’s no surrounding soil to tap into.
Drainage and root health
Good drainage is non-negotiable in stacked planters. Make sure every pot’s drainage hole is clear and not blocked by the support rod or compacted soil. Experts agree that the best drainage strategy is simply using well-draining potting mix and pots with adequate holesno need for thick layers of rocks at the bottom.
Stability and safety
A properly built tower is surprisingly sturdy, but there are a few things you can do to prevent wobbling:
- Make sure the base pot is large and heavy enough to support the stack.
- Drive the rod deeply into the ground or anchor it securely to a heavy base.
- Angle the pots so they rest on the soil and on the rod, not just hanging from the rod alone.
- For towers without a rod, use outdoor-safe adhesive between tiers for extra security.
For smaller tabletop towers or decorative stacks, a bit of poster putty or similar material under a slightly uneven pot can help prevent wobbles without permanent glue.
Winter care for terra cotta
In cold climates, terra cotta is vulnerable to cracking as water in the clay freezes and expands. Garden experts suggest moving smaller pot towers under cover, grouping them near warm walls, or wrapping the pots with breathable materials like burlap to help them survive winter. Elevating pots on bricks or feet and avoiding waterlogged soil are also key.
Creative Ways to Customize Your Hometalk-Style Pot Tower
Paint and finishes
If you love a more colorful or coastal vibe, paint your terra cotta pots before stacking. Many DIYers use acrylic paints, chalk paint, or outdoor craft paints, then seal the outside with a clear sealer to help the finish last. Distressed, whitewashed, or “beachy” painted pots pair beautifully with petunias or trailing ivy.
Theme your planting
Try fun themes for your tower:
- Pizza garden: basil, oregano, thyme, cherry tomatoes in a nearby container
- Pollinator tower: lantana, verbena, and salvia to attract butterflies and bees
- Fragrance tower: lavender, scented geraniums, and lemon thyme
Add small garden signs, fairy lights, or decorative stakes to lean into the Hometalk-style, “I made this myself and I’m kind of proud” aesthetic.
Common Mistakes (and How to Avoid Them)
Overcrowding the pots
It’s tempting to cram every pot with plants, but overcrowding leads to poor airflow, more disease, and stressed roots. Start with fewer, smaller plants; your tower will fill in faster than you think.
Using garden soil instead of potting mix
Garden soil is too heavy and may compact in containers, especially terra cotta. Container potting mix is formulated to be lighter, drain well, and retain just enough moisture for healthy roots.
Ignoring wind and kids
Tall towers on open decks or near active play areas need extra stability. Place them against a wall or corner, or opt for a slightly shorter tower (3–4 pots) if your household includes energetic children, dogs, or that one friend who gestures a lot.
Real-Life Experience: Living With a DIY Terra Cotta Pot Tower
Building a terra cotta pot tower is one thing. Living with it through a full season (or several) is where the real lessons show up. Here are “experience notes” drawn from how DIYers actually use and tweak their Hometalk-style towers over time.
Week 1: The honeymoon phase
The first week after you build the tower, you’ll probably check on it more than you check your email. The plants are perky, the soil is perfectly level, and you’re convinced this might be your personality now: vertical gardener.
This is the moment to take photosbefore summer heat, wind, and your own occasional neglect start doing their thing. Lots of Hometalk users report that a fresh tower instantly makes an entryway look styled, even if the rest of the yard is still a work in progress.
Weeks 2–4: The watering reality check
By week two or three, you notice something important: the top pots dry out faster than the lower ones. Sun hits the top more directly, and there’s less soil volume up there. That means checking moisture levels at different tiers instead of assuming one watering schedule works for all.
Many gardeners solve this by:
- Switching the thirstiest plants to the lower tiers where soil stays moist longer
- Adding a light mulch on top of the soil to slow evaporation
- Watering in the early morning so plants head into the day fully hydrated
Midseason: The jungle phase
Once your plants hit their stride, the tower begins to look like a leafy, flowery waterfall. This is when you start gently pruning and deadheading.
Trailing plants can sometimes get so enthusiastic that they block sunlight from the tiers below. A quick trim keeps lower plants from disappearing into shade. At the same time, regular deadheading of spent blooms coaxes more flowers, giving you that full, lush look you see in vertical-gardening inspiration photos.
Late season: The makeover opportunity
As summer winds down, you have choices:
- Refresh the tower with fall favorites like pansies, ornamental kale, and small mums.
- Replant with cool-weather herbs like parsley and chives.
- Empty and clean the pots so they’re ready for the next season’s design.
Cleaning terra cotta with a mild bleach solution (about 1 part bleach to 9 parts water, then rinsed thoroughly) can help remove salts and algae, keeping your pots looking fresh and minimizing disease carry-over.
Winter: Protecting your handiwork
If you live where winters freeze, this is when you decide whether your tower overwinters outdoors or comes apart for storage. Many gardeners disassemble the tower, let the pots dry completely, and store them in a shed or garage. Those who leave towers outside often move them against a south-facing wall, raise them on pot feet, and insulate the base to reduce freeze–thaw stress.
Either way, your first year with a terra cotta pot tower teaches you a lot about your climate, your plants, and your own gardening style. Some people go on to build matching pairs for front steps; others experiment with taller towers, herb-only versions, or painted, themed creations. That’s the real magic of this Hometalk-friendly projectit’s endlessly customizable, budget-friendly, and keeps giving you new ideas each season.
Final Thoughts
A DIY terra cotta pot tower is more than a clever planter; it’s a compact, vertical garden that brings color, fragrance, and personality to even the smallest space. With a few clay pots, a sturdy support, and some well-chosen plants, you can build a stacked flower or herb tower that looks like something you’d scroll past on Hometalk or Pinterestand then realize, “Hey, I actually made that.”
Give your entryway, balcony, or patio a simple but stunning upgrade. Start with one tower, learn what works in your light and climate, and don’t be surprised if you end up planning a whole little forest of terra cotta towers next season.