Table of Contents >> Show >> Hide
- Why Chair Cushion Storage Matters More Than You Think
- What Is the DIY Chair Cushion Storage Solution?
- Plan Your DIY Cushion Storage Station
- Materials & Tools Checklist
- Step-by-Step: Build Your DIY Chair Cushion Storage Solution
- Smart Variations for Different Spaces
- How to Keep Cushions Clean and Fresh
- Common Mistakes to Avoid
- DIY Chair Cushion Storage Experiences & Ideas (Bonus Section)
- Final Thoughts
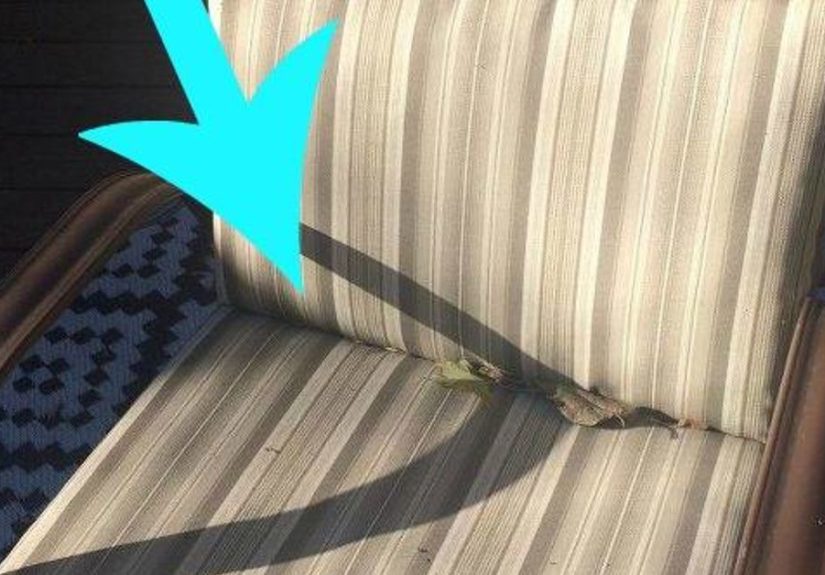
If your patio chair cushions are constantly covered in leaves, pollen, bird gifts, or mystery dust,
you are not alone. Outdoor cushions are like magnets for every bit of debris floating through your
backyard. You fluff them, you shake them, you swear you’ll put them away “next time” – and then one
good windstorm later, they’re back to looking like compost starters.
That’s exactly why the idea behind the “DIY Chair Cushion Storage Solution” from the Hometalk-style
DIY crowd is so clever: instead of leaving cushions out on the seats to collect debris, you give them
their own dedicated storage spot. Think simple wall-mounted hooks or rails where cushions hang
vertically when they’re not in use. Leaves fall down, water drains off, and your cushions stay cleaner
and drier with almost no extra effort.
In this guide, we’ll walk through why cushion storage matters (yes, even if you only sit outside on
weekends), how to plan your own cushion storage station, and step-by-step instructions to build an
easy system inspired by Hometalk-style projects. We’ll also cover care tips from cleaning and fabric
experts so your cushions don’t turn into moldy science experiments by the end of the season.
Why Chair Cushion Storage Matters More Than You Think
Sun, rain, and mold: the not-so-cute side of outdoor cushions
Outdoor cushions may be labeled “weather-resistant,” but that doesn’t mean “invincible.” UV rays fade
colors and weaken fabric over time. Rain, morning dew, and humidity soak into the filling and can
encourage mold and mildew if cushions don’t dry properly. Cleaning and storage experts recommend
fully drying cushions before putting them away and storing them in a ventilated, dry area to avoid
that musty smell and black spots.
On top of that, cushions that sit flat on chairs act like leaf catchers and pollen traps. If you have
trees nearby, you know the routine: one breeze and the chairs look like they’re wearing fuzzy green
sweaters. The more often you have to brush, vacuum, or wash them, the faster the fabric and seams wear
out.
Clutter & critters: another reason to rethink storage
Leaving cushions scattered across chairs, benches, and lounge seats also makes your patio feel busy
and cluttered. A simple storage plan instantly makes the space look tidier, even if everything else
is still a work-in-progress.
Poor storage can also invite uninvited guests. Slightly damp, undisturbed cushions sitting in boxes or
corners can attract insects, including wasps looking for a soft nesting spot. Good airflow and dry
storage go a long way toward keeping bugs from treating your cushions like prime real estate.
What Is the DIY Chair Cushion Storage Solution?
The beauty of this Hometalk-inspired DIY project is its simplicity. The core idea:
get cushions off the seats and up on the wall.
Instead of a bulky storage box or stuffing cushions into a closet, you install a row of sturdy hooks
or a rail in a protected spotlike along a fence, under a covered porch, under the deck, or inside a
garage or shed. Each cushion gets its own “parking spot” on a hook. You can hang them by:
- Existing ties (if they’re strong enough).
- Small sewn-on fabric loops.
- Grommets and carabiners.
This vertical storage does three important things:
- Keeps cushions away from falling leaves and debris.
- Improves airflow so they dry faster after use or light rain.
- Makes it easy to grab, hang, and put them backno wrestling with lids or bins.
Hometalk-style versions of this project often show cushions hanging neatly on a wall with simple coat
hooks or garage hooks, turning a basic wall into a functional “cushion closet.”
Plan Your DIY Cushion Storage Station
Step 1: Measure your cushions
Before you buy anything, grab a tape measure and note:
- Width of each cushion.
- Height (front to back) if you’re hanging them on their long edge.
- Number of cushions you want to store.
This helps you figure out how many hooks you need and how long your rail or board should be. Plan a
little space between cushions so air can circulatethink at least an inch or two between each one.
Step 2: Choose the right location
Your storage spot should check as many of these boxes as possible:
- Covered or partially protected from direct rain.
- Good airflow to help cushions dry.
- Convenientnear the seating area so you’ll actually use it.
- Off the ground so water and pests are less of an issue.
Popular locations include a garage wall, the inside of a shed, an under-deck area, or the side of a
house under the eaves. Storage pros also suggest keeping cushions in dry, breathable spaces rather
than sealed, damp corners to prevent mold and odors.
Step 3: Pick the right hardware
For outdoor or semi-outdoor areas, look for:
- Galvanized or stainless-steel hooks that resist rust.
- Exterior-grade screws.
- A solid backer board (like a 1×6 or 1×8) if you don’t have studs exactly where you want hooks.
Indoors (garage, mudroom, enclosed porch), standard heavy-duty coat hooks or tool hooks work well as
long as they’re rated to hold a few pounds each.
Materials & Tools Checklist
Here’s a basic shopping and tool list for a simple wall-mounted solution:
Materials
- 1–2 boards (1×6 or 1×8) cut to the length of your storage area.
- Outdoor-rated primer and paint or stain (if the board is exposed).
- 6–12 heavy-duty hooks (number depends on your cushion count).
- Exterior screws and wall anchors (if not screwing into studs or solid wood).
- Optional: small D-rings, grommets, or extra fabric to create hanging loops on cushions.
Tools
- Measuring tape and pencil.
- Drill/driver and drill bits.
- Level (to avoid “drunk-looking” crooked rows of cushions).
- Stud finder (for walls).
- Paintbrush or roller.
- Scissors and basic sewing kit or fabric glue (if adding loops).
Step-by-Step: Build Your DIY Chair Cushion Storage Solution
1. Prep and paint the backer board
Cut your board to size, sand any rough edges, and prime and paint or stain it if it will be visible.
A quick coat of exterior paint not only looks more finished but also protects the wood from moisture.
2. Lay out your hooks
On the board, lightly mark where each hook will go. Space them based on cushion width, leaving a
little breathing room between each. For example, if your cushions are 18 inches wide, a spacing of
around 18–20 inches between hooks works well.
Use a level to draw a straight line along the board where the tops of the hooks will sit so everything
lines up nicely once installed.
3. Attach hooks to the board
Pre-drill screw holes for each hook to prevent the board from splitting, then attach the hooks with
the screws included or with your own weather-resistant screws. Tighten until secure but don’t
overtighten to the point of stripping the wood.
4. Mount the board to the wall or fence
Use a stud finder if you’re mounting to a framed wall. When mounting outdoors to a fence, siding, or
brick, choose appropriate anchors or fasteners. Make sure the board is:
- Level.
- High enough that cushions don’t drag on the ground.
- Comfortably reachable so you’re not doing a shoulder workout every time you hang them.
5. Add hanging loops (if needed)
If your cushions only have ties at the corners, you can:
- Sew a short, reinforced fabric loop to the back top edge.
- Install a small grommet and use a carabiner or S-hook to hang.
Keep loops small and strong so they don’t tug at the seams or distort the cushion shape.
6. Hang, test, and tweak
Hang all your cushions on their hooks and step back. Check that:
- Nothing is touching the ground.
- Cushions can swing slightly so air gets behind them.
- You can remove and rehang them with one hand (ideally while holding a cold drink in the other).
If something feels awkward, adjust hook spacing or add a second row higher or lower for different
cushion sizes.
Smart Variations for Different Spaces
Small balcony or apartment patio
No fence or garage wall? Try:
- Over-the-door hooks on a balcony storage door.
- A narrow, wall-mounted rail with flip-down hooks.
- A freestanding coat rack tucked into a corner (for very light cushions only).
In tighter spaces, you can pair your hook system with a small deck box for extra throws or seasonal
pillows.
Large deck or backyard
If you have more space, consider combining your hanging solution with:
- A storage bench that holds extra pillows or blankets.
- Deck boxes with breathable liners for off-season storage.
- A designated “outdoor mudroom” corner with hooks for cushions, garden tools, and pool toys.
DIY guides for storage benches show how you can build seating with built-in storage underneath,
perfect for off-season cushions or outdoor games.
How to Keep Cushions Clean and Fresh
Clean before storingalways
Cleaning experts recommend washing or spot-cleaning outdoor cushions at least a couple of times a
season, especially before long-term storage. Use mild soap and water, rinse thoroughly, and let them
dry completely in the sun.
Storing dirty or damp cushions is the fastest way to grow mold, mildew, and odors. Even in your new
storage station, moisture plus grime equals trouble.
Encourage airflow and avoid “plastic coffins”
While airtight bins can be helpful in some climates, many specialists recommend breathable storage
for cushionsespecially in humid areasso trapped moisture can escape. Using vertical hanging storage
plus breathable covers or bags can help prevent mold growth.
Seasonal storage strategy
When patio season winds down, you can:
- Clean and fully dry cushions.
- Use your hook system inside a shed or garage for winter.
- Or move them into breathable fabric storage bags on a shelf.
Lifestyle and home editors also suggest bringing cushions inside before the first frost and storing
them in a dry indoor space to prevent fabric damage and mildew.
Common Mistakes to Avoid
- Hanging cushions while they’re still wet: Let them dry in the sun first so moisture
doesn’t get trapped behind them. - Using non-rust-resistant hardware outdoors: Standard screws and hooks can rust and
drip stains onto your cushions. - Mounting too low: Cushions should not brush the deck, where they can wick up
moisture and dirt. - Overloading a single hook: One hook per cushion is best; too many per hook can sag
or tear fabric loops.
DIY Chair Cushion Storage Experiences & Ideas (Bonus Section)
Once you start using a wall-mounted cushion storage system, you realize it’s not just about being
“neat.” It quietly changes how you use your outdoor space. Instead of debating whether it’s worth
dragging cushions out for a 30-minute coffee break, you simply grab a couple from their hooks, toss
them on the chairs, and you’re done. No digging through a deck box, no wondering which lid goes to
which container.
Many DIYers share similar “aha” moments. One homeowner with a leafy backyard realized she was spending
more time brushing off cushions than actually sitting on them. Her solution was to install a row of
basic garage hooks along the inside wall of her covered porch. Each cushion got its own hook, and she
added small loops to the back of the cushions with leftover outdoor fabric. After a few weekends of
use, she noticed two things: the cushions stayed cleaner, and she and her family were actually using
the porch more often because setup and cleanup were so fast.
Another family with kids and dogs turned their under-deck area into a mini “backyard locker room.”
They added a simple 2×4 frame, attached a painted board, and mounted heavy hooks in two rows. The
top row holds chair cushions; the bottom row holds pool towels, life jackets, and a mesh bag of pool
toys. Because everything hangs off the ground, rainwater that blows in doesn’t soak anything, and
leaves mostly blow through instead of piling up. The kids learned quickly where things “live,” and
cleanup after pool time went from chaos to a 5-minute routine.
In smaller spaces, the experience is more about visual calm. A city apartment balcony that once
looked cluttered with cushions, a small table, and planters suddenly felt bigger after the owner
installed an over-the-door hook system inside her balcony closet. Instead of trying to sit around
cushions stacked like a Jenga tower, she stores them vertically behind a closed door. She can pull
them out in seconds, but when they’re not in use, the balcony feels open, airy, and much easier to
sweep.
DIYers also report that vertical storage helps them notice issues earlier. When cushions are hung at
eye level, it’s easier to spot small stains, loose seams, or a damp patch before it becomes a big
problem. A quick spot-clean or a little extra drying time can save you from throwing out an entire
set of cushions at the end of the season.
There’s also the satisfaction factor. A simple row of matching cushions hanging neatly on hooks looks
surprisingly polishedalmost like a boutique outdoor showroom. If you enjoy scrolling through
Hometalk-style inspiration photos, you’ll recognize that feeling: regular everyday items arranged in
a way that looks intentional. Your storage wall becomes part practical solution, part design moment.
Over time, many people end up customizing their storage further. Some add labels above each hook
(“Chair 1,” “Lounger,” “Bench”) so everyone returns cushions to the same spot. Others build a narrow
shelf above the hooks for lanterns or outdoor décor. A few crafty types even paint a fun color block
or mural behind the cushions so that when they’re off the wall, the storage area still looks
attractive.
The bottom line from real-world experiences: once you give your cushions a dedicated home, you protect
your investment, reduce cleaning time, and make your outdoor space more inviting. Instead of treating
cushions like an afterthought, you treat them like part of the designstored smartly, easy to grab,
and ready whenever you feel like enjoying the outdoors.
Final Thoughts
A “DIY Chair Cushion Storage Solution” doesn’t have to be complicated or expensive. With a simple
board, a few hooks, and a free afternoon, you can create a storage system that keeps cushions cleaner,
drier, and ready to use. You’ll spend less time brushing off leaves and more time actually sitting
down and enjoying your outdoor spacewhich, let’s be honest, is the whole point of having cushions in
the first place.
Whether you’re working with a tiny balcony or a sprawling deck, customizing a Hometalk-style cushion
storage area is a smart, budget-friendly upgrade. Hang them high, keep them dry, and give your outdoor
seating the low-maintenance life it deserves.


