Table of Contents >> Show >> Hide
- Why Overlays Work So Well on a Boring Armoire
- Choose a Style Before You Touch the Sandpaper
- What You’ll Need
- How to Refresh an Armoire With Overlays
- 1. Check the cabinet’s condition
- 2. Remove the doors, hardware, and shelves
- 3. Clean first, always
- 4. Repair damage and scuff-sand the surface
- 5. Plan the overlay layout with actual measurements
- 6. Cut, dry-fit, and adjust
- 7. Attach the overlays
- 8. Prime like you want the makeover to last
- 9. Paint for durability, not just color
- 10. Let it cure before heavy use
- 11. Upgrade the hardware
- Best Color Ideas for an Armoire Makeover
- Mistakes to Avoid
- How Much Does an Armoire Overlay Makeover Cost?
- Styling Ideas After the Makeover
- Experience: What This Kind of Makeover Actually Feels Like
- Final Thoughts
- SEO Tags
A plain armoire can be one of the biggest design freeloaders in a room. It takes up a lot of visual real estate, stores half your life, and somehow still manages to look like a large beige shrug. The good news? You do not need to replace it. With decorative overlays, smart prep, and the right paint strategy, you can turn a flat, forgettable cabinet into a custom-looking showpiece that feels built for your space instead of abandoned by a catalog from 2007.
This kind of cabinet makeover works because overlays do what plain doors never could: they add depth, detail, and intention. Whether you use trim to create a faux panel effect, carved appliques for a traditional look, or sleek geometric overlays for a cleaner style, the result is the same. Your armoire stops looking like storage and starts looking like furniture.
Even better, an armoire makeover is one of those rare DIY projects that can look expensive without requiring “sell a kidney for custom millwork” money. If you already own a sturdy cabinet with good bones, overlays let you upgrade the look while keeping the structure. That means less waste, lower cost, and far less chaos than hauling in something new.
Why Overlays Work So Well on a Boring Armoire
Flat cabinet doors are the blank T-shirts of furniture. They are not offensive, but they are not exactly exciting either. Overlays fix that by adding architectural detail to the surface. A simple frame of trim can mimic a shaker-style door. Curved appliques can lean traditional or vintage. Narrow molding strips can make a modern cabinet look tailored and intentional. In other words, overlays give you style without asking you to rebuild the whole piece.
They also help disguise a cabinet’s weak points. Minor dings, uneven grain, bland laminate faces, and “why did they design it like that?” door fronts all become easier to ignore when the surface has fresh dimension. Add new hardware and paint, and suddenly the armoire has character, not just square footage.
Choose a Style Before You Touch the Sandpaper
Before you start buying trim and daydreaming about a dramatic color reveal, decide what kind of armoire you want at the end. This matters because the overlay pattern, paint sheen, and hardware all need to speak the same design language. If they do not, your cabinet makeover may look less “designer transformation” and more “craft aisle after three espresso shots.”
Classic and tailored
Use thin trim to create clean rectangular frames on the doors and drawer fronts. Pair that with satin or semi-gloss paint and simple knobs or pulls in brass, black, or brushed nickel.
Traditional or vintage-inspired
Use carved onlays, rosettes, or decorative appliques at the corners or center panels. Rich paint colors, antiqued finishes, and more detailed hardware work well here.
Modern and minimal
Keep overlays narrow, symmetrical, and geometric. A moody paint color, long vertical pulls, and crisp edges can make the cabinet feel custom and current.
Cottage or collected
Try soft paint, subtle distressing, pretty knobs, and trim that feels relaxed rather than rigid. This style is forgiving, charming, and especially good for thrifted armoires.
What You’ll Need
- Degreaser or strong cleaner
- Microfiber cloths or lint-free rags
- Sandpaper in medium and fine grits
- Wood filler
- Caulk for tiny trim gaps
- Decorative overlays, appliques, or molding strips
- Wood glue or adhesive appropriate for your overlay material
- Painter’s tape
- Bonding or stain-blocking primer, depending on the surface
- Cabinet or furniture paint
- Small roller and angled brush
- New knobs or pulls if you want a full refresh
- Measuring tape, level, and pencil
- Optional: pin nailer, clamps, drill, and screwdriver
How to Refresh an Armoire With Overlays
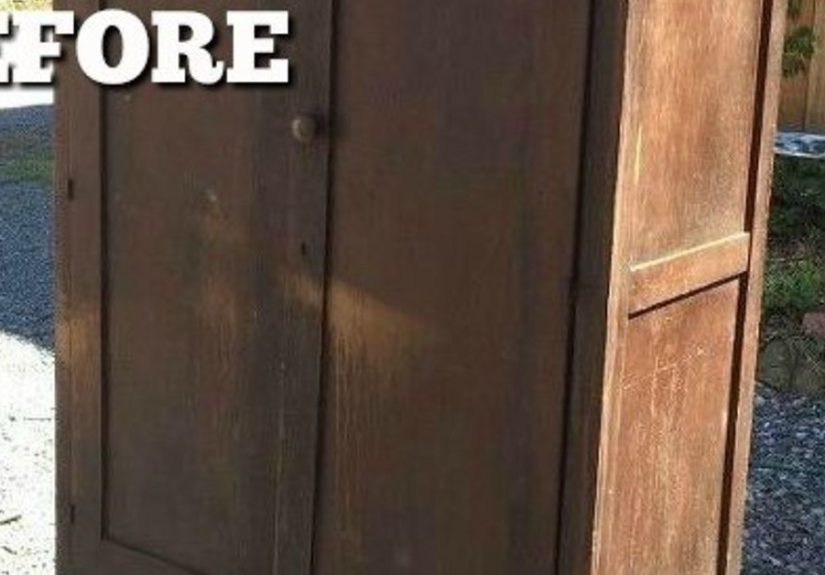
1. Check the cabinet’s condition
Not every armoire deserves a glow-up. If the frame is warped, the back is coming loose, or the doors hang like they are emotionally exhausted, fix the structure first. Cosmetic upgrades work best when the cabinet itself is solid. Tighten screws, stabilize wobbles, and make sure the doors can open and close properly before moving on.
2. Remove the doors, hardware, and shelves
Take off the doors, knobs, pulls, hinges, and any removable shelves. Label every part so reassembly is painless later. This step feels a little fussy in the moment, but it saves you from the deeply humbling experience of holding a door upside down while muttering, “How was this on here before?”
3. Clean first, always
Cabinets collect oils, wax, dust, and mystery residue that can sabotage paint adhesion. Give every surface a serious cleaning before you sand. Pay attention to edges near handles, corners, and lower sections where grime likes to settle in and make itself at home. Let everything dry fully before moving on.
4. Repair damage and scuff-sand the surface
Fill dents, scratches, and old hardware holes if needed. Once repairs dry, sand the cabinet enough to dull the sheen and create a surface the primer can grip. You are not trying to erase the cabinet’s entire past; you are just giving the new finish something to hold onto. If your armoire is laminate, be especially careful not to sand aggressively. A light, even scuff is plenty.
5. Plan the overlay layout with actual measurements
This is the step that separates a polished result from a cabinet that looks like it lost an argument with a glue gun. Measure each door and drawer front individually. Do not assume both doors are perfectly identical just because they appear to be twins. Cabinets love surprise asymmetry.
Use painter’s tape or pencil lines to mock up the overlay design before attaching anything. Stand back and check the spacing. A border that looks balanced from six feet away usually looks balanced in real life. A border that seems “close enough” up close may haunt you forever.
6. Cut, dry-fit, and adjust
If you are using molding strips, cut them carefully and dry-fit everything before gluing. Mitered corners should meet neatly, and the frames should sit flat against the door surface. If you are using decorative appliques or purchased overlays, test placement and alignment first. This is not the moment for blind optimism.
7. Attach the overlays
Once the layout looks right, attach the trim or overlays with the appropriate adhesive. Some DIYers also use a pin nailer or brad nailer for extra hold on wood trim, especially on larger doors. Wipe off excess glue quickly, because dried glue can show through paint and turn your beautiful finish into a textured little plot twist.
After the overlays are attached, fill nail holes if needed and caulk tiny seams sparingly. The goal is crisp detail, not frosting a cupcake.
8. Prime like you want the makeover to last
Primer is not the boring middle child of the project. It is the reason your makeover keeps looking good after repeated use. Choose a bonding primer for slick or previously finished surfaces, and a stain-blocking primer if the wood has tannins, discoloration, or old finish issues. Prime the doors, drawer fronts, and cabinet body evenly, then let the primer dry thoroughly.
For the smoothest finish, lightly sand the primer once dry and remove the dust before painting. This extra step is one of those annoyingly grown-up decisions that actually pays off.
9. Paint for durability, not just color
Armoires get touched, bumped, opened, and occasionally bullied by overstuffed blankets. Use a durable cabinet or furniture paint rather than a basic wall paint. Satin and semi-gloss finishes are popular because they are easier to wipe clean and tend to show off trim detail nicely.
Apply thin, even coats. Thick coats may seem faster, but they are more likely to drip, pool around overlay edges, and make the finish look heavy. Two light coats usually beat one ambitious coat every time. If you want an ultra-smooth look, use a quality mini roller on broad surfaces and an angled brush for corners, profiles, and trim lines.
10. Let it cure before heavy use
Dry and cured are not the same thing. Paint can feel dry to the touch long before it is fully hardened. That means you should resist the urge to slam doors, reinstall overstuffed shelves, or hang necklaces from the knobs two hours after painting. Give the finish time to cure so your hard work does not end up with dents, sticking doors, or ghostly fingerprints.
11. Upgrade the hardware
New hardware is the jewelry of a cabinet makeover. If your armoire started life looking bland, changing the knobs or pulls can dramatically shift the mood. Long bar pulls can modernize the piece. Small brass knobs can make it feel classic. Crystal or ceramic knobs can add a little collected charm. If you are drilling new holes, measure twice. Then once more for emotional support.
Best Color Ideas for an Armoire Makeover
The right color depends on where the armoire lives and how bold you want to be.
Soft white or warm ivory
Great for brightening a room and showing off decorative overlays. This look feels clean, classic, and versatile.
Greige, taupe, or mushroom
Perfect for a sophisticated neutral makeover that still adds more personality than plain white.
Deep navy or charcoal
Excellent for making an old cabinet feel expensive and tailored. These shades pair beautifully with brass or black hardware.
Muted green
Sage, olive, or smoky green can make an armoire feel collected and designer-ish without trying too hard.
Black
Bold, dramatic, and surprisingly elegant when the trim details are crisp. It is the little black dress of furniture makeovers.
Mistakes to Avoid
- Skipping the cleaning step because the cabinet “doesn’t look that dirty”
- Using trim that is too thick for the scale of the doors
- Guessing the layout instead of measuring it
- Applying heavy paint coats around overlays
- Reinstalling hardware before the finish has cured
- Mixing ornate overlays with ultra-modern hardware unless that contrast is very intentional
- Ignoring hinge placement if the new trim changes clearance
How Much Does an Armoire Overlay Makeover Cost?
The price can vary widely, but this is still usually far cheaper than buying a new statement cabinet. A budget version using simple trim, paint, and new knobs may stay in the low hundreds. A more detailed version with specialty overlays, premium primer, upgraded hinges, and better hardware can cost more, but it often still lands well below the price of a new custom-looking armoire.
The real value is visual impact. When the cabinet becomes a focal point instead of a filler piece, the whole room benefits. And unlike many trendy purchases, this one also holds your sweaters.
Styling Ideas After the Makeover
Once the cabinet is finished, style it like you mean it. Add baskets inside for organization. Line the back panel with wallpaper for surprise personality. Use the top for a lamp, framed art, or a trailing plant. If the armoire stores media, linens, office supplies, or clothing, the outside can still look beautiful while the inside quietly handles the chaos of daily life. We love a multitasker.
Experience: What This Kind of Makeover Actually Feels Like
Here is the part most tutorials skip: the experience of doing an armoire makeover with overlays is equal parts satisfying, dusty, weirdly emotional, and absolutely worth it. At first, the cabinet often looks too plain to matter. You may even wonder whether it deserves the effort. Then you remove the doors, clean off years of residue, and realize the piece has been waiting for someone to notice it.
The first big shift usually happens during layout. You tape off a trim design or hold decorative overlays against the door, step back, and suddenly the cabinet begins to make sense. That is when the project stops feeling like repair work and starts feeling like design. A boring armoire becomes a future statement piece. The room starts to look different in your head before it looks different in real life.
Then comes the humbling middle section, also known as “prep.” You sand more than expected. You find little dents you did not notice before. One corner is slightly off. One door is a tiny bit taller than the other because, apparently, furniture enjoys secrets. This is also the phase where patience matters most. The people who rush through prep are the same people later asking why the paint chipped near the handle. Cabinets have a way of exposing shortcuts.
Attaching overlays is usually the most exciting moment because the piece changes fast. What looked flat and basic in the morning can start looking custom by afternoon. It is the furniture equivalent of adding bone structure. But it also requires restraint. Too much glue, uneven spacing, or trim that is slightly crooked can throw off the entire look. This is why dry-fitting feels tedious but ends up saving the day.
Painting is where the cabinet gets its personality. Color changes everything. A dark armoire with crisp trim can look elegant and moody. A soft white one can feel fresh and cottage-inspired. A green or blue cabinet can look collected, intentional, and just quirky enough to be interesting. The real surprise is how much more expensive the cabinet can appear once the overlays and paint start working together. Suddenly the piece does not whisper “temporary storage.” It says, “Yes, I have taste, and yes, I know where the extra blankets are.”
The last part of the experience is learning to leave it alone while the finish cures. This is harder than it sounds. You will want to touch the doors, reinstall everything, and admire your own brilliance at close range. Resist. The final reward comes when the hardware goes back on, the doors close smoothly, and the cabinet looks like it was always meant to be that way.
That is the magic of this makeover. It is not just about paint or trim. It is about taking a functional but forgettable piece and giving it detail, presence, and a little dignity. And honestly, not every makeover gets to be both beautiful and useful. This one does. Which is more than we can say for half the decorative bowls in modern home decor.
Final Thoughts
A boring cabinet makeover is not about pretending an old armoire is something it is not. It is about seeing what it could be with better lines, better color, and better detail. Overlays are one of the smartest ways to pull that off because they change the architecture of the piece without requiring a full rebuild.
If your armoire is sturdy but uninspiring, this project can be a game-changer. Clean it well, measure carefully, choose overlays that match your style, and do not cut corners on prep. The reward is a cabinet that looks more custom, more intentional, and much more at home in your space. In short: same storage, better outfit.