Table of Contents >> Show >> Hide
- Why Make a Wreath From the Garden?
- Pick Your Wreath “Vibe”
- Tools and Supplies
- Harvesting From the Garden Without Regrets
- Step-by-Step: Fresh Garden Greenery Wreath (The Classic)
- Step-by-Step: Herb Wreath From the Garden (Kitchen-Friendly)
- Step-by-Step: Dried Garden Wreath (Long-Lasting)
- Design Tricks That Make It Look Professionally Made
- How to Keep a Fresh Wreath Looking Fresh
- Safety Notes: Kids, Pets, and “But It’s So Pretty” Plants
- Troubleshooting Your DIY Wreath
- Seasonal Garden Ingredient Ideas
- Eco-Friendly “Afterlife” for Your Wreath
- Final Thoughts
- Garden Wreath Diaries: The Extra of Real-World Experience
There are two kinds of people in the world: the ones who buy a wreath and call it a day, and the ones who look at their backyard and think,
“I could absolutely turn that rosemary into front-door greatness.” If you’re here, congratulationsyou’re in the second group. You’re also about
to discover that a DIY garden wreath is basically the easiest way to make your home look like it has its life together (even if the kitchen counter says otherwise).
This guide walks you through how to make a DIY wreath from the garden using fresh greenery, herbs, and seasonal bits you can harvest or forage responsibly.
You’ll get practical steps, design tricks that make it look “store-fancy,” and care tips so your wreath doesn’t turn into a crunchy halo in three days.
We’ll also cover safety (because holly berries are not a snack, no matter how festive they look).
Why Make a Wreath From the Garden?
A garden wreath isn’t just décorit’s a tiny victory lap for anyone who’s ever kept a plant alive longer than a week. Making your own wreath is:
- Budget-friendly: You’re using what you already grow (or can trim without guilt).
- More personal: It smells like your garden, not like a warehouse aisle labeled “Seasonal Pine Scent.”
- Flexible: Fresh, dried, herbal, minimalist, wildly extrayour door, your rules.
- Lower-waste: You can compost the natural pieces when you’re done.
Pick Your Wreath “Vibe”
Before you start clipping greenery like an enthusiastic squirrel, decide what kind of wreath you want. Your choice affects the supplies and how long it will last.
1) Fresh Greenery Wreath
Best for: front doors, porches, winter holidays, and anyone who loves that fresh-cut evergreen scent.
Think pine, cedar, juniper, magnolia, boxwood, or mixed foliage.
2) Herb Wreath (Yes, You Can Cook With It)
Best for: kitchens, gifts, and people who want their décor to multitask.
Rosemary, thyme, sage, bay, oregano, and lavender dry beautifully and smell like you live inside a cozy recipe blog.
3) Dried Garden Wreath
Best for: long-lasting décor you can hang and forget (the ultimate luxury).
Use dried flowers, seed heads, ornamental grasses, and sturdy leaves.
Tools and Supplies
You don’t need a craft room. You need a few basics, plus the confidence to ignore perfectionism.
Wreath Base Options
- Wire wreath form: Classic, lightweight, great for the “bundle and wrap” method.
- Grapevine wreath: Rustic, forgiving, easy to tuck stems into.
- Embroidery hoop or metal hoop: Minimalist and modern (also great for asymmetrical designs).
Must-Have Tools
- Hand pruners or garden snips
- Floral wire (green is sneaky and blends in)
- Wire cutters (your pruners will not enjoy cutting wire)
- Gloves (sap is sticky; your future self will thank you)
Nice-to-Have Extras
- Twine or raffia (for a natural look)
- Ribbon (to instantly “finish” the wreath)
- Floral picks or small zip ties (handy for heavier accents)
- Small bucket/tub of water (for conditioning greenery)
- Anti-desiccant spray (optional for fresh greens)
Harvesting From the Garden Without Regrets
The secret to a lush fresh foliage wreath is not “more plants.” It’s better prep.
Harvest smart and your wreath will look fuller, last longer, and avoid that sad, floppy vibe.
How to Choose Great Wreath Materials
- Look for flexibility: Bend a stem gently. If it snaps immediately, it’s better for drying than for shaping.
- Mix textures: Pair soft, feathery greens (cedar/juniper) with structured leaves (magnolia/bay) for dimension.
- Choose “support greens”: Fir, cedar, boxwood, or woody herbs act like the foundation.
- Add “sparkle” materials: Seed pods, dried citrus slices, pinecones, or a pop of ribbon for contrast.
Condition Your Cuttings (A.k.a. Give Them a Drink)
Fresh cut greenery often benefits from a hydration break before you build. Place cut ends in room-temperature water for a few hours.
This simple step can help keep foliage supple while you work and improve how long it looks fresh once it’s hung.
Responsible Foraging Notes
- Take small amounts from each plant rather than stripping one shrub bare.
- Skip protected areas and private property.
- When in doubt, use your own garden trimmings (they’re already cheering you on).
Step-by-Step: Fresh Garden Greenery Wreath (The Classic)
This is the go-to method used by florists and DIYers because it’s sturdy, fast, and forgiving. You’re basically making a circle out of overlapping mini bouquets.
Step 1: Prep Your Greenery
- Trim stems into manageable pieces (usually 6–10 inches, depending on your base size).
- Strip leaves off the last inch of each stem so wire has something to grip.
- Sort greens into little piles by type (this makes designing easier and less chaotic).
Step 2: Make Small Bundles
Gather 3–6 stems per bundle. Combine a “base” green (like cedar or fir) with one accent (like eucalyptus-style leaves, bay, or magnolia).
Keep bundles similar in thickness so your wreath stays balanced.
Step 3: Attach the First Bundle
- Secure the end of your floral wire to the wreath form.
- Lay your first bundle on the frame and wrap the wire tightly around the stems a few times.
- Don’t cut the wireyou’ll keep wrapping as you go.
Step 4: Overlap Like Shingles
Place the next bundle so it covers the stem ends of the previous bundle by about half. Wrap wire around the stems.
Repeat all the way around the form. This overlap is what hides mechanics and makes the wreath look full.
Step 5: Finish the Circle
- When you reach the starting point, tuck the final bundle under the first greenery to hide the seam.
- Wrap wire firmly, cut it, and twist the end securely on the back of the frame.
- Fluff and rotate the wreathfix thin spots by tucking in extra sprigs and wiring them down.
Step 6: Add Decorative Accents (Optional, but Fun)
Keep accents simple and intentional: pinecones in one cluster, a ribbon bow, dried orange slices, or a few seed pods.
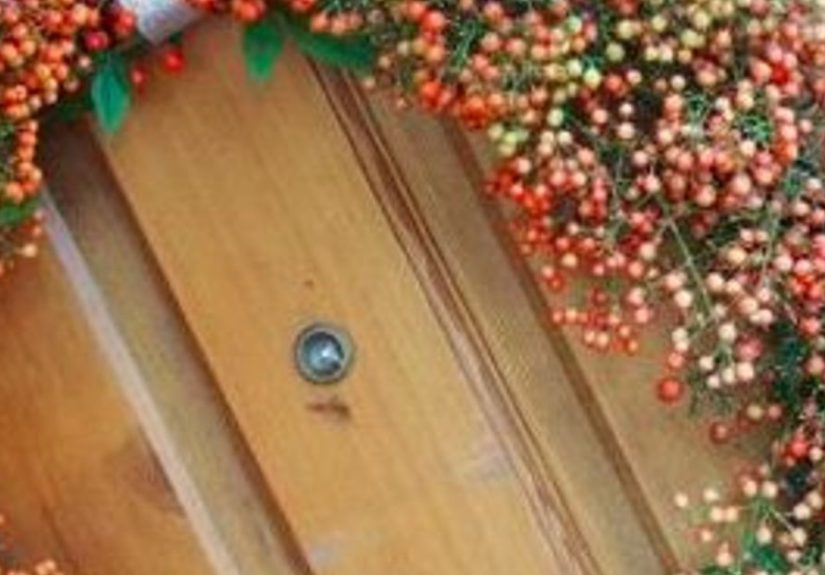
If you add berries, be mindful of safety around kids and pets (more on that below).
Step-by-Step: Herb Wreath From the Garden (Kitchen-Friendly)
An herb wreath DIY is part décor, part aromatherapy, part “I definitely have my life together” energy.
Woody herbs (rosemary, thyme, sage) tend to hold shape well as they dry.
- Harvest herbs: Choose long, flexible stems. Shake off dirt and gently pat dry.
- Bundle: Make small bunches (like tiny herb bouquets).
- Attach: Wire each bundle to a small hoop or wire form, overlapping to cover stems.
- Design tip: Alternate textures (rosemary + thyme, rosemary + sage) so it doesn’t look like one giant green haircut.
- Dry: Hang in a dry, airy spot. Once dry, the wreath becomes a “snip-as-you-cook” helper.
Step-by-Step: Dried Garden Wreath (Long-Lasting)
If you want wreath décor that survives busy weeks, a dried flower wreath or dried garden wreath is your best friend.
Use statice, strawflower, lavender, yarrow, ornamental grasses, seed heads, and sturdy leaves.
How to Dry Your Materials
- Air-dry: Tie small bunches and hang upside down in a dark, dry place.
- Press: Great for flat leaves and delicate flowers used on minimal hoops.
- Let it “cure”: Some materials look best after a week or two of drying.
Assemble the Wreath
- Start with a grapevine base or wire form.
- Create small clusters (2–5 stems) and wire them in place.
- Work in sections, stepping back often to keep the shape balanced.
Design Tricks That Make It Look Professionally Made
You don’t need fancy suppliesyou need a few visual rules that designers swear by.
Use the “Texture Triangle”
- Fluffy: cedar, pine, grasses
- Flat: magnolia, bay, camellia leaves
- Spiky: rosemary, juniper, seed heads
Limit Your Palette
Choose 2–3 greens and 1 accent color. Too many accents can look like your wreath got into the craft closet unsupervised.
Make a “Focal Zone”
Cluster accents at one area (bottom, side, or top) instead of scattering them everywhere. This looks intentional and modernlike you planned it,
not like you panicked.
How to Keep a Fresh Wreath Looking Fresh
A fresh wreath is basically a bouquet that decided to become a circle. Treat it like cut greenery and you’ll get a much longer runway.
- Hydrate before hanging: If possible, soak or rehydrate greenery before assembly, and mist occasionally after.
- Choose the right location: Cool, shaded spots last longer than sunny, windy, or heat-blasted areas.
- Mist strategically: Light misting can help in dry conditions. (For some wreath types, focus on greenery rather than ribbons or porous accents.)
- Keep it away from heat: Indoors, avoid vents, fireplaces, and direct sun.
- Consider anti-desiccant: Optional, but some gardeners use it to reduce moisture loss.
Safety Notes: Kids, Pets, and “But It’s So Pretty” Plants
Some traditional holiday greens and berries can be irritating or toxic if ingested. If you have curious kids or pets, play it safe:
- Avoid or keep out of reach: mistletoe, holly berries, English ivy, yew, and other potentially harmful plants.
- Skip unknown berries and mystery cuttings.
- Keep fresh greenery away from open flames and heat sources (dried greens can be flammable, too).
Troubleshooting Your DIY Wreath
“My wreath looks thin.”
Add more bundles, and make sure each new bundle overlaps the last by about half. Also mix leaf sizesflat leaves can “fill space” fast.
“It’s lopsided.”
Rotate the wreath every few minutes while building. Your eyes adjust quickly; a fresh angle resets your design brain.
“The wire is showing.”
Tuck in small sprigs where wire is visible. Green floral wire helps, but hidden mechanics are the real magic trick.
“It’s drying too fast.”
Move it to a cooler, shaded place. Indoor heat and direct sun are the speed-run mode for crispy greenery.
Seasonal Garden Ingredient Ideas
Spring
- Flowering herbs (lavender buds), soft vine clippings, fresh greens, small blossoms (use sturdy blooms)
- Asymmetrical hoop wreaths with lots of negative space
Summer
- Rosemary, bay, thyme, sage
- Dried lavender, strawflower, grasses
- Bright ribbon and citrusy accents
Fall
- Hydrangea heads (dried), seed pods, ornamental grasses
- Small pinecones, mini gourds (lightweight), dried leaves
Winter
- Pine, cedar, fir, juniper
- Magnolia leaves for bold contrast
- Pinecones and a simple bow for a classic evergreen wreath
Eco-Friendly “Afterlife” for Your Wreath
When your wreath is done being fabulous, let it keep working:
- Compost: Most natural materials can be composted (remove wire first).
- Mulch protection: Evergreen boughs can be used to protect garden beds in cold snaps.
- Dry and save: Some elements (pinecones, dried citrus, sturdy ribbons) can be reused next season.
Final Thoughts
A DIY wreath from the garden is one of those rare projects that feels both simple and impressive. You get to work with fragrance, texture,
and seasonal colorplus you end up with something that makes your front door look like it belongs in a magazine spread (or at least a very flattering group text photo).
Start with what you have, keep the design intentional, and remember: the best wreaths look alive, not perfect.
Garden Wreath Diaries: The Extra of Real-World Experience
The first time most people try making a garden wreath, they assume it’s going to be delicate, fussy, and full of complicated craft secrets.
Then reality shows upusually in the form of sticky sap on your fingers and a small pile of “oops” clippings on the table. And honestly? That’s part of the charm.
A wreath made from your own garden tends to feel less like a craft project and more like a tiny seasonal ritual: step outside, notice what’s thriving,
and bring a piece of that life back to your door.
One of the most common “aha” moments is discovering how much structure matters. Fresh greens look effortless on a finished wreath,
but the process is basically repeating one simple actionbundle, wrap, overlapuntil the circle fills in. At first, your bundles might be too big,
which makes the wreath bulky and harder to control. Then you try smaller bundles and suddenly everything behaves. The wreath starts looking fuller,
not because you used more greenery, but because the overlap hides stems and creates that layered, shingled look that reads as “professional.”
Another experience people talk about: the scent is wildly satisfying. A rosemary-and-bay herb wreath can make a kitchen smell like you’ve been quietly simmering
something delicious all day, even if dinner is… cereal. And as it dries, the fragrance changesless sharp, more cozy. That “living” quality is why garden wreaths
feel different than store-bought ones: they evolve. A magnolia wreath, for example, often shifts as it dries, developing a warm, bronzy patina.
Instead of fighting that change, you learn to lean into it. You stop asking it to stay frozen in time and let it do its seasonal thing.
There’s also the very relatable “front door test.” You finish your wreath indoors, feel proud, hang it outside, step back…
and realize you need a bow, or one side looks heavier, or your focal cluster landed at an angle that says “I hung this while holding groceries.”
The fix is usually simple: rotate the wreath, add one small bundle to balance, or cluster accents in one clear focal zone.
That little adjustment can take it from “nice” to “wow,” and it teaches you the most useful design habit of allstep back often.
And then there’s durability. Beginners worry the wreath will fall apart the first time a breeze exists. But when you wrap your wire snugly and keep bundles consistent,
the wreath is sturdier than it looks. The real enemy isn’t windit’s heat and sun. People who hang fresh greenery in a cool, shaded spot often report it holds up far longer,
while wreaths baked by afternoon sunlight can dry fast. It’s a practical lesson that sticks: a wreath is décor, but it’s also plant material, and plant material has opinions.
The best part of the experience is what happens next: you start noticing wreath ingredients everywhere. You spot a shrub that needs a trim and think,
“That would look great on a hoop.” You harvest lavender and automatically set some aside for drying. You save pinecones in a jar like they’re treasure.
Your garden stops being just “plants” and becomes a seasonal supply closet. And that’s the real winyour wreath isn’t just something you made once.
It becomes a repeatable, relaxing way to mark time, celebrate what’s growing, and make your home feel welcoming with materials that were literally outside five minutes ago.


