Table of Contents >> Show >> Hide
- How to Steal Ideas Without Copy-Pasting Someone Else’s Kitchen
- 33 Before-and-After Kitchen Makeovers
- 1) Closed-Off → Open Plan
- 2) Dark + Dingy → Bright + Airy
- 3) Builder Beige → Two-Tone Style
- 4) Tight Galley → Streamlined Workhorse
- 5) Dead Corners → Pull-Out Wins
- 6) Tile Countertops → Seamless Surface
- 7) No Prep Space → Real Island
- 8) Counter Clutter → Coffee/Appliance Zone
- 9) One Ceiling Light → Layered Lighting
- 10) Visual Chaos → One Hero Feature
- 11) Heavy Uppers → Air + Shelves
- 12) Tired Hardware → Instant Update
- 13) Worn Floors → Spill-Proof Upgrade
- 14) Random Food Storage → Pantry Wall
- 15) Dusty Soffits → Taller Look
- 16) Traffic Jams → Better Flow
- 17) Sterile White → Warm Wood Touch
- 18) Tiny Sink → Workstation Upgrade
- 19) Microwave Over Range → Real Vent Hood
- 20) Finish Soup → Cohesive Metals
- 21) Noisy Appliances → Strategic Swaps
- 22) Big Dining, Small Kitchen → Rebalanced Space
- 23) Trapping Peninsula → Clear Circulation
- 24) Beige Fatigue → Color That Lasts
- 25) Awkward Eating Spot → Banquette
- 26) Rental Limits → Reversible Refresh
- 27) Cave Cabinets → Drawer-First Base
- 28) Trash in the Walkway → Hidden Pull-Out
- 29) Extension Cord City → Better Electrical
- 30) “Painted Walls Only” → Full Paint Reset
- 31) Good Boxes, Bad Doors → Cabinet Refacing
- 32) Hosting Chaos → Butler’s Pantry
- 33) “It’s Fine” → Finally Fits Your Life
- Renovation Reality Check: Budget, Value, and What Usually Pays Off
- A Fast Planning Checklist
- Conclusion
- Real-World Renovation Experience: The Part Between Before and After (About )
Kitchens have a special talent: they’re where dinner happens, where friends gather, and where a single spilled spice can turn
into a full-blown life lesson. If your space feels dated, cramped, or just “not you anymore,” these before-and-after kitchen
makeovers prove a comforting truthsmart choices beat big budgets.
Think of this as inspiration with a side of strategy. You’ll see layout fixes (the unsexy hero), lighting upgrades (the glow-up),
storage improvements (the sanity saver), and style moves that make everything look intentional. Steal the ideas, not the exact
finishes. Your future selfstanding in a kitchen that finally workswill thank you.
How to Steal Ideas Without Copy-Pasting Someone Else’s Kitchen
Each makeover below includes the core problem (before), the fix (after), and one move you can borrow. As you read, look for
repeat patterns: better flow, more light, smarter storage, and a tighter palette. Those are the ingredients that show up in
the best kitchen remodel inspirationregardless of style.
33 Before-and-After Kitchen Makeovers
1) Closed-Off → Open Plan
Before: a walled-in kitchen. After: one wall removed, island added.
Steal it: keep plumbing where it is; spend on openness and circulation.
2) Dark + Dingy → Bright + Airy
Before: dark cabinets, weak light. After: lighter paint, under-cabinet task lights.
Steal it: paint + lighting is the fastest visible “after.”
3) Builder Beige → Two-Tone Style
Before: everything matches. After: darker lowers, lighter uppers, new pulls.
Steal it: contrast adds depth without luxury price tags.
4) Tight Galley → Streamlined Workhorse
Before: cluttered counters. After: tall pantry storage + slimmer work run.
Steal it: in small kitchens, go vertical and keep aisles clear.
5) Dead Corners → Pull-Out Wins
Before: corner cabinet black hole. After: lazy Susan or swing-out trays.
Steal it: fix storage mechanics before adding more cabinets.
6) Tile Countertops → Seamless Surface
Before: grout traps crumbs. After: one-piece look countertop + undermount sink.
Steal it: fewer seams = easier cleaning (and better photos).
7) No Prep Space → Real Island
Before: nowhere to chop. After: island with drawers, outlets, seating.
Steal it: measure clearances so people can pass without shoulder-checks.
8) Counter Clutter → Coffee/Appliance Zone
Before: gadgets everywhere. After: coffee bar or appliance garage.
Steal it: give daily tools a “home base” so counters stay usable.
9) One Ceiling Light → Layered Lighting
Before: shadows on prep areas. After: ambient + task + accent lighting.
Steal it: lighting should flatter faces and food, not interrogate them.
10) Visual Chaos → One Hero Feature
Before: too many patterns. After: calm basics + bold backsplash or hood.
Steal it: choose one “lead actor,” let everything else support it.
11) Heavy Uppers → Air + Shelves
Before: top-heavy wall. After: some uppers removed, open shelves added.
Steal it: keep closed storage for the stuff you don’t want to dust.
12) Tired Hardware → Instant Update
Before: dated knobs, stiff hinges. After: modern pulls, soft-close.
Steal it: cabinet “jewelry” can make basic boxes look custom.
13) Worn Floors → Spill-Proof Upgrade
Before: peeling or fussy floors. After: durable tile/engineered wood/LVP.
Steal it: pick finishes that match your real life, not your fantasy brunch.
14) Random Food Storage → Pantry Wall
Before: snacks in five cabinets. After: tall pantry with pull-outs.
Steal it: visibility beats “more shelves” for everyday use.
15) Dusty Soffits → Taller Look
Before: bulky soffits. After: cabinets extended up (or soffits color-matched).
Steal it: one continuous vertical line reads more “built-in.”
16) Traffic Jams → Better Flow
Before: people cut through prep space. After: clearer lanes, better work zones.
Steal it: protect prep space like it’s a VIP section.
17) Sterile White → Warm Wood Touch
Before: clean but cold. After: wood shelves, island, or accents.
Steal it: one warm material softens everything instantly.
18) Tiny Sink → Workstation Upgrade
Before: sheet pans don’t fit. After: deeper basin + accessories.
Steal it: if you cook a lot, upgrade the sink before the “wow” tile.
19) Microwave Over Range → Real Vent Hood
Before: dated focal point. After: hood + relocated microwave.
Steal it: ventilation improves comfort (and keeps smells from moving in permanently).
20) Finish Soup → Cohesive Metals
Before: mixed chrome/bronze/???. After: 2–3 consistent finishes.
Steal it: repetition reads “designed,” even on a budget.
21) Noisy Appliances → Strategic Swaps
Before: loud, unreliable appliances. After: fewer upgrades, better performance.
Steal it: prioritize the dishwasher and rangeyour daily workhorses.
22) Big Dining, Small Kitchen → Rebalanced Space
Before: oversized dining area. After: kitchen expanded + island added.
Steal it: borrow square footage from rooms you rarely use.
23) Trapping Peninsula → Clear Circulation
Before: bottlenecks. After: slimmer peninsula or island.
Steal it: kitchens need “lanes,” not cul-de-sacs.
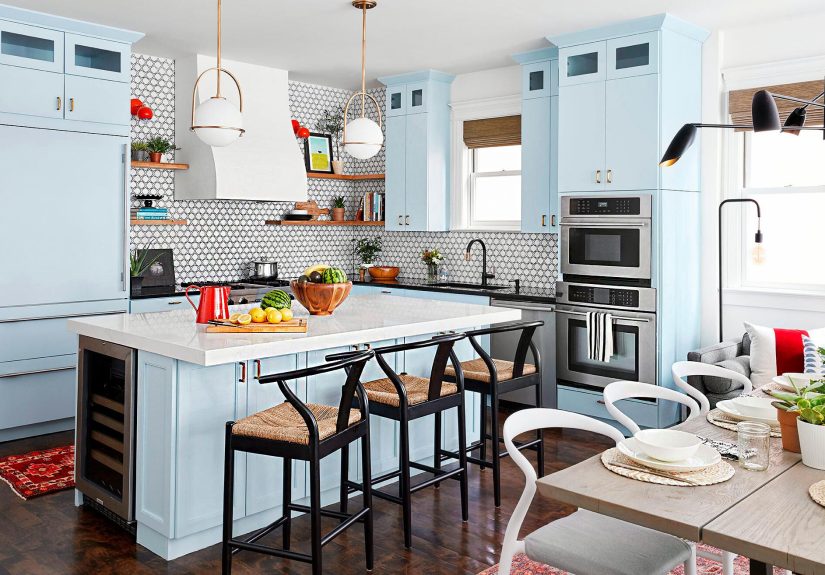
24) Beige Fatigue → Color That Lasts
Before: bland neutrals. After: cabinet color (green/blue/charcoal) + warm basics.
Steal it: color on cabinets is easier to change later than stone.
25) Awkward Eating Spot → Banquette
Before: table blocks traffic. After: built-in bench with storage.
Steal it: built-ins maximize tight corners and feel custom.
26) Rental Limits → Reversible Refresh
Before: stuck with dated finishes. After: peel-and-stick, removable hardware, better bulbs.
Steal it: upgrade light quality first; it makes every surface look better.
27) Cave Cabinets → Drawer-First Base
Before: digging for pots. After: deep drawers + dividers.
Steal it: drawers are the easiest day-to-day quality-of-life upgrade.
28) Trash in the Walkway → Hidden Pull-Out
Before: trash can obstacle. After: pull-out near prep.
Steal it: place trash where prep happens, not where it’s “least ugly.”
29) Extension Cord City → Better Electrical
Before: too few outlets. After: added outlets/circuits (especially at the island).
Steal it: plan power for the gadgets you already own.
30) “Painted Walls Only” → Full Paint Reset
Before: walls fresh, room still tired. After: trim + ceiling updated too.
Steal it: ceilings countdon’t ignore them.
31) Good Boxes, Bad Doors → Cabinet Refacing
Before: solid boxes, dated fronts. After: new doors, veneer, hinges, hardware.
Steal it: refacing can look “new” with less downtime than replacement.
32) Hosting Chaos → Butler’s Pantry
Before: nowhere to stage food. After: pantry zone with counter + storage.
Steal it: add a support space if the kitchen can’t grow.
33) “It’s Fine” → Finally Fits Your Life
Before: functional but uninspiring. After: better light, better storage, one signature feature.
Steal it: function first, then one joyful splurge.
Renovation Reality Check: Budget, Value, and What Usually Pays Off
Here’s the practical pattern you’ll see in credible national data: targeted updates tend to deliver stronger “value per dollar”
than luxury overhauls. One major reason is that kitchens are expensive, and buyers don’t always pay you back for highly personal
choices. If you’re staying for years, renovate for your comfort. If you’re selling soon, aim for clean, current, and functional
rather than “most expensive.”
Where minor upgrades often win
Minor kitchen remodels commonly focus on cabinet refreshes, updated counters, improved lighting, and better fixtureswithout
moving walls or reworking every utility line. In the 2025 Cost vs. Value data, the national minor-kitchen-remodel averages are
roughly $28K in cost and about $32K in resale value (around a 113% recoup). Big remodels tend to recoup less: national midrange
major kitchen projects are around the ~50% range, with upscale major remodels lower.
Cabinets: paint, reface, or replace?
If your cabinet boxes are solid, you typically have options. Painting is the budget MVP for a new look. Refacing is a middle path
when you want new doors and a fresh exterior but don’t need a layout change. Full replacement makes sense when the layout is wrong,
storage is inadequate, or the boxes are failing.
Lighting is a “wellbeing” upgrade
Designers and homeowners increasingly treat lighting as more than visibilityit sets the mood and supports daily routines.
A smart system layers ambient, task, and accent light so the kitchen works for morning coffee, weeknight cooking, and evening hangouts.
A Fast Planning Checklist
Use this quick checklist before you spend a dollar. It’s the difference between “I love it” and “Why did we do that?”
- Write your top 3 annoyances: lighting, storage, traffic, prep space, etc.
- Measure: aisle widths, island possibilities, and appliance door swings.
- Pick a palette: cabinet color(s), counter tone, and 2–3 metal finishes to repeat.
- Choose your “hero”: one standout feature (hood, backsplash, island, or lighting).
- Plan boring essentials: outlets, ventilation, trash pull-out, and durable flooring.
- Set a buffer: time and money for surprises (because houses love surprises).
Conclusion
The best kitchen remodels aren’t defined by the priciest stone or the trendiest tilethey’re defined by how calmly the room runs
on a normal weekday. Start with flow and function, layer in good lighting, and pick finishes that are easy to live with.
Then give yourself one “signature” moment (a hood, a backsplash, a color, or killer pendants) that makes you smile every time you walk in.
Real-World Renovation Experience: The Part Between Before and After (About )
The “after” photos are glamorous. The “during” phase is… character-building. Many homeowners describe the middle of a kitchen
renovation as living in a pop-up restaurant where the menu is “microwave” and “more microwave.” That’s normal. Planning for it
is what separates “annoying” from “I may move into my car.”
The smoothest projects start with a brutally honest list of daily pain points. Not “I want marble,” but “two people can’t pass
each other,” “the trash is in the walkway,” “I have nowhere to set groceries,” or “the only good light is from my phone flashlight.”
When decisions get messy (and they will), those pain points become your compass. If a choice doesn’t fix a pain point, it’s optional.
This is also why some of the best makeovers keep the same footprint: moving plumbing and gas lines can add cost and complexity fast,
while smart storage and lighting upgrades improve life immediately.
Next comes decision fatigue. It’s real. After the 17th cabinet sample, everything looks like “slightly different beige,” and you’ll
suddenly develop strong opinions about grout widthopinions you didn’t know your soul contained. A system helps. Limit your palette.
Repeat finishes. Pick a cabinet color (or two), choose one countertop tone, then repeat 2–3 metal finishes across faucet, hardware,
and lighting. Suddenly, you’re not choosing 500 unrelated thingsyou’re choosing within guardrails. Guardrails are freedom.
Logistics matter more than most people expect. Lead times can stretch, and trades don’t always line up perfectly. Homeowners who do
best set up a temporary kitchen on day one: a microwave, coffee maker, and mini-prep zone; a dish tub in the bathroom or laundry sink;
and a dedicated trash plan (seriouslytrash gets weird fast). Keep a few “no-cook” meals ready for the busiest week, and give yourself
permission to eat cereal for dinner without spiraling.
Budget-wise, a small “surprise fund” is emotional insurance. Hidden issues happen: a subfloor problem, an outlet that needs moving,
or a cabinet panel that arrives damaged. Buffer time matters, too. The schedule that goes perfectly is the schedule that exists only in
a marketing brochure. Build slack into your timeline so the project doesn’t own your life.
Here’s the payoff: a great renovation buys you fewer micro-annoyances every day. When storage is logical, lighting is layered, and prep
space fits your routines, the kitchen stops feeling like a constant negotiation. You cook more comfortably. You clean faster. You host
without panic. That’s the real makeover. The prettiness is just the bonus.


