Table of Contents >> Show >> Hide
- Before You Start: Figure Out What Kind of Scratch You Have
- Way 1: Polish Out Light Clear-Coat Scratches (The “Eraser” Method)
- Way 2: Use Touch-Up Paint for Medium-Depth Scratches (The “Fill and Blend” Method)
- Way 3: Repair Deep Scratches with Sanding + Primer + Paint + Clear Coat (The “Mini Body-Shop” Method)
- Common Mistakes That Make Scratches Look Worse
- When It’s Smarter to Call a Pro
- How to Keep Scratches from Coming Back
- Conclusion
- Real-World Experiences and Lessons (So You Don’t Learn Them the Hard Way)
Car scratches have a special talent for showing up right after you wash your car. You step back to admire your
shiny paint… and there it is: a thin line, a scuff, or a “who did this?” mark that looks like it was signed by a
shopping cart. The good news: you can remove (or dramatically reduce) many scratches at homeif you choose the
right method for the depth of the damage.
This guide breaks car scratch repair into three practical approachespolishing for light clear-coat scratches,
touch-up paint for medium-depth scratches, and a more complete sanding/prime/paint/clear process for deeper
scratches. Along the way, you’ll learn quick tests to diagnose the scratch, what tools matter (and which ones are
just “expensive confidence”), and how to avoid the common mistakes that turn a small scratch into a large life
lesson.
Before You Start: Figure Out What Kind of Scratch You Have
“Scratch” is a catch-all word. Your repair success depends on whether the damage is in the clear coat, the color
coat (base coat), or down to primer/metal. Here’s a simple way to classify it.
Quick scratch tests you can do in two minutes
- Wash first. Dirt can masquerade as damage. Use car shampoo (not dish soap), rinse well, and dry
with a microfiber towel. - Fingernail test: Gently run a clean fingernail across the scratch.
- If your nail doesn’t catch, it’s usually in the clear coat (best-case scenario).
- If your nail catches, it may be into the base coat or deeper (still fixable, but more steps).
- Color clue: If you see white/gray, you might be looking at primer. If you see
metal or rusty orange, the scratch is through the paint system and needs a more complete repair. - Water trick: Mist the area with water.
- If the scratch nearly disappears when wet, it’s likely a clear-coat issue you can polish out.
- If it stays obvious when wet, it’s probably deeper than clear coat.
Safety and sanity checklist
- Work in shade, on cool paint (hot panels make products dry too fast and smear).
- Use gloves and eye protection, especially when sanding or using solvents.
- Use good ventilation if you’re applying primer/paint/clear coat.
- If your scratch is near cameras, parking sensors, or radar panels, be extra carefulover-sanding or heavy polishing
can create cosmetic distortion.
Way 1: Polish Out Light Clear-Coat Scratches (The “Eraser” Method)
This is the best option for light scratches and swirl marks that live in the clear coat. You’re not “filling”
anythingyou’re leveling the clear coat around the scratch so it blends back into a smooth surface.
When people say “scratch remover compound,” this is usually what they mean: a mild abrasive polish that refines the
surface.
Best for
- Clear coat scratches that don’t catch your fingernail
- Scuffs from bags, bushes, or light contact
- Haze and minor marring after improper washing
What you’ll need
- Car wash soap, microfiber towels
- Clay bar or synthetic clay mitt (optional, but helpful if the paint feels rough)
- Painter’s tape (to protect trim edges)
- Scratch remover polish or rubbing compound (start mild; go stronger only if needed)
- Foam applicator pad or microfiber applicator
- Quality finishing polish (optional for extra gloss)
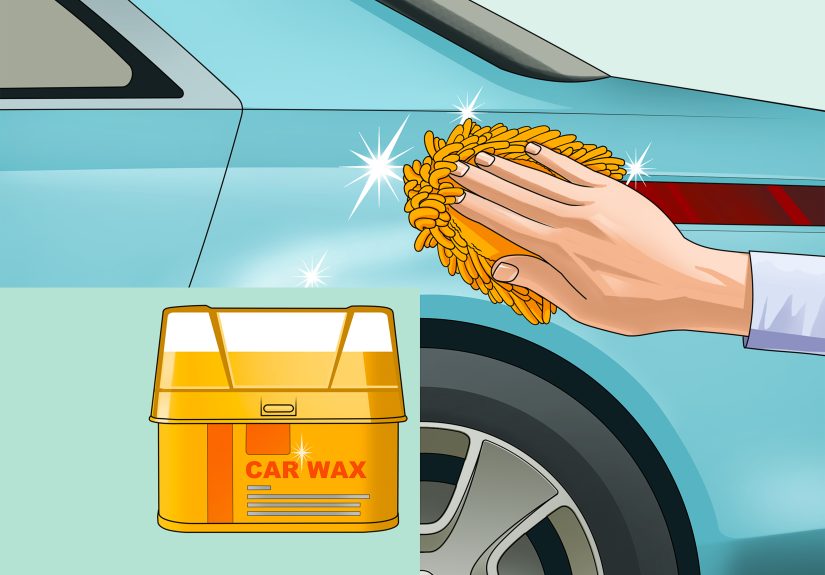
- Paint sealant or wax to protect the corrected area
Step-by-step
- Clean and inspect. Wash the area and dry it. If the paint feels gritty, use a clay bar with proper
lubricant so you’re not polishing contaminants into the finish. - Mask edges and trim. Tape rubber trim and sharp body lines. Those areas have thinner paint and can
be easier to burn through. - Start with the least aggressive product. Put a small amount of polish on your applicator. Work a
1–2 square foot section in overlapping passes. Use moderate pressure and keep your motions consistent. - Wipe and check. Buff residue with a clean microfiber towel. Inspect in good light from multiple
angles. Repeat once or twice if needed. - Escalate carefully (only if necessary). If the scratch is still visible, step up to a slightly more
aggressive compound. Don’t jump straight to the harshest product unless you enjoy avoidable regret. - Refine and protect. Follow with a finishing polish if you want peak gloss, then apply a wax or
sealant. Polishing removes a tiny amount of clear coatprotect the fresh surface afterward.
Specific example
If you have a faint door-handle scratch that almost disappears when the panel is wet, a light polish is usually
enough. You’ll typically see improvement after the first pass, then the last bit fades after a second or third pass
plus a finishing polish.
Pro tip
Many “scratches” are actually paint transfer from another object. Before polishing aggressively, try a dedicated
automotive cleaner or isopropyl alcohol diluted with water (used lightly) to see if the mark is transfer rather than
missing paint.
Way 2: Use Touch-Up Paint for Medium-Depth Scratches (The “Fill and Blend” Method)
If the scratch catches your fingernail or stays visible when wet, you may be into the base coat. Polishing alone
can’t replace missing color. That’s where touch-up paint comes in: you fill the scratch with
matching color (and often clear coat), then gently level and blend it so it doesn’t look like a raised “paint worm.”
Best for
- Scratches through clear coat and into color coat
- Key scratches that are thin but noticeable
- Small chips or line scratches on doors and fenders
What you’ll need
- Factory-matched touch-up paint (use your paint code from the door jamb or owner documentation)
- Touch-up clear coat (if the kit doesn’t include it)
- Wax and grease remover (or a paint-safe panel prep product)
- Fine applicators (micro brushes or a toothpick for ultra-thin scratches)
- 2000–3000 grit sandpaper (optional for leveling) + sanding block or small pad
- Polish/compound + microfiber towels
- Wax/sealant after curing
Step-by-step
- Clean deeply. Wash, dry, then use a panel prep product to remove wax and oils. Touch-up paint hates
greasy surfaces. - Feather any sharp edges. If the scratch has raised edges, you can gently knock them down with very
fine paper (use extreme care). The goal is not to widen the scratch; it’s to remove jagged edges that catch light. - Apply paint in thin layers. Use a micro brush or toothpick to place paint into the scratch,
not all over the surrounding area. Let each layer flash and dry before adding the next. Multiple thin coats look
better than one thick blob. - Add clear coat if needed. Once the color looks even and fully dry, apply a thin clear coat layer to
match surrounding gloss. - Let it cure. This is where patience earns its paycheck. Rushing to sand or polish fresh touch-up
paint can smear or tear it out of the scratch. - Level and blend. If the repair is raised, lightly wet sand with 2000–3000 grit (very small area,
minimal pressure), then compound and polish to restore gloss. - Protect after curing. Apply a sealant or wax once the repair has had adequate time to harden.
Specific example
A thin key scratch on a black door panel often looks dramatic because it reflects light sharply. After filling with
paint-matched touch-up and leveling gently, the line usually becomes hard to spot unless you’re staring at it from
six inches awayat which point you’re basically doing automotive microsurgery for sport.
Reality check
Metallic, pearl, and tri-coat paints are harder to blend invisibly. Touch-up can still improve the appearance, but
a perfect match may require professional spraying and blending into adjacent panels.
Way 3: Repair Deep Scratches with Sanding + Primer + Paint + Clear Coat (The “Mini Body-Shop” Method)
If the scratch is deep enough to expose primer, metal, or rust, you need to rebuild the paint layers. This method is
more work, but it’s also the most complete DIY approach for deep scratches. Done carefully, it can prevent corrosion
and make the damage far less noticeable.
Best for
- Deep scratches down to primer or bare metal
- Scratches with rust starting to form
- Gouges that look like the paint got “carved”
What you’ll need
- Automotive sandpaper (400–600 for shaping, then 1000–2000+ for refining; choose based on severity)
- Sanding block or small firm pad (fingers alone create uneven pressure)
- Rust remover or converter (if rust is present) + clean rags
- Automotive primer (compatible with your paint system)
- Paint matched to your color code (spray can or touch-up, depending on area size)
- Clear coat (spray is common for larger areas)
- Masking tape, masking paper/plastic
- Compound and polish for final blending
- Wax/sealant for protection after curing
Step-by-step
- Clean and strip contamination. Wash, dry, and prep the panel. Remove wax, tar, and oils.
- Address rust immediately. If you see rust, gently sand to clean metal and treat remaining corrosion
with a rust product designed for automotive use. Rust spreads under paint like a rumor in a group chatfast and
inconvenient. - Sand the scratch and feather the edges. The goal is a smooth transition around the damaged area.
Use a sanding block, keep the area small, and avoid sharp body lines. - Prime in light coats. Apply thin, even primer coats. Let each coat flash per product directions.
Once dry, lightly sand to smooth the surface. - Apply color in multiple light coats. Whether using a spray can or a larger touch-up application,
build coverage gradually. Heavy coats cause runs, mottling, and heartbreak. - Clear coat for gloss and protection. Clear coat provides UV resistance and the shine you’re trying
to match. Apply light coats, then let it cure. - Wet sand and polish to blend (after curing). Once fully cured, wet sand with very fine grit to
level texture, then compound and polish to restore clarity and gloss. - Seal the deal. After the finish hardens, protect it with a sealant or wax.
Specific example
If a scratch on the edge of your rear quarter panel shows primer and you live in a rainy area, repairing it quickly
matters because moisture can creep into the exposed layers. A careful prime/paint/clear approach can prevent rust
and keep the repair from expanding into a bigger (and pricier) problem.
Common Mistakes That Make Scratches Look Worse
- Skipping the wash. Polishing over grit can create more scratches than you started with.
- Using household abrasives. Magic erasers and harsh cleaners can dull or haze clear coat.
- Going too aggressive too soon. Start mild, evaluate, then step up if needed.
- Overworking edges and body lines. Paint is thinner there; it’s easier to burn through.
- Touch-up paint blob syndrome. Thick paint sits above the surface and looks obvious in sunlight.
- Rushing cure time. Fresh paint that isn’t cured won’t sand or polish cleanly.
When It’s Smarter to Call a Pro
DIY car scratch removal is greatuntil it isn’t. Consider a professional body shop or detailer if:
- The scratch is large, on multiple panels, or paired with dents and creases.
- You have a high-end metallic/pearl/tri-coat color and want an invisible blend.
- Rust is widespread or bubbling under paint (a sign it’s spreading beneath the surface).
- The damage is on a bumper corner with textured plastic or complex curves.
- You’re prepping a lease return and need factory-level appearance.
How to Keep Scratches from Coming Back
- Wash smarter: Use the two-bucket method or a foam pre-rinse, and always use clean microfiber towels.
- Dry gently: Blot or use a soft drying towel; avoid old bath towels (they’re basically sandpaper in disguise).
- Protect regularly: Wax, sealants, or ceramic coatings help reduce minor marring and make washing easier.
- Parking strategy: The far corner of the lot is cheaper than paint work. Yes, it’s also exerciseconsider it a bonus feature.
Conclusion
The key to removing scratches from a car is matching the method to the damage. Light clear-coat scratches often
respond beautifully to polishing. Medium scratches usually need paint to replace missing color. Deep scratches need a
layered repairsanding, primer, paint, and clear coatto protect the metal and restore the finish. Take your time,
start with the least aggressive approach, and remember: the goal isn’t perfection under a microscopeit’s a clean,
glossy result that looks great in real life.
Real-World Experiences and Lessons (So You Don’t Learn Them the Hard Way)
In the real world, scratches don’t show up with a label that says, “Hello! I am a Level 1 clear-coat scratch and I
can be removed with a polite polish.” They show up at night, under a streetlight, when you’re already tired, and
suddenly your brain is auditioning for a detective show. Here are some common scenarios people run intoand what
typically works best.
Scenario 1: The “Shopping Cart Autograph.” This one is a classic: a long, light scuff on the side of
the car, usually with a faint smear of another color. Many people panic and jump straight to touch-up paint, but
paint transfer is often the main issue. After a careful wash, a gentle cleaner can sometimes remove the transferred
material, and then a light scratch remover compound finishes the job. The lesson: always try to confirm whether
you’re looking at missing paint or borrowed paint. Borrowed paint is easier to return.
Scenario 2: The “Bush vs. Clear Coat” Driveway Ambush. You squeeze past a shrub that seems harmless
and flexibleuntil the next morning when the sun hits your hood at exactly the angle of truth. These scratches
often fade dramatically when wet, which is your clue that polishing is the right move. People who get the best
results tend to work small sections, use clean microfiber towels, and stop as soon as the scratch blends in. The
lesson: polishing is controlled patience, not an arm workout competition.
Scenario 3: The “Key Scratch of Questionable Origin.” Thin, sharp, and very visibleespecially on
dark colors. These scratches often catch a fingernail and remain obvious when wet, which means the base coat might
be involved. Touch-up paint can make a huge difference, but the trick is resisting the urge to “paint the whole
scratch in one go.” The best-looking DIY repairs usually come from multiple thin layers, applied precisely into the
scratch, followed by careful leveling and polishing after curing. The lesson: touch-up paint is more like icing a
cake than painting a wallprecision beats volume.
Scenario 4: The “Deep Gouge with a Side of Rust.” This is the scratch that makes you say, “Well,
that’s… educational.” If bare metal is exposed, rust can start sooner than people expect, especially in wet or salty
environments. The DIY wins here come from treating rust early, feathering edges properly, and rebuilding layers with
primer, color, and clear coatthen waiting for curing before polishing. The lesson: deep scratch repair isn’t just
cosmetic; it’s protective maintenance. Fixing it promptly can save you from a bigger repair later.
Scenario 5: The “I Tried a Random Hack and Now It’s Dull.” Sometimes people use household abrasives
or overly aggressive products and end up with hazy, dull clear coat. The fix is usually a proper polishing sequence
(compound, then a finer polish) and then protection. The lesson: your car’s clear coat is tough, but it’s not a
kitchen countertop. Automotive paint responds best to automotive products and gentle technique.
Scenario 6: The “Perfect Indoors, Terrible in Sunlight” Surprise. A repair can look great in the
garage and still show edges outside. That’s usually because texture (orange peel), gloss differences, or a slightly
raised touch-up line is catching the light. People who avoid this tend to check their work in multiple lighting
conditions, keep transitions gradual, and polish carefully for a uniform shine. The lesson: sunlight is the final
exampreview your work before you call it done.
The biggest takeaway from all these experiences is simple: successful car scratch repair is less about secret tricks
and more about choosing the right method, using clean tools, and knowing when to stop. If your goal is to make the
scratch hard to notice in daily life, you can often get there with one of the three approaches above.
And if you want it to look factory-perfect on a tricky paint color? That’s when the pros earn their keep.


