Table of Contents >> Show >> Hide
- Before You Fold: Quick Prep for Better-Looking Paper Flowers
- Way #1: The Classic Origami Tulip (Plus a Stem)
- Way #2: The Traditional Origami Lily (Petals for Days)
- Way #3: The Kusudama Flower (Modular, Fancy, and Worth It)
- Which Origami Flower Should You Make First?
- Troubleshooting: Common Origami Flower Problems (and Fixes)
- Display Ideas: Make Your Paper Flowers Look Intentional
- Real-World Folding Experiences (The Part Nobody Warns You About)
- Conclusion
If you’ve ever wanted a bouquet that never wilts, never needs watering, and won’t judge you for forgetting it on a windowsill,
welcome: this is the wonderfully low-maintenance world of origami flowers.
With nothing more than paper, a decent crease, and a tiny bit of patience (the kind you can absolutely fake for 10 minutes),
you can fold blossoms that look charming in a vase, on a gift, or perched on your desk like a tiny “I have my life together” flag.
Below are three different ways to make an origami flowereach with a distinct vibe:
a classic tulip (cute and quick), a traditional lily (dramatic petals, big “wow”), and a modular kusudama flower
(five petals, maximum bragging rights). I’ll also share paper tips, troubleshooting, display ideas, and a longer
“what it’s actually like” experience section at the end so you can fold with confidence instead of folding with panic.
Before You Fold: Quick Prep for Better-Looking Paper Flowers
What you’ll need
- Square paper (origami paper is ideal, but any paper cut into a square works).
- A flat surface (tables are great; laps are… character-building).
- Optional tools: a ruler or card for crisp creases, a pencil/chopstick for curling petals, glue or tape (for the kusudama flower).
Paper size & thickness (the secret sauce)
If you’re a beginner, start with larger squares6×6 inches (15×15 cm) is a friendly size for most flower models.
Very thick paper can fight tight folds; very thin paper can tear if you bully it. For flowers, “middle-of-the-road” paper
tends to behave best: crisp enough to hold shape, flexible enough to fold cleanly.
Crease like you mean it (but don’t crease like you’re angry)
Origami rewards clean creases. Press firmly along folds, then ease up when you’re working through layers.
If a step says “fold lightly,” it means “mark the paper,” not “try to impress it into submission.”
Way #1: The Classic Origami Tulip (Plus a Stem)
The tulip is a go-to easy origami flower because it looks great even if your folds aren’t museum-perfect.
You’ll typically use two squares: one for the bloom and one for the stem (green paper is a nice touch).
Difficulty & time
- Skill: Beginner
- Time: ~8–15 minutes (faster once you’ve made one)
- Paper: 1 square for the flower + 1 square for the stem
Part A: Fold the tulip bloom
- Start with a square (colored side up if you have two-sided paper).
Fold in half horizontally, crease, and unfold. Fold in half vertically, crease, and unfold. - Make diagonal creases: Fold corner-to-corner one way, crease, unfold. Repeat with the other diagonal.
You now have a starburst of creases meeting in the center. - Collapse into a “waterbomb base”: Bring the left and right edges inward while guiding the top down,
so the paper collapses into a triangle with layered flaps. (It feels like the paper “snaps” into place.) - Form the tulip sides: With the triangle point facing up, fold the left and right corners of the top layer
up toward the top point (like making a kite). Flip over and repeat on the other side. - Create the locking tuck: On one side, fold one flap over so the edges align neatly, then tuck a corner
into the pocket on the opposite flap. Repeat on the back. This helps the bloom hold its shape. - Inflate the flower: Locate the small opening at the bottom. Gently blow into it (or puff air with your mouth nearby
if you prefer not to blow directly). The bloom “pops” into a rounded tulip shape. - Finish the petals: Fold the top points outward slightly to create petal edges. Adjust the opening until it looks balanced.
Part B: Fold a simple stem
There are many stem styles. This one is sturdy, beginner-friendly, and designed to slide into the tulip’s base.
- Start with a green square, colored side down (if applicable).
- Fold diagonally to make a triangle. Crease sharply.
- Make a kite: Fold the left and right corners of the triangle up to meet the top point, forming a diamond shape.
- Narrow it into a stem: Fold the left and right outer edges inward toward the center line, creating a long, slim kite.
Crease well. - Create a leaf: Fold one outer flap outward to form a leaf shape (you can angle it up or down).
This is the part that makes it look like a “real” stem rather than a green spike. - Assemble: Insert the top of the stem into the tulip’s opening. If it feels loose, slightly widen the stem’s tip with a tiny reverse fold.
Make it prettier (fast)
- Use patterned paper for the bloom and solid green for the stem for instant “bouquet energy.”
- Gently round the tulip by pressing from the inside with a fingertip before inflating.
- Make three tulips in different shades of one color for a simple, classy set.
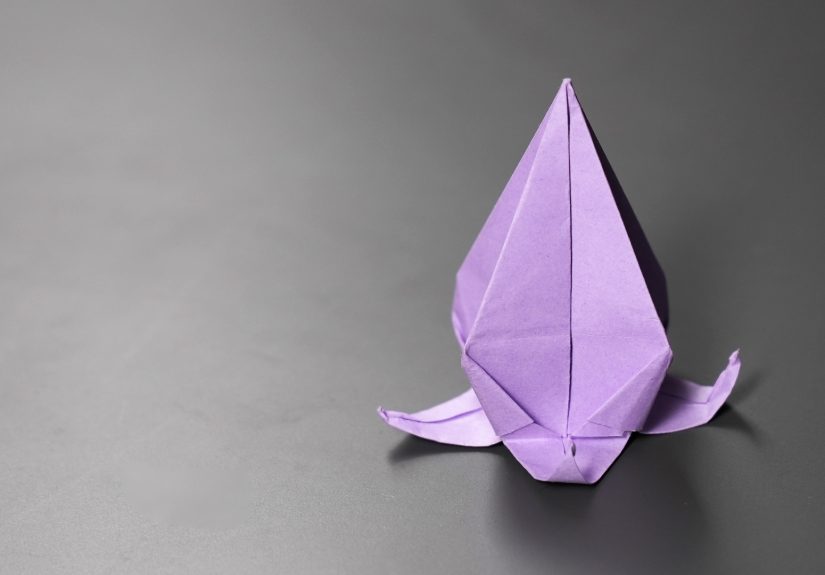
Way #2: The Traditional Origami Lily (Petals for Days)
The classic origami lily is a staple because it opens into a dramatic flower with four main petals.
It’s still “beginner-friendly,” but it asks for calmer hands and cleaner creases than the tulip.
The payoff is huge: it looks like you tried harder than you did. (We love that.)
Difficulty & time
- Skill: Advanced beginner
- Time: ~10–20 minutes
- Paper: 1 square sheet
Step-by-step: Fold the lily
- Make a square base: Start with a square. Fold it in half horizontally and vertically (crease, unfold).
Fold diagonally both ways (crease, unfold). Using these creases, collapse the model into a smaller square base
(also called a preliminary base): two flaps on each side. - Position the base: Place the base so the open flaps face downward (like a diamond with layered flaps).
- Make the “petal fold” setup: On the top flap, fold the left and right edges into the center line (a kite shape),
then unfold those two folds. Fold the top triangle down and unfold. - Petal fold (the magic move): Lift the top layer’s bottom point upward while opening the flap.
Use the creases you made to squash and flatten the flap into a long diamond shape.
Take your timethis step is where the lily starts looking serious. - Repeat on all sides: Rotate and do the same petal fold for each of the remaining three flaps.
You’ll end up with a tall, narrow shape with four long points. - Thin the petals: On each side, fold the outer edges inward toward the center line again to make the petals slimmer.
Flip/rotate and repeat until all four sides match. - Open the flower: Gently pull the top points outward to form petals. Don’t yankpaper remembers.
- Curl the petals: Using a pencil or chopstick, softly curl each petal outward by rolling the tip over the tool.
This small step makes the lily look much more natural and less “I am a geometry assignment.”
Quick variations
- Two-tone lily: Use paper that’s one color on one side and a contrasting color on the other for eye-catching petal edges.
- Mini lilies: Try 3×3 inch squares for small bouquet fillers (but expect fiddly folds).
- Gift topper: Flatten the base slightly and tape it to a wrapped gift for an instant “handmade” upgrade.
Way #3: The Kusudama Flower (Modular, Fancy, and Worth It)
“Kusudama” often refers to modular origamimultiple folded units assembled into a single piece.
For this flower, you make five identical petals and then join them into a bloom. Traditional modular origami
can be no-glue, but many kusudama flowers use a tiny bit of adhesive or double-sided tape for strength.
Think of it as “origami with a supportive friend.”
Difficulty & time
- Skill: Beginner to intermediate (repetitive, which is actually helpful)
- Time: ~20–40 minutes (faster after petal #2)
- Paper: 5 square sheets for one flower (same size)
- Optional: glue stick or double-sided tape
Fold one petal unit (make five)
- Start with a square, colored side down if you want the color on the outside.
Fold diagonally to make a triangle (colored side out once folded). - Bring corners up: Take the left and right corners of the triangle and fold them up to the top point.
You’ll get a diamond shape with two little “ears.” - Squash fold the ears: Open one “ear” and flatten it into a small square/diamond shape.
Repeat on the other side. (This is where the petal starts forming its structure.) - Fold tips down: Fold the top triangle tips of those squash folds downward to create clean edges.
- Fold outer edges in: Fold the left and right outer edges inward (toward the center) to narrow the shape.
Crease firmlythis helps the petal look crisp. - Create the petal cone: Fold the unit in half lengthwise, bringing the sides together.
The folded shape should naturally curve into a petal-like cone. - Secure (optional): Use a tiny bit of glue or tape along the inner seam to keep the petal cone closed.
Repeat until you have five matching petals.
Assemble the flower
- Join petals edge-to-edge: Apply a thin line of glue (or tape) along the side of one petal cone and press it to the next.
Hold for a few seconds so it bonds. - Keep going: Attach petal #3, #4, and #5 the same way, forming a ring.
- Close the loop: Glue the final open edges together to complete the flower.
- Optional center: Add a small paper fringe, a bead, or a rolled paper “stamen” to the middle for extra realism.
Why people love kusudama flowers
- They look complex (even though you’re basically repeating the same petal five times).
- They sit well on stems, in bouquets, or even in a larger kusudama ball arrangement.
- They’re great “practice projects” because repetition builds skill fast.
Which Origami Flower Should You Make First?
| Flower | Best For | Paper Needed | Skill Feel |
|---|---|---|---|
| Tulip + Stem | Quick bouquets, gifts, beginner wins | 2 squares | Friendly and forgiving |
| Traditional Lily | Display pieces, “wow” petals | 1 square | Precise but doable |
| Kusudama Flower | Decor projects, repetition practice | 5 squares (+ optional glue) | Easy steps, more time |
Troubleshooting: Common Origami Flower Problems (and Fixes)
“My flower looks… flat.”
- Tulip: Make sure you actually inflated the bloom and gently rounded it before final petal shaping.
- Lily: Open the petals slowly and curl the tips outwardcurling adds instant volume.
“My folds don’t line up.”
Tiny alignment errors compound quickly. Slow down on the first two folds of any model (they set the “grid” for everything else).
If you notice misalignment early, it’s often faster to restart than to wrestle a crooked model into submission.
“My paper is tearing.”
- Use slightly larger paper and avoid overly thick stock for tight folds.
- Reduce friction by opening layers gently instead of pulling.
- If you’re using printer paper, fold a bit more slowlythose fibers aren’t always thrilled about sharp reverse folds.
Display Ideas: Make Your Paper Flowers Look Intentional
- Mini bouquet: Three tulips + one lily makes a balanced arrangement without needing 47 flowers.
- Gift topper: Tape a tulip stem to a present and write the recipient’s name on the leaf.
- Desk decor: A single lily in a small cup (with a bit of rice or pebbles for support) looks surprisingly fancy.
- Wall cluster: Kusudama flowers look great grouped in threes on a wall with removable adhesive strips.
Real-World Folding Experiences (The Part Nobody Warns You About)
Let’s talk about what it actually feels like to make an origami flowerbecause “Step 6: petal fold” is a very calm sentence
for something that can cause a person to stare into the middle distance and whisper, “Where did I go wrong?”
Most people have the same first experience with an origami flower: the first few folds feel easy, then you hit a moment where
the paper is supposed to “collapse” or “open and flatten,” and suddenly you’re holding a crumpled triangle that looks like it
lost a fight with a receipt printer. This is normal. Origami has a funny learning curve: it’s not hard because you’re not smart;
it’s hard because paper is stubborn and very into consequences.
The tulip is usually the confidence-builder. You can fold it a little imperfectly and it still looks like a flowerespecially once
you puff it open and shape the petals. People often find that making a second tulip immediately after the first one feels
shockingly easier. Your hands remember the sequence even if your brain is still catching up. By the third tulip, you start
thinking, “I could totally make a bouquet.” By the fifth tulip, you’re naming them. (This is also normal.)
The lily is where you learn the value of patience. The model rewards precision: sharp creases make the opening step smooth,
while sloppy creases make it feel like you’re trying to fold a tiny parachute in a wind tunnel. The good news is that the lily also
teaches a powerful trick: if you slow down for the setup folds, the later steps practically do themselves. And once you curl the
petals with a pencil, even a “pretty good” lily becomes a “wow, you made that?” lily. Curling is basically contouring, but for paper.
Kusudama flowers are a different kind of satisfying. The first petal can feel fiddly, the second petal feels more reasonable,
and by petal #3 you’re in a rhythmlike folding is suddenly your new background music. Many people like kusudama flowers for
group crafting because you can split the work: one person folds petals, another assembles. It’s also oddly relaxing to see
separate parts become a finished bloom. The final momentwhen you glue the last two edges and the flower “clicks” into a ring
feels like solving a puzzle you didn’t even know you were solving.
If you’re making origami flowers for gifts, the best “pro move” is to fold in batches. Make several tulips first, then several stems,
then assemble. Your results will look more consistent because your hands stay in the same folding mode. And if you’re decorating,
don’t underestimate simple presentation: a small jar, a ribbon, and three paper flowers can look intentionally designed, not like
“I panic-crafted this at midnight” (even if you absolutely did).
Most of all, expect your first flower to be a practice flower. Origami is one of those crafts where the second attempt looks
dramatically betternot because the steps changed, but because you changed. Your folds get cleaner, your pressure gets
more controlled, and you start noticing tiny details (like symmetry and edge alignment) that make a big visual difference.
Give yourself permission to learn with paper. It’s cheaper than learning with ceramics, and it breaks less dramatically.
Conclusion
You now have three solid ways to make an origami flower: a tulip for quick wins, a lily for elegant petals,
and a kusudama bloom for modular wow-factor. Start with the style that matches your mood, use paper that folds cleanly,
crease with intention, and remember: if your first flower looks a little “abstract,” congratulationsyou’re doing art.


