Table of Contents >> Show >> Hide
- Before You Start: Know Your Leather and Gather Supplies
- Way 1: Quick Everyday Cleaning for Light Dirt
- Way 2: Deep Clean with Saddle Soap or Leather Cleaner
- Way 3: Remove Tough Stains, Salt Marks, and Scuffs
- Drying, Conditioning, and Protecting Leather Boots
- Common Mistakes When Cleaning Leather Boots
- How Often Should You Clean Leather Boots?
- Personal & Practical Experiences: Making Leather Boot Care a Habit
- Conclusion: Clean Boots, Longer Life, Happier Feet
If your leather boots could talk, they’d probably say, “Please stop kicking curbs and ignoring me.” A good pair of boots can last for years, but only if you give them a little regular TLC. The good news? Cleaning leather boots at home isn’t complicated, and you don’t need a closet full of fancy products to do it.
In this guide, we’ll walk through three practical ways to clean leather boots, from quick daily wipe-downs to deep cleaning and stain removal. We’ll also cover how to dry, condition, and protect them so they stay soft, polished, and ready for whatever your day throws at them.
Before You Start: Know Your Leather and Gather Supplies
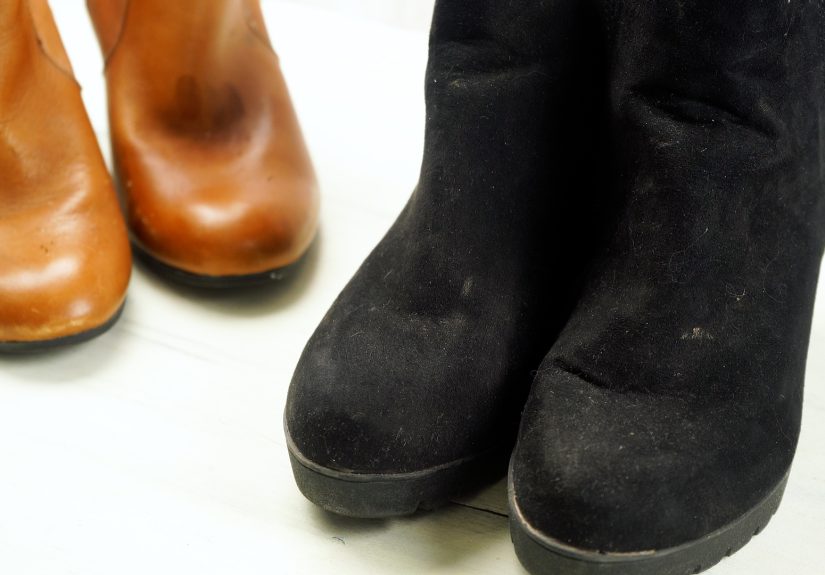
Before you grab the nearest bottle of cleaner and go to town, it helps to know what kind of leather you’re dealing with. This article focuses on smooth leather boots (think work boots, dress boots, or classic fashion boots). Suede, nubuck, and roughout leather require different products and a more delicate process, so don’t treat them the same way as smooth leather.
Check the Care Label
Many quality boots come with a care tag, card, or brand care page online. If the manufacturer says “no wax,” “no oil,” or recommends specific cleaners, follow that guidance first. Some leathers are pre-treated, oiled, or finished in a way that reacts differently to certain products.
Basic Supplies You’ll Need
- Soft horsehair or nylon brush
- Clean, lint-free cloths (preferably white so dyes don’t transfer)
- Mild soap or dedicated leather cleaner
- Saddle soap (for deep cleaning heavily soiled boots)
- Leather conditioner or cream
- White vinegar (for salt stains)
- Newspaper or paper towels (for drying and holding shape)
- Optional: waterproofing spray, wax, or leather oil
Once you’ve got your supplies ready, you can choose the cleaning method that matches how dirty your leather boots really are.
Way 1: Quick Everyday Cleaning for Light Dirt
Think of this as “boot washing lite.” It’s ideal after a normal day out when your boots picked up some dust, but aren’t caked in mud.
Step 1: Remove Surface Dirt
Start by taking the laces out of your boots. This keeps cleaner from building up on the laces and lets you reach into creases and around eyelets.
Use a soft brush to gently sweep off loose dirt, dust, and dried mud. Pay attention to seams and the welt (the strip around the edge of the sole) where grime collects easily.
Step 2: Wipe with a Damp Cloth
Dampen a clean cloth with lukewarm water not hot. Hot water can dry out leather. Wring it out well so it’s damp, not dripping. Wipe the surface of each boot in small sections, lifting off dirt rather than grinding it into the leather.
Step 3: Spot Clean Mild Marks
If you see light smudges or fingerprints, you can make a very mild cleaning solution by mixing a drop of gentle dish soap or a small amount of leather cleaner with warm water. Dip a cloth into the solution, wring it out, then gently wipe the affected area.
Always test on an inconspicuous spot first (like near the heel) to be sure the leather doesn’t darken or discolor.
Step 4: Let the Boots Air Dry
After wiping, let the boots air dry at room temperature. Don’t set them in front of a heater or in direct sunlight. Excessive heat can make leather stiff, brittle, and prone to cracking.
Stuff the boots lightly with newspaper or paper towels to help them keep their shape and absorb excess moisture.
For many people, this simple wipe-down once a week is enough to keep everyday leather boots looking clean and polished between deeper cleanings.
Way 2: Deep Clean with Saddle Soap or Leather Cleaner
If your boots have seen some things mud, grime, oil, or layers of old polish it’s time for a deep clean. Saddle soap and dedicated leather cleaners are designed to lift dirt out of the leather’s pores and refresh the surface.
Step 1: Brush and Prep
Again, remove the laces. Brush the boots thoroughly to remove as much surface dirt as possible. Deep cleaning works best when you’re not grinding grit into the leather.
Step 2: Create a Mild Lather
Follow the instructions on your leather cleaner or saddle soap. Typically, you’ll:
- Dampen a clean cloth or sponge with warm water.
- Rub it lightly into the saddle soap or apply a small amount of liquid cleaner.
- Work it into a light lather not a giant foam party.
Too much soap can strip natural oils from the leather, so less is more.
Step 3: Clean in Sections
Working in small areas, gently massage the lather into the leather using circular motions. Focus on heavily soiled spots, toe caps, and around the heel. Avoid soaking the leather; it should feel slightly damp, not soggy.
If the boots are extremely dirty, wipe away dirty lather with another damp cloth and repeat until the cloth comes away relatively clean.
Step 4: Wipe and Dry
Use a fresh damp cloth to remove any remaining cleaner or soap residue. Then gently pat the boots dry with a towel.
Stuff the boots with paper and set them in a well-ventilated area to dry naturally. This might take several hours. Be patient rushing the drying process with heat can cause permanent damage.
Step 5: Condition the Leather
Deep cleaning removes not only dirt, but some of the natural oils that keep leather flexible. Once the boots are dry to the touch, apply a leather conditioner or cream.
Use a clean cloth to apply a small amount of conditioner, working it into the leather in thin, even layers. Let it soak in for at least 15–30 minutes, then buff gently with a soft cloth to remove any excess.
Depending on how often you wear your boots and in what conditions, deep cleaning plus conditioning every few months (or more frequently for heavy use) helps prevent cracking and keeps leather boots looking rich and healthy.
Way 3: Remove Tough Stains, Salt Marks, and Scuffs
Sometimes your boots don’t just look a little dusty they come back from winter sidewalks or muddy trails looking like they fought a snowplow. This is where targeted stain cleaning comes in.
Removing Salt Stains from Leather Boots
Salt from winter roads and sidewalks leaves those unmistakable white rings across the toe and sides of boots. Left untreated, salt can dry out leather and cause long-term damage.
To gently remove salt stains:
- Wipe the boots with a damp cloth to remove loose salt.
- Mix equal parts white vinegar and water in a small bowl.
- Dip a clean cloth into the solution, wring it out, and test on a hidden spot first.
- Gently dab or wipe the salt stains in small circles. The vinegar helps dissolve the dried salt.
- Once the rings fade, wipe the area with a cloth dampened with plain water to remove residual vinegar.
- Let the boots air dry and then apply conditioner to replenish moisture.
Handling Dark Stains and Spills
For dark stains (like from muddy water or spilled coffee), a mild leather cleaner or saddle soap is usually the safest choice. Avoid harsh household cleaners, alcohol, or bleach they can discolor and dry out leather quickly.
If a stain doesn’t budge with gentle cleaning, you may be better off taking the boots to a professional cobbler or leather repair shop rather than risking damage with aggressive DIY methods.
Buffing Out Scuffs
Small scuffs often look worse than they really are. After a basic clean and condition, many shallow marks soften or disappear.
For remaining scuffs, you can:
- Use a matching leather cream or polish to blend the color.
- Apply a tiny amount of product with a cloth and buff in small circles.
- Finish with a soft brush or cloth for a consistent shine.
Drying, Conditioning, and Protecting Leather Boots
Cleaning is only half the story. How you dry and maintain your boots afterward has a huge impact on how long they last and how good they look.
Drying Leather Boots the Right Way
After any cleaning session:
- Let boots air dry at room temperature.
- Stuff them with newspaper or paper towels to help them keep their shape and absorb extra moisture.
- Avoid radiators, fireplaces, heaters, or strong direct sunlight.
Too much heat can shrink leather, cause deep wrinkles, or create surface cracks that no amount of conditioner will fully fix.
Conditioning Schedule
How often you condition leather boots depends on how you use them:
- Heavy use / harsh conditions: Condition every few weeks to every 1–2 months.
- Moderate use: Every 2–3 months is often enough.
- Occasional wear: A light conditioning a few times a year usually works.
Signs your boots need conditioning: the leather looks dull, feels dry or stiff, or shows fine lines when you bend it. Soft, slightly glossy leather usually means you’re on track.
Waterproofing and Weather Protection
If your boots regularly see rain, snow, or slush, consider adding a waterproofing product after cleaning and conditioning. Options include:
- Wax-based waterproofing (more heavy-duty, can slightly darken leather)
- Waterproofing sprays made for leather footwear
- Oils or treatments designed for oiled or work leathers
Always test in a small hidden area first, as many waterproofing products darken leather or change its sheen. Apply according to the manufacturer’s instructions and reapply periodically as needed.
Common Mistakes When Cleaning Leather Boots
Even with the best intentions, it’s easy to do a few things that your boots won’t love. Try to avoid:
- Soaking the leather: Leather doesn’t like being drenched. Too much water can warp its shape and pull out natural oils.
- Using harsh cleaners: Household cleaners, vinegar by itself (without dilution), alcohol, and bleach are too strong for most leather boots.
- Over-conditioning: Yes, you can go overboard. If boots feel sticky, mushy, or won’t hold a shine, you may be applying too much product.
- Skipping drying time: Applying conditioner or waterproofing to damp leather can trap moisture and lead to mildew or uneven absorption.
- Neglecting the welt and sole edges: Dirt builds up there and can break down stitching over time.
How Often Should You Clean Leather Boots?
There’s no single rule that fits everyone, but here’s a simple guideline:
- After heavy use (mud, rain, salt): Do at least a quick clean and dry as soon as possible, followed by conditioning once they’re fully dry.
- Weekly or biweekly: If you wear the same boots often, a brush and damp wipe keep buildup away.
- Every few months: Give them a full deep clean, condition, and optional waterproofing.
Consistent, gentle care is better than waiting until your leather boots look rough and then trying to “fix everything” in one intense session.
Personal & Practical Experiences: Making Leather Boot Care a Habit
Cleaning leather boots can feel like a chore at first, but once you turn it into a small ritual, it becomes surprisingly satisfying. Here are some real-world observations and “lessons learned the hard way” that can help you get the most from every cleaning session.
The “End of the Day” Brush-Down Trick
One of the easiest habits you can build is a 60-second brush-down when you get home. Put your boots on a mat by the door, grab a horsehair brush, and quickly sweep off dust and grit before it has time to grind into the leather. This tiny routine dramatically reduces how often you’ll need deep cleaning and keeps your boots looking presentable even if you’re hard on them.
Why Skipping Conditioning Comes Back to Haunt You
It’s tempting to clean boots, admire how fresh they look, and call it a day. But leather is skin when you strip out oils with water and cleaner, it needs moisture back. Many people don’t notice the damage right away. Then, a few months later, the leather looks dull and feels stiff. Fine lines turn into cracks around flex points, especially the toe and instep.
Adding conditioner after cleaning is like putting lotion on dry hands in winter. You don’t have to overdo it; even a light, even coat makes a big difference over time.
Salt Stains in Winter: The Sneaky Leather Killer
If you live where sidewalks are salted, you’ll see white rings or lines appearing on your boots after walking through slush. It’s easy to shrug them off as just cosmetic, but those marks signal salt pulling moisture out of your leather. The longer you leave salt on, the more it dries the leather and weakens it.
People often find out the hard way: by the time spring comes, the boots feel stiff, crease deeply when you walk, and may even crack along those salt lines. Even if you don’t have time for a full deep clean, doing a quick wipe and diluted vinegar treatment on salt stains as soon as you get home can save your boots.
Choosing the Right Products for Your Lifestyle
If you’re mostly wearing fashion boots to the office, you can get away with a gentle cleaner, a good all-purpose leather conditioner, and maybe a light waterproofing spray for rainy days. But if you wear work boots outdoors, on construction sites, or on hiking trails, consider slightly more robust products like boot oils and waxes designed for heavy-duty leather.
Be aware that oils and waxes can darken leather and change the finish. That’s not a problem for rugged work boots, but it might be an issue on pale tan fashion boots where you want to preserve the original color. Testing in a hidden spot is always worth the few extra minutes.
Rotating Boots Extends Their Life
Another practical tip: if you can, avoid wearing the same pair of boots every single day. Leather absorbs moisture from your feet and the environment, and it needs time to dry out fully between wears. Rotating between two pairs lets each one rest and dry naturally, which can significantly extend their lifespan and keep them feeling more comfortable.
When to Call a Professional
DIY cleaning is great for regular maintenance, but there are times when a cobbler or professional leather cleaner is worth the cost:
- Deep oil or dye stains you can’t lift with gentle methods.
- Severe salt damage where the leather feels brittle.
- Color loss or uneven fading after years of wear.
- Structural issues like loose soles, broken stitching, or cracked heels.
Professionals can often recolor, refinish, and repair boots you might otherwise assume are “done.” If you’ve invested in high-quality leather boots, a periodic professional refresh can make them look almost new again.
Turning Cleaning Time into “Reset Time”
There’s also a psychological upside to cleaning leather boots. Taking ten or fifteen minutes to sit down, brush off the dirt of the day, and buff a little shine back into the leather can feel oddly calming. It’s a small, tangible way to care for something you use all the time. Over time, you’ll start to notice how the leather develops a patina that tells the story of where you’ve been without looking neglected.
Conclusion: Clean Boots, Longer Life, Happier Feet
Learning how to clean leather boots is less about perfection and more about consistency. A quick brush and wipe after a long day, a deep clean when they start to look dull, targeted stain removal when winter salt strikes, and regular conditioning all work together to keep your boots soft, strong, and good-looking.
Treat your leather boots like the long-term investment they are. With a few simple routines and the right cleaning methods, they’ll not only look better they’ll last longer, feel more comfortable, and be ready to carry you through countless miles, seasons, and adventures.


